This translation was generated by a machine and has not been reviewed by a person yet. Speak this language? Review it.
Introduction
While Mac Pro models from 2010 or 2012 are no longer young, it is entirely possible to drastically increase their performance by replacing the microprocessors (CPUs) with more powerful models.
Warning! The electronic components that will be handled are extremely sensitive to electrostatic discharge:
- Do not work on carpet or a rug,
- Touch the metal chassis of the Mac before any handling,
- Ensure that the computer is properly unplugged.
What you need
-
-
-
At the back of the Mac Pro, locate the locking latch.
-
Lift the locking latch.
-
You can now open the side panel.
 Ask FixBot
-
-
-
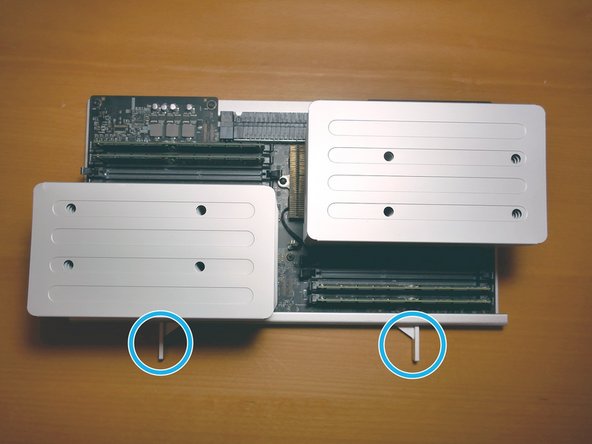
Locate the two locking latches on the processor assembly.
-
Each latch has a ribbed end.
-
Press on the ribbed ends of the latches.
-
-
-
Push the latches to partially open them.
-
Pull the latches to fully open them.
-
The CPU assembly will release and move forward slightly.
-
-
-
Pull the CPU assembly toward you until it is completely removed from the computer chassis.
-
-
-
-
Make sure the processor block is facing you: the two locking latches should be directly in front of you.
-
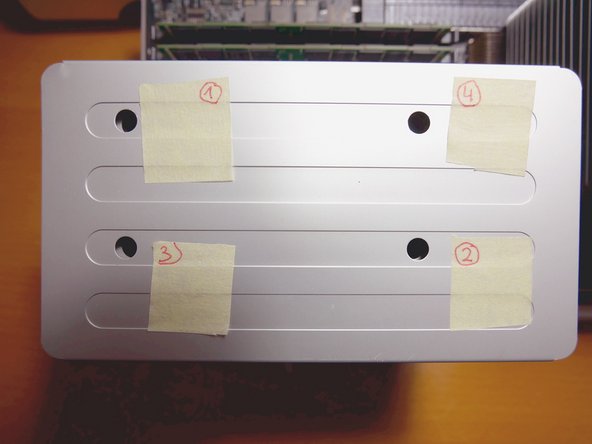
In order to remove the heatsinks without damaging their power socket or stripping the screws, it is important to unscrew each screw carefully and in the indicated order.
-
-
-
Cut small pieces of masking tape, then stick them onto the heatsinks, next to each screw hole.
-
Note on the labels the order in which you will need to unscrew each screw.
-
-
-
Once all the screws are disengaged, you can lift the heatsink.
-
-
-
Remove all remaining thermal paste from the heat sinks using ArtiClean solvent and a microfiber cloth.
-
Once you have removed all traces of thermal paste, finish cleaning the heat sink using a little "Surface purifier" and a cotton swab.
-
-
-
Locate the tension lever: it is held in place by a hook. Press down on it and then rotate it to release the lever from the hook.
-
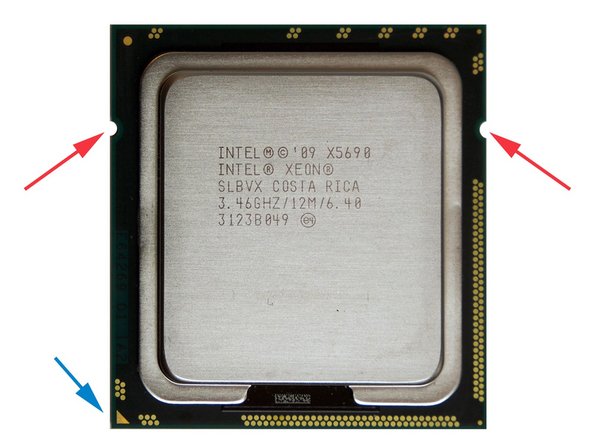
You can now lift the metal retention frame and access each microprocessor.
-
-










To finish, apply a thin layer of new thermal paste to each microprocessor, reinstall the heatsinks by tightening their screws in the reverse order of removal, then reassemble the Mac Pro by following the steps in reverse order.

