Introduction
Use this guide to completely replace your mini's hard drive.
Note that some of the connections in this Mac are more fragile to disconnect and more difficult to reconnect than in other Macs. This guide is thorough in explaining how to remove each part that's in the way of the hard drive, but experienced repairers may be able to move the fan and the antenna plate out of the way without disconnecting them to save time.
What you need
-
-
Place your thumbs in the depressions cut into the bottom cover.
-
Rotate the bottom cover counter-clockwise until the white dot painted on the bottom cover is aligned with the ring inscribed on the outer case.
 Ask FixBot
-
-
-
Tilt the mini enough to allow the bottom cover to fall away from the outer case.
-
Remove the bottom cover and set it aside.
-
-
-
Remove the two 11.3 mm T6 Torx screws securing the fan to the logic board near the antenna plate.
-
-
-
Lift the ear of the fan nearest the RAM up off the standoff secured to the outer case.
-
-
-
Lift the fan out of the mini for enough clearance to access its connector.
-
Grab all the wires at once and gently pull straight up to disconnect the fan from the logic board.
-
Remove the fan.
-
-
-
Remove the single 3.5 mm T6 Torx screw securing the cowling to the heat sink.
-
-
-
Lift the cowling from the end nearest the antenna plate.
-
Rotate the cowling away from the outer case and remove it from the mini.
-
-
-
-
Remove the following screws securing the antenna plate to the mini:
-
Two 6.6 mm T8 Torx screws
-
Two 5.0 mm T8 Torx or 2.0 mm Hex screws (either screwdriver will work)
-
When putting back together:
-
-
-
Slightly lift the antenna plate from the end closest to the RAM.
-
Carefully pull the antenna plate away from the circular rim of the outer case.
-
-
-
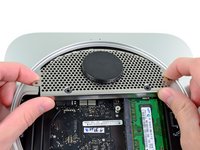
Use the tip of a spudger to carefully pry the antenna connector up from its socket on the AirPort/Bluetooth board.
-
-
-
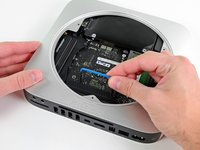
Use the flat end of a spudger to pry the hard drive connector up from its socket on the logic board.
-
-
-
Use the tip of a spudger to lift the IR sensor connector up and out of its socket on the logic board.
-
-
-
Remove the following three screws:
-
One 5.0 mm T8 Torx or 2.0 mm Hex screw (either screwdriver will work)
-
One 16.2 mm T6 Torx screw
-
One 26 mm T6 Torx standoff
-
-
Tool used on this step:Mac mini Logic Board Removal Tool$4.99
-
Insert the Mac mini Logic Board Removal Tool into the two holes highlighted in red. Be sure it makes contact with the top side of outer case below the logic board before proceeding.
-
Carefully pull the tool toward the I/O board. The logic board and I/O board assembly should slightly slide out of the outer case.
-
Remove the Mac mini Logic Board Removal tool.
-
-
-
Simultaneously push the two plastic clips on the far left and right sides of the I/O board toward the middle of the I/O board and pull the I/O board away from the outer case.
-
Only pull the logic board assembly out of the outer case until the edge of the I/O board is about .5" away from the edge of the aluminum outer case.
-
-
-
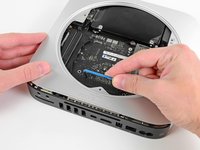
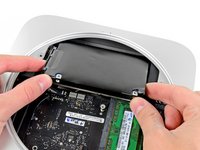
Pull the hard drive away from the front edge of the mini and remove it from the outer case.
-
-
-
Pull the hard drive away from the front edge of the mini and remove it from the outer case.
-
-
-
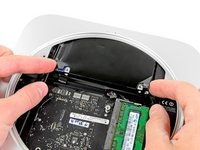
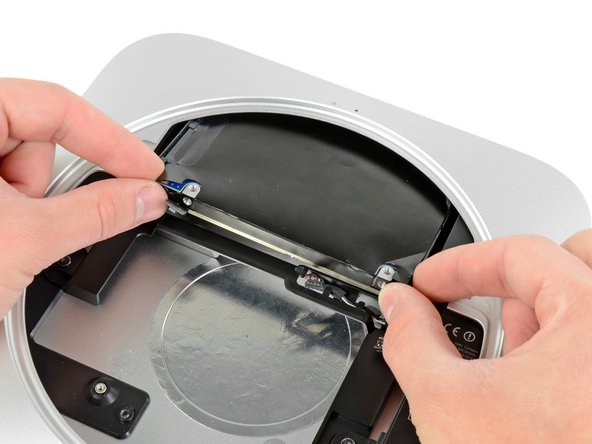
Remove the hard drive cable.
-
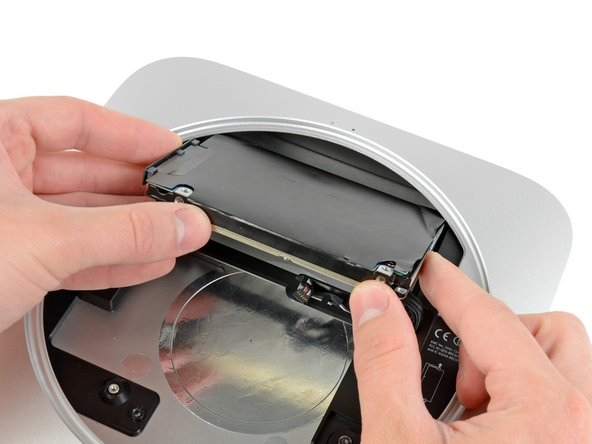
Remove the two 6.2 mm T8 Torx screws from the side of the hard drive.
-
-
-
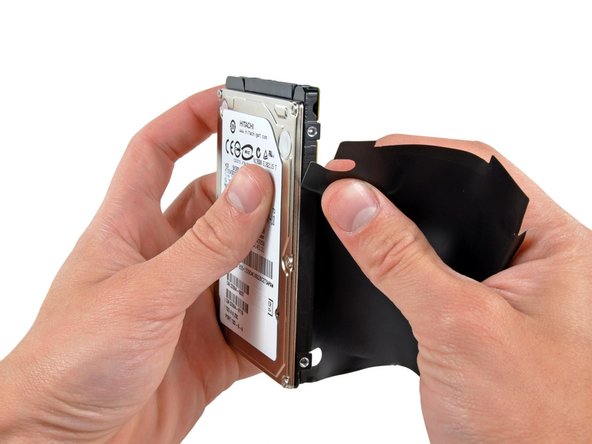
Carefully peel the hard drive cover off the hard drive.
-
Hard drive remains.
-
If you are installing a new hard drive, we have an OS X install guide to get you up and running.
-


To reassemble your device, follow these instructions in reverse order.
Cancel: I did not complete this guide.
380 other people completed this guide.

56 Guide Comments
That's right, steps 10-11 and 13-16 are not necessary.
It suffices to rotate the antenna plate out of the way without detaching its cable.
And after disconnecting the hard drive you can wiggle it out of the enclosure
without dealing with the logic board. Muc less hassle, and much less intimidating.
This is great advice! It worked fine for me, thanks!
This also worked for me. Follow machobbes advice - whole process took about 10 minutes. Easy peasy.
The one difficulty I had was getting the new SSD (or HDD) to lock back into the fixings inside of the casing. Best solution if you are having this problem is to turn the Mini upside down, ensuring that the antenna cable isn't stretched too far, and aided by the wonderful powers of gravity, get the new HDD unit fixed into place properly.
Good advice. I too just moved the antenna plate to the side and the drive was easily accessible.