
Mac mini Late 2014 SSD Replacement

What you need

  1. Mac mini Late 2014 SSD Replacement, Bottom Cover: step 1, image 1 of 1
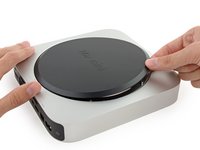
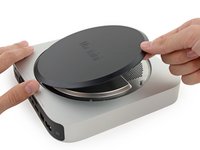
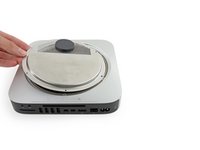
    • The bottom cover is clipped onto three screw posts.

    • Pry near, but not right on the screw posts.

  2. Mac mini Late 2014 SSD Replacement: step 2, image 1 of 3 Mac mini Late 2014 SSD Replacement: step 2, image 2 of 3 Mac mini Late 2014 SSD Replacement: step 2, image 3 of 3
    • Use the plastic opening tool to pry the bottom cover up off of the Mac mini.

  3. Mac mini Late 2014 SSD Replacement: step 3, image 1 of 2 Mac mini Late 2014 SSD Replacement: step 3, image 2 of 2
    • Lift and remove the bottom cover.

  4. Mac mini Late 2014 SSD Replacement, Antenna Plate: step 4, image 1 of 1
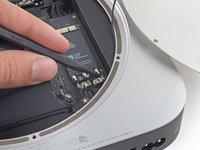
    • Remove the following TR6 screws from the antenna plate:

    • Three 4.1 mm screws

    • Three 1.9 mm screws

  5. Mac mini Late 2014 SSD Replacement: step 5, image 1 of 2 Mac mini Late 2014 SSD Replacement: step 5, image 2 of 2
    • Do not completely remove the antenna plate; it is still connected to the Mac mini by an antenna cable.

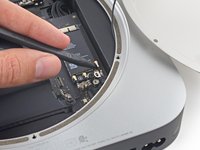
    • With the I/O ports facing you, flip the antenna plate to the right to allow access to the antenna cable connector.

  6. Mac mini Late 2014 SSD Replacement: step 6, image 1 of 1
    • Remove the single 3.4 mm T6 screw and washer from the antenna cable.

    • Be careful not to lose the washer when removing the screw.

  7. Mac mini Late 2014 SSD Replacement: step 7, image 1 of 2 Mac mini Late 2014 SSD Replacement: step 7, image 2 of 2
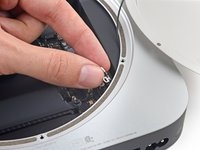
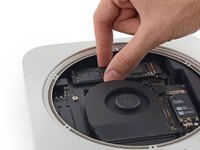
    • Use the point of a spudger to lift the antenna connector straight up off its socket on the airport card.

  8. Mac mini Late 2014 SSD Replacement: step 8, image 1 of 2 Mac mini Late 2014 SSD Replacement: step 8, image 2 of 2
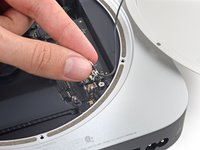
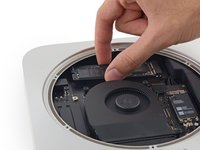
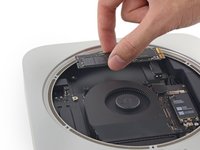
    • Carefully pull the antenna cable out from the gap between the power supply and case.

  9. Mac mini Late 2014 SSD Replacement: step 9, image 1 of 1
    • Remove the antenna plate from the Mac mini.

  10. Mac mini Late 2014 SSD Replacement, SSD: step 10, image 1 of 1
    • Remove the 5 mm T5 screw securing the SSD.

  11. Mac mini Late 2014 SSD Replacement: step 11, image 1 of 3 Mac mini Late 2014 SSD Replacement: step 11, image 2 of 3 Mac mini Late 2014 SSD Replacement: step 11, image 3 of 3
    • Lift the free end of the SSD up slightly and pull it out of its socket.

  12. Mac mini Late 2014 SSD Replacement: step 12, image 1 of 3 Mac mini Late 2014 SSD Replacement: step 12, image 2 of 3 Mac mini Late 2014 SSD Replacement: step 12, image 3 of 3
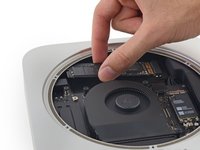
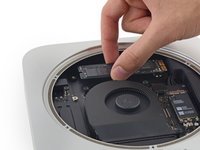
    • Carefully lift the SSD out of the case without scratching or touching the gold contacts.

Conclusion

To reassemble your device, follow these instructions in reverse order.

104 other people completed this guide.

Sam Goldheart

Member since: 10/18/12

465,602 Reputation

538 Guides authored

Team

iFixit Member of iFixit

Staff

135 Members

16,718 Guides authored

29 Comments

If I have a Mac Mini without SSD, only with normal Hard Drive (NO Fusion). Can I install a new one SSD like on this tutorial?. Thanks!

Juan Miguel Ramirez - Reply

Please see my comment later in the thread.

Thomas Hall -

Si, yo lo hice y la diferencia es abismal. Necesitaras un adaptador y por supuesto el SSD. Yes, I did it and the difference is abysmal. You will need an adapter and of course the SSD.

Manuel Jesús Flores Jiménez -

Yes, but you need to add a cable to connect it. If you buy the SSD from OWC, they sell a kit which includes the cable and tools (for an extra $20-40, depending on what size/model SSD you get).

shamino -

I have the same question as Juan

Cronan McNamara - Reply

Add Comment

View Statistics:

Past 24 Hours: 36

Past 7 Days: 188

Past 30 Days: 839

All Time: 174,737