
Mac Mini Late 2014 Fan Replacement

Prerequisite Only
This guide is only intended to be used as a prerequisite for other guides. It's incomplete by itself.

What you need

  1. Mac Mini Late 2014 Fan Replacement, Fan Assembly: step 1, image 1 of 1
    • Remove the two 12 mm T6 screws from the fan.

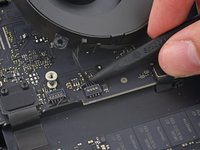
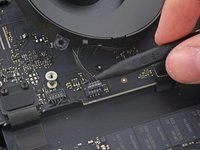
    • Loosen the 27 mm T6 captive screw–it will get removed with the fan assembly.

  2. Mac Mini Late 2014 Fan Replacement: step 2, image 1 of 3 Mac Mini Late 2014 Fan Replacement: step 2, image 2 of 3 Mac Mini Late 2014 Fan Replacement: step 2, image 3 of 3
    • The fan connector is trapped under the edge of the fan and cannot be disconnected until the fan is moved.

    • Do not attempt to remove the fan entirely.

    • Lift the fan straight up to free the captive screw from its hole in the logic board.

    • Pull the fan away from the SSD until you can easily access the fan connector.

  3. Mac Mini Late 2014 Fan Replacement: step 3, image 1 of 2 Mac Mini Late 2014 Fan Replacement: step 3, image 2 of 2
    • Use the point of a spudger to lift the fan connector straight up out of its socket on the logic board.

  4. Mac Mini Late 2014 Fan Replacement: step 4, image 1 of 1
    • Remove the fan from the Mac mini.

Conclusion

To reassemble your device, follow these instructions in reverse order.

Sam Goldheart

Member since: 10/18/12

465,762 Reputation

538 Guides authored

Team

iFixit Member of iFixit

Staff

135 Members

16,817 Guides authored

0 Comments

Add Comment

View Statistics:

Past 24 Hours: 0

Past 7 Days: 0

Past 30 Days: 0

All Time: 240