
MSI GP60 2PE Leopard RAM Replacement

What you need

  1. MSI GP60 2PE Leopard RAM Replacement, Battery: step 1, image 1 of 1
    • Flip MSI GP60 2PE Leopard, so that the back is facing up.

  2. MSI GP60 2PE Leopard RAM Replacement: step 2, image 1 of 1
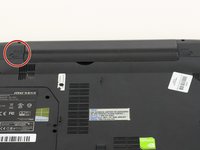
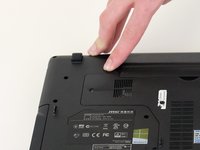
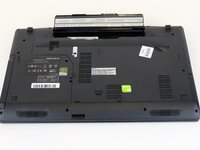
    • Find the unlock tab located on the upper right side of the device, then slide it to the right.

  3. MSI GP60 2PE Leopard RAM Replacement: step 3, image 1 of 3 MSI GP60 2PE Leopard RAM Replacement: step 3, image 2 of 3 MSI GP60 2PE Leopard RAM Replacement: step 3, image 3 of 3
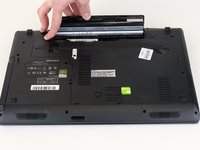
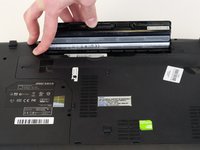
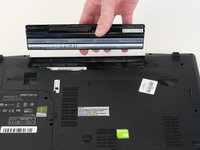
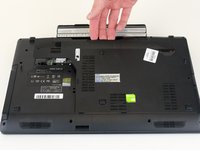
    • Slide and hold the release tab on the left side of the battery, so that you can remove the battery.

  4. MSI GP60 2PE Leopard RAM Replacement: step 4, image 1 of 3 MSI GP60 2PE Leopard RAM Replacement: step 4, image 2 of 3 MSI GP60 2PE Leopard RAM Replacement: step 4, image 3 of 3
    • While holding the release tab, remove the battery slowly.

  5. MSI GP60 2PE Leopard RAM Replacement, Back Panel: step 5, image 1 of 1
    • Flip the device over so the back is facing up.

  6. MSI GP60 2PE Leopard RAM Replacement: step 6, image 1 of 2 MSI GP60 2PE Leopard RAM Replacement: step 6, image 2 of 2
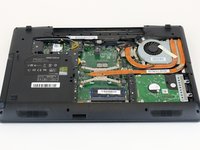
    • Remove the four 5mm screws from the back of the device using a Phillips #00 screwdriver.

    • There is a screw located under the battery; lift the battery up to access it.

  7. MSI GP60 2PE Leopard RAM Replacement: step 7, image 1 of 2 MSI GP60 2PE Leopard RAM Replacement: step 7, image 2 of 2
    • Once all four screws are removed, lift the back off.

  8. MSI GP60 2PE Leopard RAM Replacement, RAM: step 8, image 1 of 1
    • Press the tabs on the side of the RAM to remove it.

  9. MSI GP60 2PE Leopard RAM Replacement: step 9, image 1 of 1
    • Slide the RAM out of the slot carefully.

Conclusion

To reassemble your device, follow these instructions in reverse order.

3 other people completed this guide.

0 Comments

Add Comment

View Statistics:

Past 24 Hours: 0

Past 7 Days: 6

Past 30 Days: 16

All Time: 1,266