MSI GE62 7RD RAM Replacement

What you need

  1. MSI GE62 7RD RAM Replacement, RAM: step 1, image 1 of 1
    • Flip the laptop over so that the bottom is on top.

    • Caution: make sure the laptop is fully powered off (not sleep mode) and not connected to the AC charging adapter before beginning the repair.

  2. MSI GE62 7RD RAM Replacement: step 2, image 1 of 2 MSI GE62 7RD RAM Replacement: step 2, image 2 of 2
    • Remove the fifteen 6.5 mm Phillips #0 screws from the bottom of the laptop using a Phillips #0 screwdriver.

    • Be sure to remove the two screws in the middle of the laptop, they're easy to miss! They might be under a factory seal label.

  3. MSI GE62 7RD RAM Replacement: step 3, image 1 of 2 MSI GE62 7RD RAM Replacement: step 3, image 2 of 2
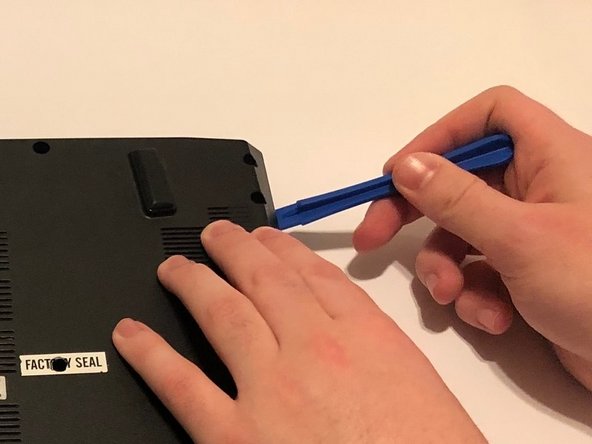
    • Remove the back case from the laptop.

    • If the backing is really stuck, you may use a plastic opening tool or picks to provide leverage.

  4. MSI GE62 7RD RAM Replacement: step 4, image 1 of 2 MSI GE62 7RD RAM Replacement: step 4, image 2 of 2
    • With both thumbs, pull the silver overhangs on the sides of the RAM until the old stick of RAM pops up.

  5. MSI GE62 7RD RAM Replacement: step 5, image 1 of 1
    • Remove the old stick of RAM by pulling back and out.

  6. MSI GE62 7RD RAM Replacement: step 6, image 1 of 2 MSI GE62 7RD RAM Replacement: step 6, image 2 of 2
    • Place the new stick of RAM in the socket so that the electrical contacts match.

    • Push the top of the stick of RAM down and in until you hear the click of the silver overhangs latch onto the RAM.

Conclusion

To reassemble your device, follow these instructions in reverse order.

One other person completed this guide.

0 Comments

Add Comment

View Statistics:

Past 24 Hours: 1

Past 7 Days: 5

Past 30 Days: 11

All Time: 835