This translation may not reflect the most recent updates from the source guide. Help update the translation or view the source guide.
Introduction
In this guide, I'll show you how to repair or replace the fly screen in the fly screen frame of the MPK VisionVent S eco (Model 27) rooflight.
This often gets damaged, especially if the sun has already made the mesh brittle.
As a replacement, you can use standard UV-resistant fly screen mesh, but I recommend using the highest quality possible to make it last longer.
Size: 28x28 cm (slightly larger than the cutout)
MPK Replacement Parts
Please note that there is also a complete replacement fly screen frame available from the manufacturer.
But in the spirit of sustainability, let's rather replace the fly screen ourselves!
MPK No. 290.5G - Fly screen frame gray
MPK No. 290.5W - Fly screen frame white
MPK No. 290.5B - Fly screen frame beige
Attention!
Additionally, be aware that there are different versions (e.g., with a blind) and colors for which this guide may not be suitable.
What you need
-
-
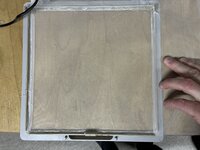
Make sure the frame is pointing straight down at a right angle.
-
Now,pull the fly screen frame straight down, if necessary with a bit of pressure against the installed window frame.
-
This will unclip the frame from the hinges.
-
-
-
The easiest way to do this is to slide the handle slightly over the edge of the table while you work. Then you just have to be extra careful on the side with the handle.
-
-
-
First, use a putty knife, a putty knife blade or a razor blade to loosen the adhesive from the side wall, starting from the top.
-
After that, loosen the adhesive from the underside (also with a putty knife, a putty knife blade or a razor blade).
-
Also, clean the corners thoroughly. You can try using a thin flat-head screwdriver for this if your putty knife or knife blade isn't suitable.
-
Repeat these steps for each of the four sides until the mesh and the adhesive are completely removed (including in the corners and around the handle).
-
-
-
-
Clean the adhesive surfaces with a vacuum cleaner.
-
If necessary, you can also do some touch-up work or remove any remaining adhesive residue with isopropanol.
-
-
-
Align the new fly screen with two edges on the adhesive border of the frame.
-
Optional: To make the job easier for myself and to prevent it from slipping, I used spring clamps to secure it on the other two sides.
-
Depending on the size of the new fly screen, you might need to make a cutout for the guiderails on the hinge side of the frame, so that the mesh can be tensioned properly.
-
-
-
While gluing, you can use something like a toothpick to pull the fly screen neatly and completely into the corners and glue it down. This ensures that the fly screen is stretched cleanly.
-
-
-
Now, glue the fly screen to the frame with the hot glue and make sure that the mesh is stretched neatly.
-
After the first two sides are glued, remove the spring clamps (optional) and, if necessary, re-tension the mesh with your free hand.
-
Wait until the hot glue has cooled down and, if necessary, remove any strings or drips outside of the frame's glue channel.
-
-
-
Now, use the utility knife, its blade, or a razor blade to cut off any excess fly screen or glue along the edge of the glue channel.
-
Also, remember to cut the corners cleanly so that the mesh-frame can sit flush with the mounting frame.
-
Carefully remove the cleanly cut-off piece of fly screen and, if necessary, do some touch-up work to get a clean cut edge.
-
-
-
Before installation, check the result again from both sides.
-
Minor bumps in the mesh can now also be smoothed out with a hairdryer. Don't use a heat gun for this, as they get too hot!
-
-
-
To reattach the fly screen frame to the rooflight, work through steps 1 and 2 in reverse order.
-


To reassemble your device, work through steps 1 and 2 in reverse order.
Cancel: I did not complete this guide.
One other person completed this guide.
Special thanks to these translators:
95%

hainzy is helping us fix the world! Want to contribute?
Start translating ›
