This translation was generated by a machine and has not been reviewed by a person yet. Speak this language? Review it.

MF 2700H Training Guide

Lacito and 2 other contributors
Last updated on Oct 7, 2026
Views: 929
View statistics:
- Past 24 Hours:
- 2
- Past 7 Days:
- 10
- Past 30 Days:
- 30
- All Time:
- 929
Comments: 1
1 comment on steps.
Completed: 3 4
3 people have marked this guide "completed." Will you be next?
4 people have marked this guide "completed." Including you — great job!
Favorites: 0 1
No one has favorited (and subscribed to) this guide. Will you be the first?
1 person has favorited (and subscribed to) this guide — and that's you!
Community-Contributed Guide
An awesome member of our community made this guide. It was not created by iFixit staff.
-
-
-
The MF 2700H strapping machine is one of the most complete semi-automatic strapping machines on the market.
-
Safety, high production, practicality, easy adjustment, and an innovative design—these are some of the highlights of the Lacito MF 2700H.
-
I'll tell you a secret: the MF 2700H is the only one on the market where the operator can store 3 coils, totaling 3,000 m; with this, the machine can seal more than 42,800 packages—the competition can't keep up.
 Ask FixBot
-
-
-
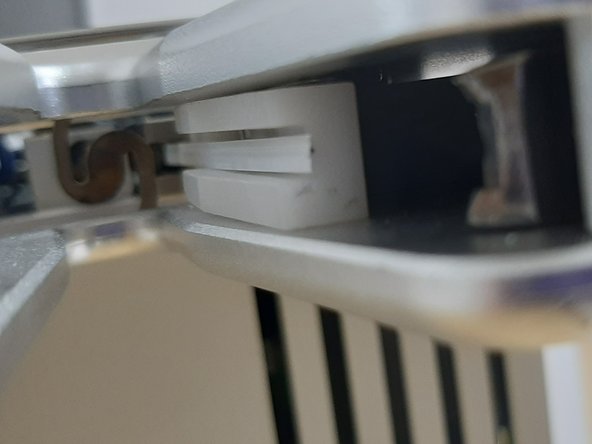
The Winder is a part located at the front of the machine, responsible for winding the strap. (Photo 1)
-
The position of the Winder must always be the same; it must be at 90 degrees, with one tab facing up and the other tab facing down. (Photo 2)
-
-
-
And with the machine turned off, we can access the Winder through a gap located below the part. Then, using your index finger, access this gap and rotate the Winder to the correct position, (Photo 2)
-
The Winder must be in the same position as in Photo 3, with one flap facing up and the other facing down.
-
-
-
Main switch, intended to energize and de-energize the machine for maintenance processes.
-
Power button, intended to turn the machine on or off.
-
Emergency button, intended to shut down the machine in case of emergency.
-
-
-
To turn on the machine, activate the master switch, leaving the selector positioned at the yellow indicator (Photo 1).
-
Then press the (I) button to turn on the machine (Green) (Photo 2).
-
After 2 seconds, the control panel screen will light up (Photo 3).
-
Emergency button next step (Step 5)
-
-
-
To deactivate the emergency button, turn it clockwise as indicated on the button.
-
-
-
The ESC key is of great importance to us; it is used to go back to the previous screen.
-
The SET key is only used on the second screen, and by pressing it, the operator can change data such as the number of turns and the strap size.
-
The ENT key validates all the data that the operator changes.
-
The numeric keypad from 0 to 9 is of utmost importance; it is used to enter data on screen 2 and to select functions on the other screens.
-
-
-
When you are on the home screen, press the 2 key to access the 2nd screen (automatic mode). (Photo 1)(Photo 2)
-
On this screen (Photo 2), we have some information and data; we can configure the machine here, which allows the operator to select the best strap option for their packaging.
-
The counter is the number of times the machine has been activated, meaning that every time the machine seals a package, it adds 1 to the count.
-
The number of turns is the number of rotations for tightening the strap on the package. I recommend 4 turns, but it depends on your packaging (test other setups).
-
The strap size is the final measurement the strap will have after the package is sealed on the MF 2700H. I recommend 70 mm (test other measurements).
-
-
-
Now that we have seen everything the 2nd screen has to offer, let's access the 3rd screen. (Photo 3)
-
On this screen, the operator will only use the strap tensioner; there is no need for the operator to use the positioner or the winder.
-
By pressing the number key 4, the tensioner is activated. This function is used to load the strap to the working position.
-
-
-
-
-
Now, we will load the spools into the machine.
-
The machine was designed to work with 3 spools to allow for faster changeovers and to have additional stock already in the machine. (Photo 2)
-
To begin, take the spool holder shaft, which is located on the back of the machine. (Photo 1)
-
Next, take and align 3 1000-meter spools. (Photo 2)
-
Now, insert the spool holder shaft into the center hole of the spools. (Photo 3)
-
-
-
Place the 3 coils with the support shaft already fitted into the back of the machine, as shown in Photo 1.
-
-
-
-
Now with the spool in position, place the ribbon into the ribbon guide nozzle. (Photo 1)
-
To do this, use the ribbon from the middle spool, and then pass the ribbon through the ribbon guide nozzle; don't forget to pass the ribbon in vertically. (Photo 1)
-
Pass the ribbon between the pulleys as shown in Photo 2.
-
Next, pass the ribbon along the right side of the central pulley. (Photo 3)
-
-
-
Now position the strap in the middle of the tensioner gears, as shown in image sequence 1 and 2.
-
-
-
Now, keep the strap positioned in the tensioner as in the previous step, and return to the control panel on the 3rd screen (manual mode). (Photo 1)
-
And now hold down key 4 on the numeric keypad; this will start pulling the strap. Let it travel to the end of the white guide arm on the front of the machine. (Photo 2)
-
Now that the strap is positioned, press the ESC key to return to the previous screen (automatic mode). (Photo 3)
-
-
-
As I mentioned earlier, it is possible to change the machine's parameters and select the best setting for your packaging. So, before you start strapping, let's learn how to change these parameters.
-
When you press the SET key, the cursor will be positioned on the number of wraps value, so use the numeric keys to select the desired value for the number of wraps. Recommended: 3 or 4 wraps. To confirm the changed data, press the ENT key.
-
Upon pressing ENT in the previous step, the cursor will be positioned on the Strap size; enter the desired size in millimeters. Recommended: 70 mm to 80 mm. To confirm the changed data, press the ENT key.
-
To confirm the changed data, press the ENT key; if there are no changes, press the SET key to exit the programming screen.
-
-
-
And now with the strap positioned and the machine programmed, we can start strapping. (Photo 2)
-
Every operator and the company where they work has a way of positioning the machine, has a packaging model and a production output that is peculiar to each company and operator. For this reason, the MF 2700H was designed with settings that will vary from company to company.
-
-




Cancel: I did not complete this guide.
3 other people completed this guide.
Special thanks to these translators:
100%

the is helping us fix the world! Want to contribute?
Start translating ›

