This translation was generated by a machine and has not been reviewed by a person yet. Speak this language? Review it.
What you need
-
-
-
For this, a 3-pole industrial plug must be used. (Photo 1)
-
The 3 phase cables (White) and 1 Ground (Green), which are coiled on the outside of the machine, must be installed there!
-
Finally, simply plug the Plug into a 3-phase outlet, already supplied with 220 Volts (Photo 2)
-
-
-
It is very simple to make the Pneumatic connection; just connect the PU hose and plug it into Connection 1 of the machine's Pneumatic valve! (Photo 1)
-
The Valve is located behind the coil support, the place where the PU hoses come from for the Cylinder (Piston). (Photo 2 and 3)
-
-
-
Power button, intended to turn the machine on or off. (Photo 1)
-
Emergency stop button, intended to turn off the machine in the event of an accident. (Photo 2)
-
Reset, intended to reset the machine when it has been disconnected from power or the emergency stop button has been triggered! (Photo 3)
-
-
-
To do so, press the Green Reset Button to reset the machine! (Photo 1)
-
Next, press the On Button (green) to turn on the machine. (Photo 2)
-
-
-
So when the machine is turned on, and the inductive sensor (Photo 1) detects an object passing by it, the machine will perform the packaging sealing cycle.
-
It is important to perform this test to see if the machine is working correctly.
-
With the test done, we can turn off the machine; to do so, press the Red Button, (Photo 2)
-
-
-
-
In the event of an emergency stop, press the Emergency stop button, which will remain locked in the pressed position, immediately cutting off electrical power to the machine and stopping its operation.
-
To release the Emergency stop button, turn it clockwise.
-
-
-
The first step is to remove the Coil support. (Photo 1)
-
If it is stuck, loosen the Hexagonal set screw and then remove the coil support! (Photo 1)
-
The next step is to place the Coil on the coil holder. Place the Coil in such a way that it unwinds in a Counter-clockwise direction, meaning the strap comes out toward the back of the machine! (Photo 2)
-
Then replace the Coil support on the Coil holder until the Strapping coil is tight, and then re-tighten the Hexagonal set screw (Photo 3)
-
-
-
The next step after placing the Coil in the machine is to Remove the front protective cover! (Photo 1)
-
To do this, remove the 2 hex screws. (Photo 2)
-
Then, remove the front protective cover. (Photo 3)
-
-
-
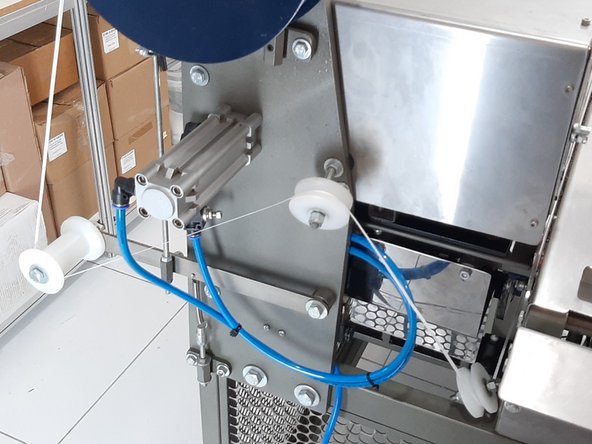
To do this, pass the strap through the left side pulley. (Photo 1)
-
After that, pass the strap between the compressed air PU hoses. (Photo 2)
-
Then, pass the strap through the center pulley. (Photo 3).
-
-
-
Next, the operator must pass the Strapping through the Alignment pulley. (Photo 1)
-
Then pass the Strapping through the Final guide located slightly inside the machine, as shown in photos 2 and 3.
-
-
-
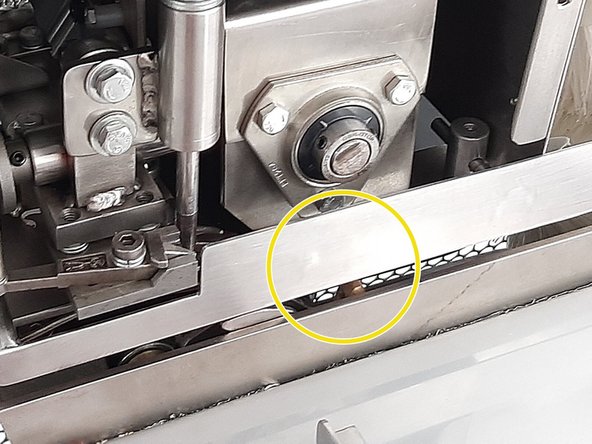
The Needle is located a little below the protection bracket! (Photo 1)
-
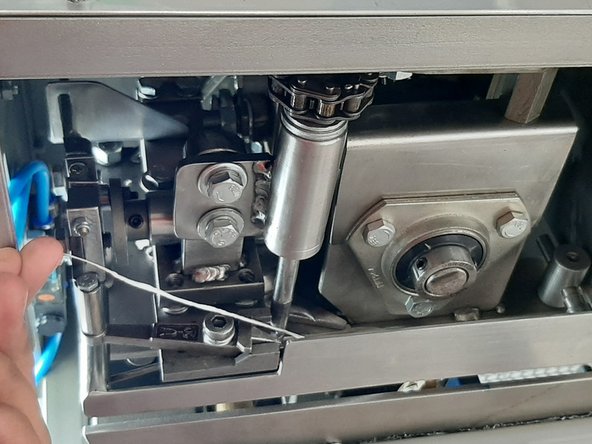
Then simply pass the Strap through the inside of the needle. (Photo 2)
-
-
-
Then, tie the strapping to the knife holder. (Photo 2)
-
-
-
Finally, just close the Protection Bracket! (Photo 1)
-
To close, simply place the Front Protection Cover, securing it with the Hex Screws! (Photo 2)
-
-
-
Then, with the machine off, place a packaged bread on the conveyor belt. (Photo 1)
-
Next, loosen the 2 side platform fasteners. (Photo 2)
-
Then adjust your side support platform so that your bread is snug on the conveyor belt. (Photo 3)
-
-
-
With that, every time the Inductive Sensor detects an object, the MF 2700A performs the sealing process for the Packaging. (Photo 2)
-

 Ask FixBot













If you have any questions, please contact our maintenance department!
Cancel: I did not complete this guide.
One other person completed this guide.

