This guide has more recent changes. Switch to the latest unverified version.
Introduction
The rotary encoder is found under the main selection button which allows you to change stories.
If the encoder no longer functions correctly, it makes it difficult to select a story.
If a replacement is necessary, component RH3HAF-10R-V-B is identical.
This tutorial is for the Lunii v1. For the Lunii v2, use the tutorial: https://fr.ifixit.com/Tutoriel/Changemen...
-
-
As the screws holding the Lunii together are found at the bottom of a hole, you will need a particularly long bit or, even better, a screwdriver.
-
Prepare the replacement encoder (RH3HAF-10R-V-B).
-
-
-
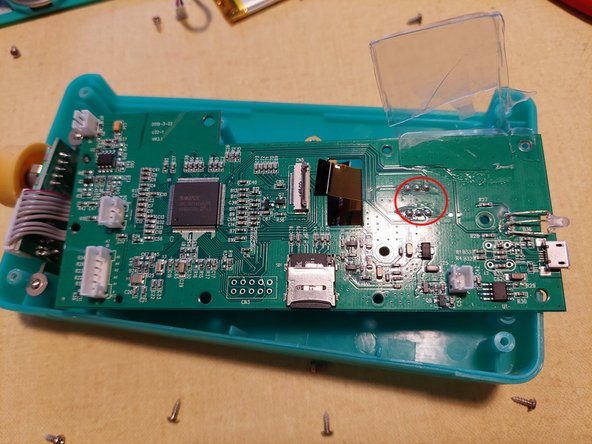
Remove the screws (circled in red) and disconnect the speaker, power, display, and battery (also circled in red). For the screen, gently lift the connector. If the cable does not freely come out of the connector, don't force it. The connecteur is probablement just not open wide enough.
-
-
-
-
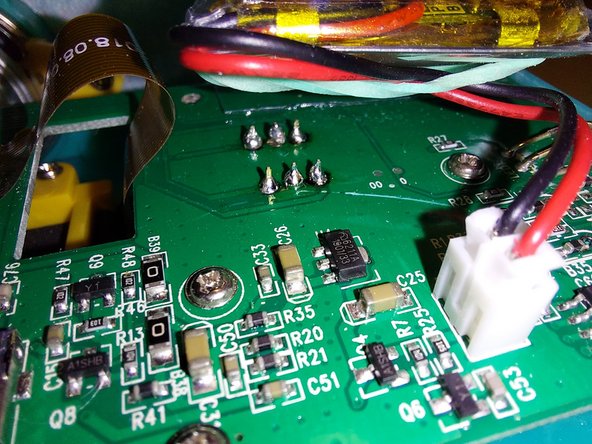
The rotary encoder is soldered on by six pins.
-
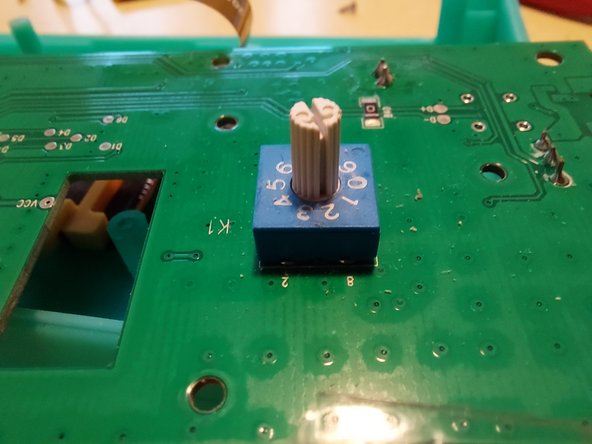
The encoder to be replaced is found on the back of the card.
-
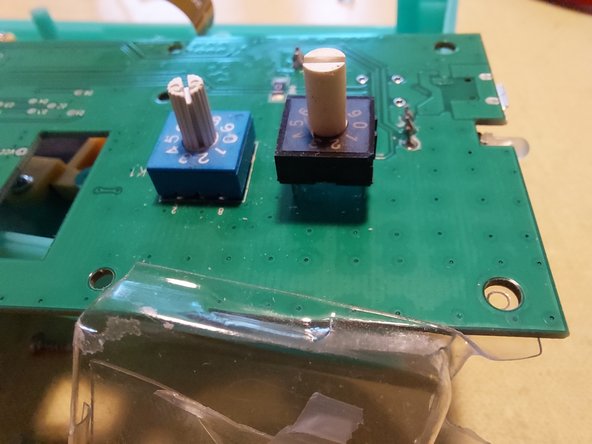
Note the position of the numbers (ex. in the photo of just the blue encoder, the numbers 2 and 3 are at the bottom) to correctly position the new part (ex. in the photo the black encoder is orientated the same as the blue encoder, with the numbers 2 and 3 at the bottom).
-
Make sure the orientation of your component is accurate; the 5 must be facing the opening (hole) in the middle of the board (the one that is used to pass the screen cable through).
-
-
-
Unsolder the encoder and remove it. Replace it with the new encoder (with the proper orientation). Resolder each leg carefully.
-


To reassemble the device, follow the instructions in reverse order.
To reassemble the device, follow the instructions in reverse order.
Special thanks to these translators:
100%

These translators are helping us fix the world! Want to contribute?
Start translating ›
5 Comments
La pièce que tu proposes pour faire l'échange à un problème : les pattes ne sont pas du bon côté. Il est de fait impossible de remettre le "5" du côté du trou où passe la nappe de l'affichage.
Ça aurait été bien de voir la nouvelle pièce ressoudée, pour savoir le sens dans lequel tu as pu la remettre pour que ça fonctionne. Tu sais donner l'orientation finale de cette pièce sur la carte ?
Merci !
Pour info, j'ai finalement commandé cette pièce (ERD110RS - https://fr.aliexpress.com/item/100500604...) qui, je pense, correspond exactement mais, ça, je ne le saurai qu'une fois que je l'aurai réceptionnée et soudée :-)
A suivre ... Mais toujours prêt à savoir comment tu as placé ta pièce initiale.
Tinou -
Bonjour,
En effet de mémoire j'ai dû faire 1 quart de tour pour insérer la nouvelle pièce, en tout cas j'ai utilisé les numéros indiqués sous la pièce pour les faire coincider avec les numéros qui sont sur la carte (sur la photo on aperçoit les numéros 8 et 2 de couleur blanche sur la carte).
Si ça n'aide pas suffisamment je redémontrai pour prendre une photo ;-)
J'ai commandé RH3HAF-10R-V-B sur https://fr.aliexpress.com/item/100500530...
JP