Free Shipping on Domestic Orders $75+

Logitech Webcam Pro 9000 Camera Replacement

What you need

    1. Logitech Webcam Pro 9000 Camera Replacement, Front and Back Cover: step 1, image 1 of 2 Logitech Webcam Pro 9000 Camera Replacement, Front and Back Cover: step 1, image 2 of 2
      • Remove the two 8 mm Phillips #0 screws on the back cover.

      • The motherboard connects the two covers together. DO NOT separate the two yet.

      • There is a button that loosens as the Phillips screws are removed. Don't be alarmed if it falls out.

      Ask FixBot

      Add Comment

    2. Logitech Webcam Pro 9000 Camera Replacement: step 2, image 1 of 2 Logitech Webcam Pro 9000 Camera Replacement: step 2, image 2 of 2
      • Remove the four 6mm Phillips #0 screws connecting the motherboard and front cover.

      • DO NOT detach the wire connecting the motherboard to the front cover.

      Ask FixBot

      Add Comment

    1. Logitech Webcam Pro 9000 Camera Replacement, Camera: step 3, image 1 of 1
      • Remove the two 8mm Phillips#0 screws on the back of the motherboard.

      Ask FixBot

      Add Comment

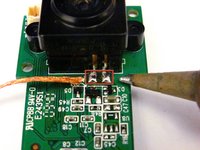
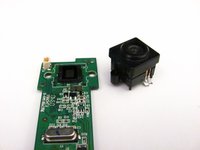
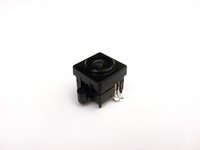
    2. Logitech Webcam Pro 9000 Camera Replacement: step 4, image 1 of 3 Logitech Webcam Pro 9000 Camera Replacement: step 4, image 2 of 3 Logitech Webcam Pro 9000 Camera Replacement: step 4, image 3 of 3
      • Remove the camera from the motherboard by desoldering the two connections as shown.

      • Follow this link to learn how to properly solder and desolder your parts.

      Ask FixBot

      Add Comment

Conclusion

To reassemble your device, follow these instructions in reverse order.

Cancel: I did not complete this guide.

nieko

Member since: 04/18/13

63 Reputation

2 Guides authored

Team

Cal Poly, Team 12-34, Amido Spring 2013 Member of Cal Poly, Team 12-34, Amido Spring 2013

CPSU-AMIDO-S13S12G34

4 Members

41 Guides authored

0 Guide Comments

Add Comment

View Statistics:

Past 24 Hours: 2

Past 7 Days: 7

Past 30 Days: 50

All Time: 2,893