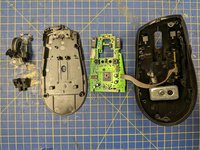
Free Shipping on Domestic Orders $75+

Logitech M500 Mouse Switch Replacement

What you need

  1. Logitech M500 Mouse Switch Replacement, Remove rubber feet: step 1, image 1 of 2 Logitech M500 Mouse Switch Replacement, Remove rubber feet: step 1, image 2 of 2
    • The screws are hidden under the four rubber feet on the underside of the mouse.

    • Carefully peel away each foot and its layer of adhesive, putting them to the side to replace later.

    Ask FixBot

    Add Comment

  2. Logitech M500 Mouse Switch Replacement, Remove the screws and top casing: step 2, image 1 of 2 Logitech M500 Mouse Switch Replacement, Remove the screws and top casing: step 2, image 2 of 2
    • Unscrew the four Phillips #0 screws hidden by the feet.

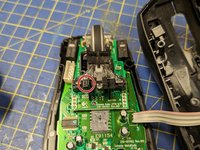
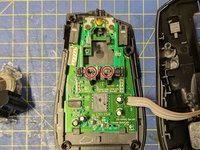
    • The top casing should now come loose with just a shake.

    Ask FixBot

    Add Comment

  3. Logitech M500 Mouse Switch Replacement, Free the USB cable: step 3, image 1 of 2 Logitech M500 Mouse Switch Replacement, Free the USB cable: step 3, image 2 of 2
    • Gently pull the USB cable out of its channel.

    Ask FixBot

    Add Comment

  4. Logitech M500 Mouse Switch Replacement, Unplug the USB cable: step 4, image 1 of 2 Logitech M500 Mouse Switch Replacement, Unplug the USB cable: step 4, image 2 of 2
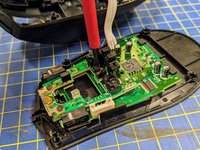
    • Grip the white plastic plug and remove it from its socket.

    • This may take some force. Try to pull straight upwards as much as possible, but it may help to wiggle the plug back and forth.

    Ask FixBot

    Add Comment

  5. Logitech M500 Mouse Switch Replacement, Remove the scroll wheel: step 5, image 1 of 3 Logitech M500 Mouse Switch Replacement, Remove the scroll wheel: step 5, image 2 of 3 Logitech M500 Mouse Switch Replacement, Remove the scroll wheel: step 5, image 3 of 3
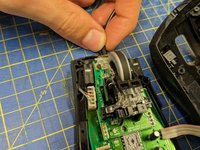
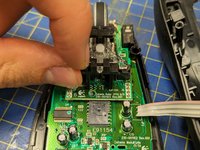
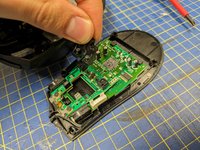
    • The scroll wheel is held in place by a plastic pin. Pull it sideways to remove it.

    • Grip the scroll wheel assembly by the transparent part and lift it out.

    • Two small springs at the front of the mouse are held in place by this assembly. Be careful not to lose them when removing it.

    Ask FixBot

    Add Comment

  6. Logitech M500 Mouse Switch Replacement, Remove scroll wheel mount: step 6, image 1 of 3 Logitech M500 Mouse Switch Replacement, Remove scroll wheel mount: step 6, image 2 of 3 Logitech M500 Mouse Switch Replacement, Remove scroll wheel mount: step 6, image 3 of 3
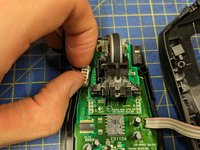
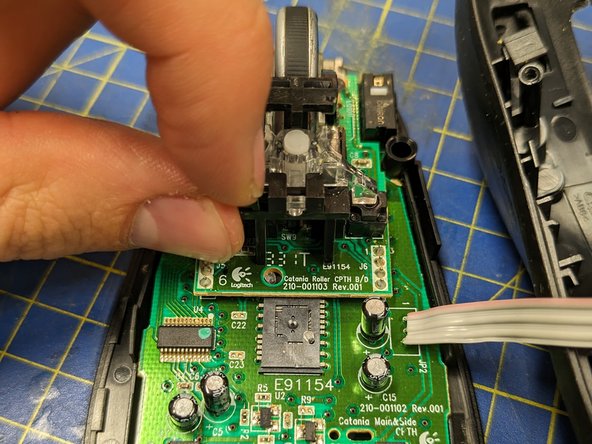
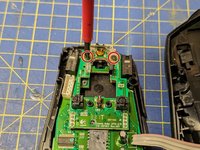
    • Remove the two screws that secure the plastic wheel mount in the centre of the circuit board.

    • You don't have to unscrew them all the way, just enough to free the wheel mount.

    • Lift the wheel mount off the circuit board.

    Ask FixBot

    Add Comment

  7. Logitech M500 Mouse Switch Replacement, Remove metal piece: step 7, image 1 of 2 Logitech M500 Mouse Switch Replacement, Remove metal piece: step 7, image 2 of 2
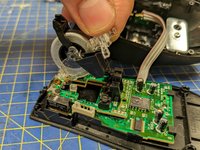
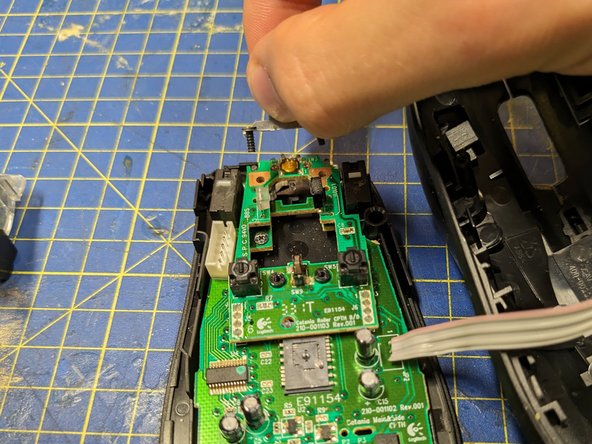
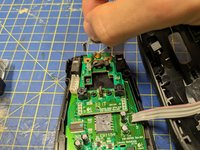
    • Undo the two screws holding down the metal piece at the front of the mouse.

    • Remove the metal piece.

    Ask FixBot

    Add Comment

  8. Logitech M500 Mouse Switch Replacement, Put the springs somewhere safe: step 8, image 1 of 1
    • Two springs sit in holes in the circuit board at the front of the mouse. Put them somewhere safe.

    Ask FixBot

    Add Comment

  9. Logitech M500 Mouse Switch Replacement, Remove the circuit board: step 9, image 1 of 3 Logitech M500 Mouse Switch Replacement, Remove the circuit board: step 9, image 2 of 3 Logitech M500 Mouse Switch Replacement, Remove the circuit board: step 9, image 3 of 3
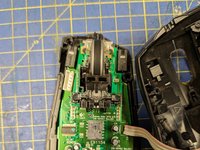
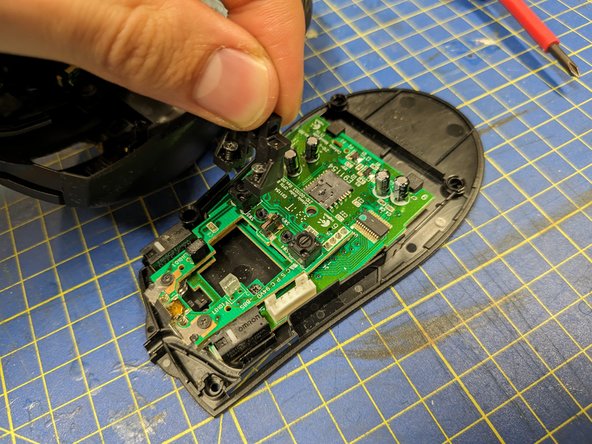
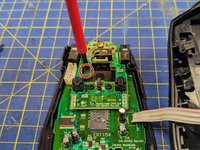
    • Remove the last screw holding down the circuit board (next to the hole left by the scroll wheel).

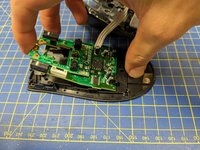
    • Remove the circuit board by lifting it up at the front.

    • There will be some resistance to lifting up the board, until the plastic that the wheel mount was screwed into snaps out of its holes in the circuit board.

    Ask FixBot

    Add Comment

  10. Logitech M500 Mouse Switch Replacement, Desolder the old switch: step 10, image 1 of 2 Logitech M500 Mouse Switch Replacement, Desolder the old switch: step 10, image 2 of 2
    • Double-check that you're removing the switch that you intend to!

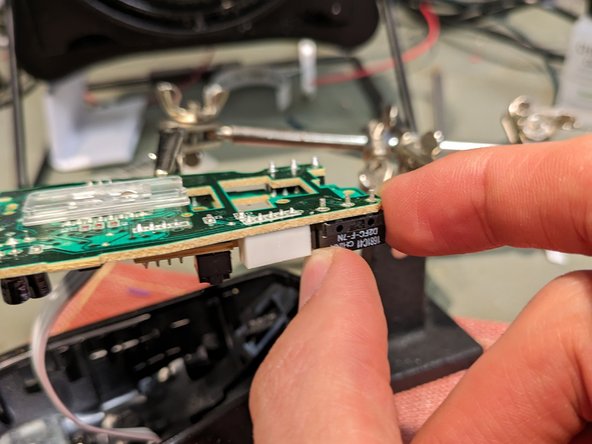
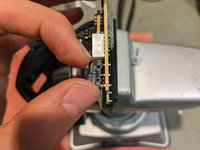
    • Remove the solder from the three pins of the old switch.

    • If you have one, a desoldering gun is the easiest tool to use. Otherwise, you could use a handheld desoldering pump or some desoldering braid along with a soldering iron.

    • Pull the old switch out of its holes. You may need to loosen any remaining drops of solder with a soldering iron while doing this.

    Ask FixBot

    Add Comment

  11. Logitech M500 Mouse Switch Replacement, Solder the replacement switch: step 11, image 1 of 2 Logitech M500 Mouse Switch Replacement, Solder the replacement switch: step 11, image 2 of 2
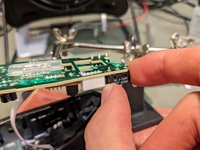
    • Insert the new switch into the holes, being careful to put it in the right way around. The white button on the top of the switch should be closest to the front end of the circuit board.

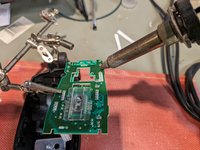
    • Solder the new switch into place.

    • Before reassembling the mouse, you may wish to reconnect the USB cable, plug it into a computer, and check that the new switch works.

    Ask FixBot

    Add Comment

Conclusion

To reassemble your device, follow these instructions in reverse order.

Cancel: I did not complete this guide.

One other person completed this guide.

Harry Cutts

Member since: 06/14/20

1,537 Reputation

8 Guides authored

3 Guide Comments

Thank you very much for your great repair guide.
It helped me to put my Logitech M500 Mouse back together, after I had fixed it on my own beforehand.

DEsigner - Reply Share

Worked like a charm, getting the springs back in position was a pain in the *** though. You might want to make sure that your tools are not magnetized.

Markus29 - Reply Share

Thanks for this guide. Mostly works on the M500S too, but you need to remove a second screw close to the Logitech logo on the circuit board before you can remove it.

Albert Onestone - Reply Share

Add Comment

View Statistics:

Past 24 Hours: 4

Past 7 Days: 57

Past 30 Days: 179

All Time: 2,731