Logitech G920 Driving Force XYAB Buttons Replacement

What you need

  1. Logitech G920 Driving Force XYAB Buttons Replacement, Steering Wheel Motherboard: step 1, image 1 of 1
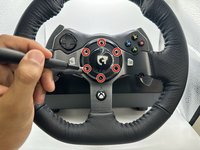
    • Use the Phillips #0 screwdriver to remove the five 9.5 mm external screws.

    • Only three of the five screws are visible from each side of the wheel due to the center unit.

  2. Logitech G920 Driving Force XYAB Buttons Replacement: step 2, image 1 of 1
    • Using the Phillips #0 screwdriver, remove the 5 mm screws holding the bumpers in place.

  3. Logitech G920 Driving Force XYAB Buttons Replacement: step 3, image 1 of 2 Logitech G920 Driving Force XYAB Buttons Replacement: step 3, image 2 of 2
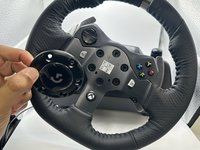
    • Using the TR25 Torx Security Screwdriver, remove the six 23.8 mm screws holding the face plate together.

    • Remove the face plate from the steering wheel.

  4. Logitech G920 Driving Force XYAB Buttons Replacement: step 4, image 1 of 2 Logitech G920 Driving Force XYAB Buttons Replacement: step 4, image 2 of 2
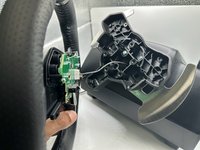
    • Remove the wheel from the main steering wheel console.

    • Ensure this is done carefully as to not damage the connection wire.

  5. Logitech G920 Driving Force XYAB Buttons Replacement: step 5, image 1 of 2 Logitech G920 Driving Force XYAB Buttons Replacement: step 5, image 2 of 2
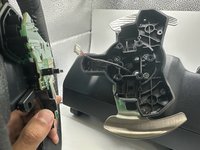
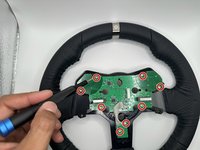
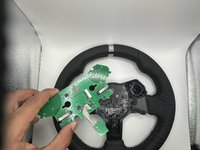
    • Remove the eight 7.5 mm screws holding the steering wheel motherboard in place using a Phillips #0 screwdriver.

    • Remove the steering wheel motherboard.

  6. Logitech G920 Driving Force XYAB Buttons Replacement, XYAB Buttons: step 6, image 1 of 1
    • Remove the XYAB buttons from the back of the steering wheel.

Conclusion

To reassemble your device, follow these instructions in reverse order.

One other person completed this guide.

0 Comments

Add Comment

View Statistics:

Past 24 Hours: 0

Past 7 Days: 5

Past 30 Days: 28

All Time: 184