Introduction
If your battery will no longer accept a charge and you need to replace the battery, you can do so with this guide. For this guide, you will need a T4 Torx screwdriver and a spudger. This is a popular repair and it is very easy to do!
What you need
-
-
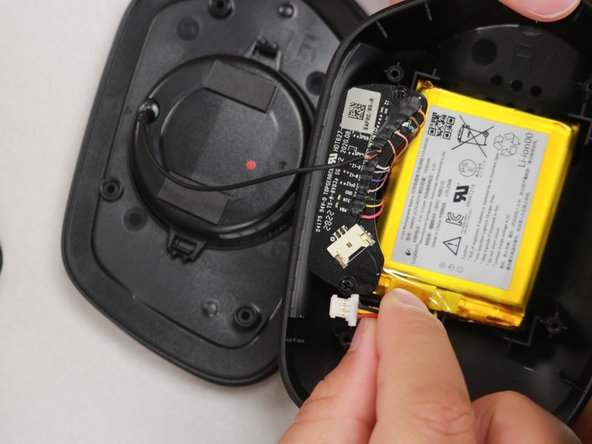
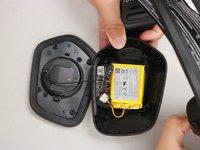
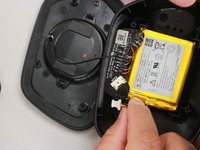
Gently pull the right ear pad off, starting from the top.
-
Slide your finger around the edges until it releases completely.
-
Remove the ear pad.
-
-


To reassemble your device, please follow these instructions in reverse order.
Cancel: I did not complete this guide.
6 other people completed this guide.

Team

Western Carolina University, Team 1-5, Virtue Spring 2023 Member of Western Carolina University, Team 1-5, Virtue Spring 2023
WCU-VIRTUE-S23S1G5
4 Members
13 Guides authored
5 Guide Comments
This guide is great, but mentioning what kind of battery to purchase for the headset would make it infinitely better...
I fully agree
Its a 1.5 phillips on the right side. On the left side its a T5 screw not a T4. And you can easily remove the battery without a spudger. It came out with my bare hands.
took 2 mins to find battery info ..........................
Logi 533-000181
after a quick search i bought this and it fit:
https://he.aliexpress.com/item/100500538...