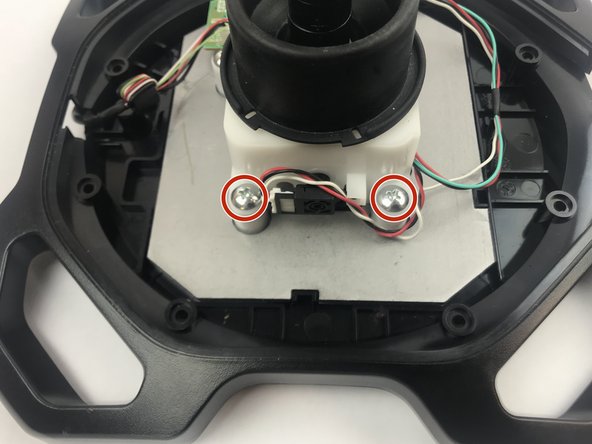
Logitech Extreme 3D Pro Main Joystick Spring Replacement

What you need

  1. Logitech Extreme 3D Pro Main Joystick Spring Replacement, Disassembly of the handle: step 1, image 1 of 1
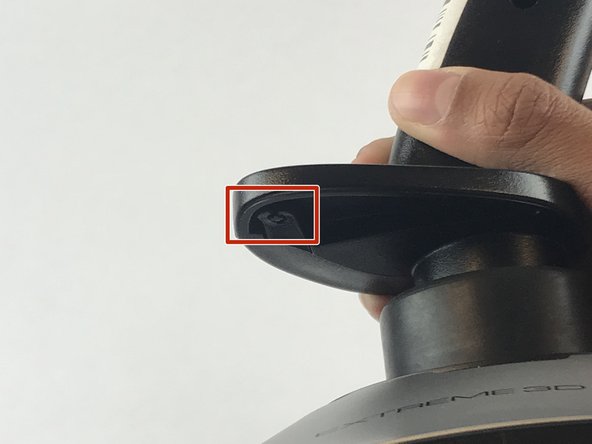
    • Remove these three Phillips #1 screws:

    • Two 10mm screws.

    • One 7mm screw.

  2. Logitech Extreme 3D Pro Main Joystick Spring Replacement: step 2, image 1 of 1
    • Using your fingers, lower the rubber boot to reveal two screws underneath the joystick.

    • Remove the two 10mm Phillips #1 screws.

  3. Logitech Extreme 3D Pro Main Joystick Spring Replacement: step 3, image 1 of 2 Logitech Extreme 3D Pro Main Joystick Spring Replacement: step 3, image 2 of 2
    • Pull apart the joystick chassis by hand.

    • Release this clip located underneath the hand rest

    • The circuit board will be loose and may fall down.

  4. Logitech Extreme 3D Pro Main Joystick Spring Replacement, Disassembly of the base: step 4, image 1 of 1
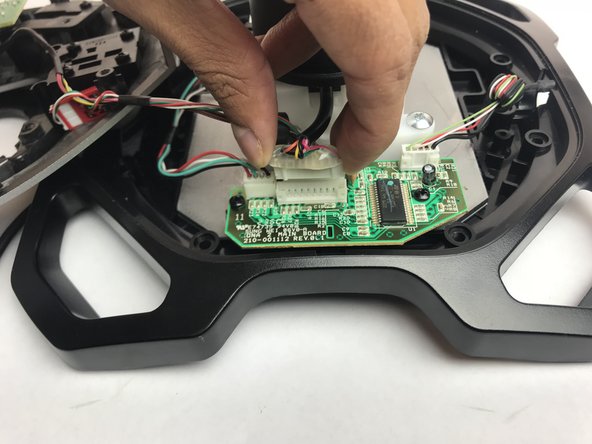
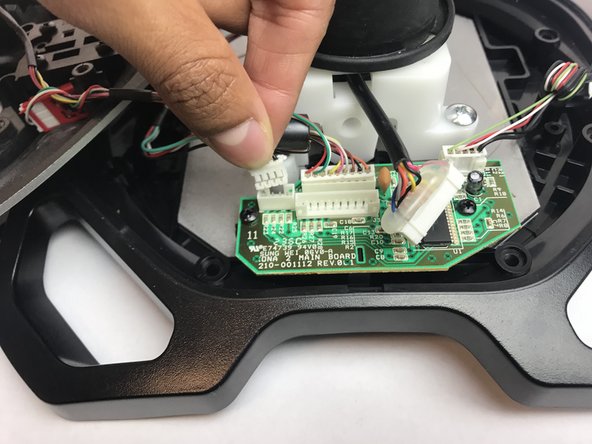
    • Remove the eight 10mm Phillips #1 screws from the bottom.

    There is a 9th screw that you need to remove near the cable

    gigakoulis - Reply

  5. Logitech Extreme 3D Pro Main Joystick Spring Replacement: step 5, image 1 of 3 Logitech Extreme 3D Pro Main Joystick Spring Replacement: step 5, image 2 of 3 Logitech Extreme 3D Pro Main Joystick Spring Replacement: step 5, image 3 of 3
    • Flip the joystick upright.

    • Lift up the sliver base cover and feed the loose circuit board through.

    • Careful with the wires still attached to the silver base cover from the bottom of the joystick.

  6. Logitech Extreme 3D Pro Main Joystick Spring Replacement, Main Joystick Spring: step 6, image 1 of 2 Logitech Extreme 3D Pro Main Joystick Spring Replacement, Main Joystick Spring: step 6, image 2 of 2
    • Disconnect the wire from the motherboard.

  7. Logitech Extreme 3D Pro Main Joystick Spring Replacement: step 7, image 1 of 2 Logitech Extreme 3D Pro Main Joystick Spring Replacement: step 7, image 2 of 2
    • Remove this plug from the motherboard.

  8. Logitech Extreme 3D Pro Main Joystick Spring Replacement: step 8, image 1 of 2 Logitech Extreme 3D Pro Main Joystick Spring Replacement: step 8, image 2 of 2
    • Remove the four 10mm Phillips #1 screws from the joystick base.

  9. Logitech Extreme 3D Pro Main Joystick Spring Replacement: step 9, image 1 of 1
    • Remove the joystick assembly.

  10. Logitech Extreme 3D Pro Main Joystick Spring Replacement: step 10, image 1 of 1
    • Remove the white plastic piece on top of the spring.

    • The white plastic will be covered in a lubricant.

  11. Logitech Extreme 3D Pro Main Joystick Spring Replacement: step 11, image 1 of 1
    • Remove the Spring

    • The spring will be covered in lubricant.

Conclusion

To reassemble your device, follow these instructions in reverse order.

5 other people completed this guide.

Emanuel Canela

Member since: 01/25/18

1,297 Reputation

7 Guides authored

Team

USF Tampa, Team S7-G1, Passmore Spring 2018 Member of USF Tampa, Team S7-G1, Passmore Spring 2018

USFT-PASSMORE-S18S7G1

4 Members

7 Guides authored

6 Comments

um, what kind of spring is that and where/how would I get a replacement?

Swift Foxe - Reply

same question here

Robbert Sprezzatura -

Where can I find a replacement spring?

ande3224@bellsouth.net - Reply

Anyone found a source for replacement springs?

Chandler - Reply

You can cut the top 360 degrees off the spring with a Dremel cutoff tool, that reduces the work require to operate the stick by about half.

Frank Clarke - Reply

In logitech 3d extreme, the middle joystick loosens over time, there is a slight gap when turning it to the right and left. Is there a solution to this?

haşim kadir yüksel - Reply

Add Comment

View Statistics:

Past 24 Hours: 4

Past 7 Days: 26

Past 30 Days: 151

All Time: 11,219