What you need
-
-
Some earlier variants of the Anywhere Mouse have a matte finish on the buttons. It is unknown if the internal construction differs from this later, shiny button version.
-
-
-
Use the blade to pry beneath the feet of the mouse and remove them. Be careful not to excessively bend the feet as they easily deform from their original flat shape.
-
-
-
Remove the four screws circled in red.
You can also gently peel back the stickers to expose the battery compartment screws.
-
-
-
Pry open the mouse using a plastic blade or spudger. The top shell of the mouse should come off relatively easily as there are no clips to disengage between the two halves.
-
-
-
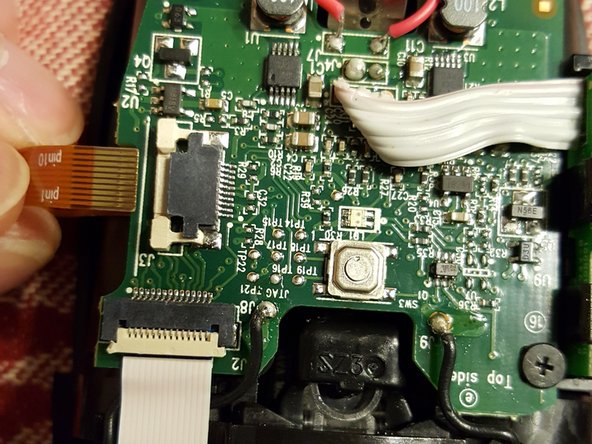
Disconnect the orange ribbon cable by carefully pulling the white locking bar horizontally out from the socket. The ribbon cable should then easily slip out of the unlocked socket.
-
-
-
Disconnect the white ribbon cable by flipping the white retention lever up. The ribbon cable should then easily slip out of the unlocked socket.
-
-
-
-
Remove the back/forward button board from its holder on the case of the mouse by carefully pulling back on the two retention clips and sliding the board out.
-
Be careful not to pull hard on the board once it is removed from its holder as the ribbon cable connecting this board to the main board is soldered and does not have a removable connector.
-
-
-
Pull gently on the rear battery contacts to slide them out of their held location in the casing.
-
-
-
Unscrew the two screws marked in yellow. This will allow you to remove the Unifying receiver storage holder.
-
-
-
Remove the two screws from the locations circled in red. This will allow you to remove the power switch board.
-
Be careful not to pull hard on the board once it is removed from its holder as the ribbon cable connecting this board to the main board is soldered and does not have a removable connector.
-
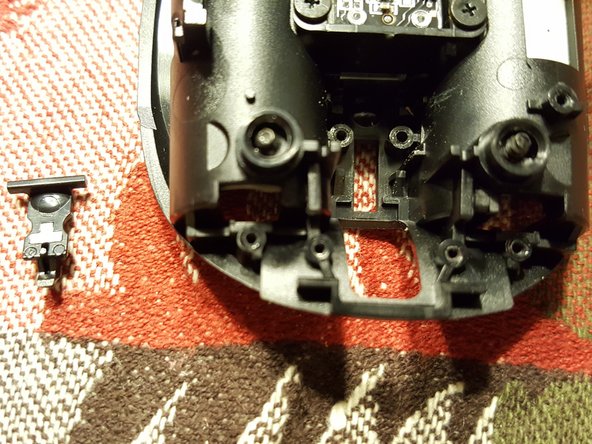
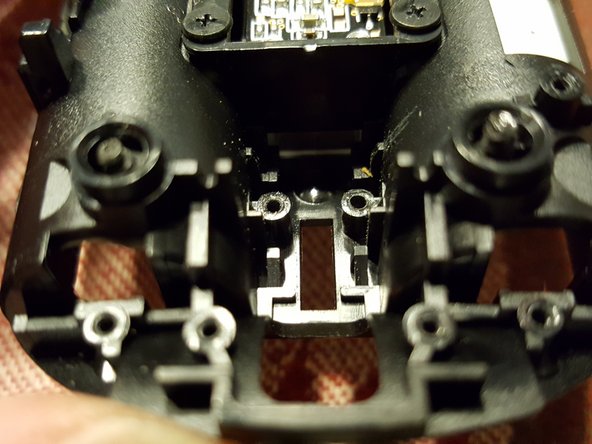
Once the power switch circuit board is unscrewed, a small plastic piece can then fall out of the casing. This piece serves to press down on the power switch when the lens cover of the mouse is closed.
-
-
-
If the plastic piece fell out, this is how it should be positioned when reassembling the mouse. The plastic piece is marked in blue.
-
-
-
With the power switch board unscrewed, you should now be able to flip the main board upwards.
-
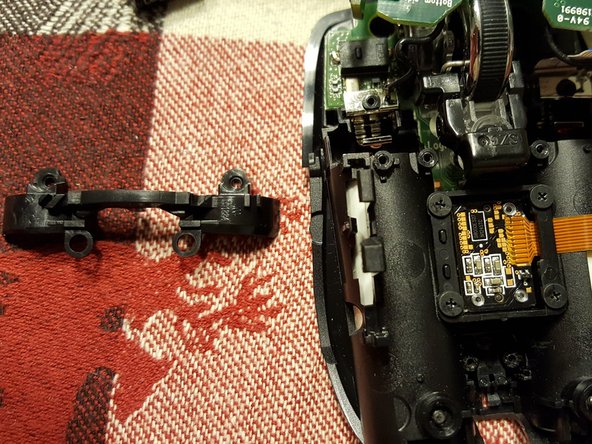
Unscrew the two screws indicated in red.
-
The retaining bridge should now easily come off.
-
-
-
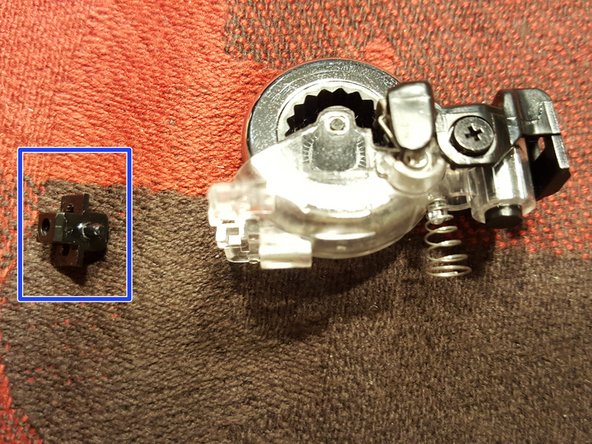
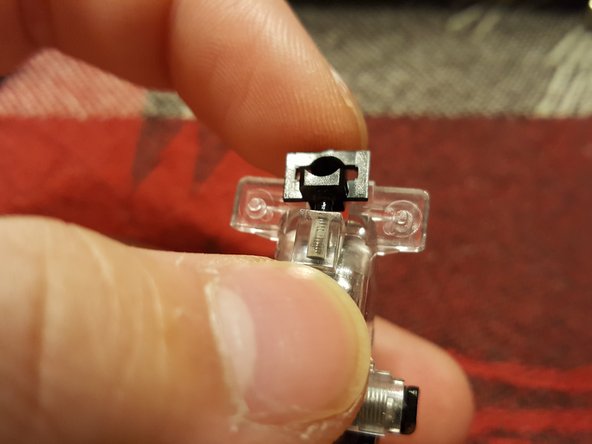
Remove the screw circled in red.
-
The scroll wheel assembly can now be lifted upwards and removed from the mouse.
-
The black plastic piece where the screw removed in this step is located is spring loaded and can fall out of the scroll wheel assembly. Be sure not to lose this piece.
-
-
-
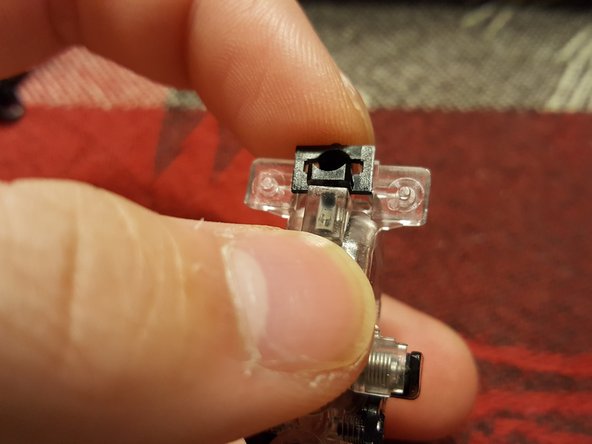
If the black plastic piece has fallen out of the scroll wheel assembly, it should be oriented like this when reassembled.
-
The plastic piece has a small peg that inserts into a spring-loaded hole in the scroll wheel assembly.
There is another small 0.6-0.8 cm long spring on the right side of the wheel assembly.
-
-
-
Remove the screws from the three locations circled in red.
-
The left/right button board can now be easily removed from the mouse casing.
-
The two main microswitches are indicated in blue.
-
-
-
Remove the four screws circled in red. The sensor assembly can then be easily removed by pulling it up and out of the casing.
-
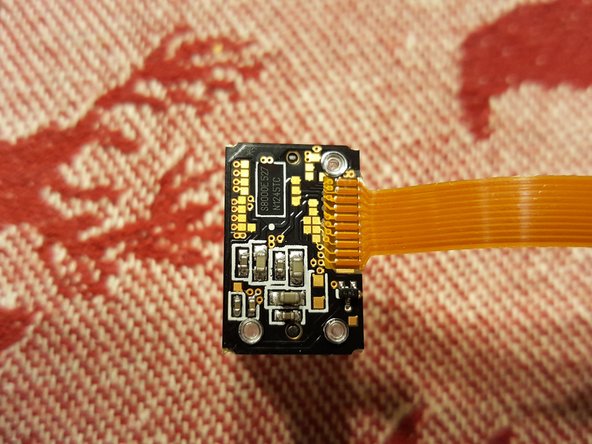
Now you can clean the lens of the mouse. The sensor itself is permanently attached to the lens however.
-
This particular sensor integrates the infrared laser diodes in the same package. It is rated at a sensitivity of 1000 DPI.
-
-
-
The mouse is now fully disassembled. The main circuit board was not removed from the casing as it was not necessary to access the sensor and remove all other parts of the mouse.
-
The major parts of the mouse are visible in the first two images of this step.
-
Here is a shot of the bottom of the main circuit board. The power switch circuit board is indicated in red while the mouse's microprocessor is indicated in blue.
-


To reassemble your device, follow these instructions in reverse order.
To reassemble your device, follow these instructions in reverse order.
Cancel: I did not complete this guide.
13 other people completed this guide.

9 Comments
Where can you order new switches when I want to replace them?
An electronics parts supply website like Mouser should have them. I don't know what specific switch you would need to replace the ones on this mouse. They are smaller than the usual microswitch. You would also need to desolder the existing switches to remove them and then solder the new ones back on to replace.
I just saw this from the other guide on how to replace the mouse switches:
"I have found 3 different manufacturers which sell micro switch replacement part for Logitech Anywhere. I only have tried E-Switch.
E-Switch TS20100F070S (Digi-Key | Mouser Electronic)
Omron D2LS (eBay | Digi-Key | Mouser Electronic)
Kailh MI873101S01 (eBay)
ZIPPY DA T Type (Original micro switch)"
Thank you for that guide. I completed until step 5 then directly step 15 and i can remove scroll wheel without unscrew anything else except screw for buttons pieces.
It was enough to clean around scroll wheel and right and left button.
Now, it works well and scroll wheel turns freely.
So, thank you much.
That afternoon, we ask us if we must buy another one…
I was experiencing the annoying double-click problem and couldn’t find the last 2 screws holding the case together until reading your tear-down finding them under the + battery decals. I proceeded to tape over the small groves in the plastic left & right switch pads where they would contact the tiny micro-switches soldered to the ckt board. Great article by the author! Thanks!
When reassembling, make sure you don’t over tighten the screws. The plastic on this mouse isn’t very strong. If you crank it, then you will strip out the plastic and the screw won’t hold the part down anymore.
Stop turning the moment you feel the screwdriver bottom out. They only need to be tight enough to keep the part from jiggling.
RE: “Step 1 - Some earlier variants of the Anywhere Mouse have a matte finish on the buttons. It is unknown if the internal construction differs from this later, shiny button version.“
I can confirm that it’s exactly the same. I’ve just disassembled an older matte finish model and the guide was 100% correct for that too.
Thank you! Remember to remind your mom to remove the batteries before storing her mouse!