Free Shipping on Domestic Orders $75+

Lockerstor AS6604T disassembly

    1. Lockerstor AS6604T disassembly, Loosening the housing: step 1, image 1 of 1
      • Remove the 3 Philips screws.

      Ask FixBot

      Add Comment

    2. Lockerstor AS6604T disassembly, Removing the housing: step 2, image 1 of 1
      • Pull the housing back to remove it.

      Ask FixBot

      Add Comment

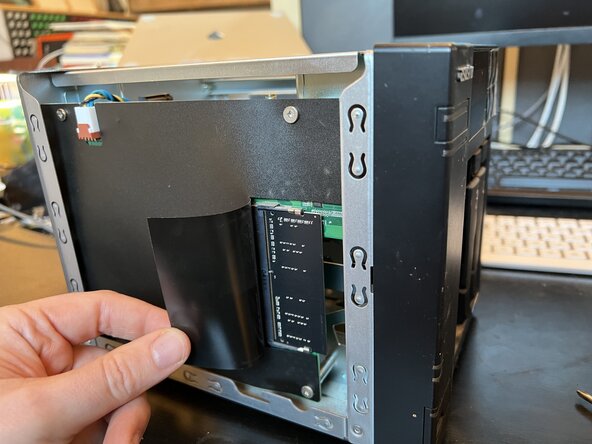
    3. Lockerstor AS6604T disassembly, Second RAM module.: step 3, image 1 of 1
      • Here you can insert a second RAM module (optional).

      Ask FixBot

      Add Comment

    4. Lockerstor AS6604T disassembly, Cables: step 4, image 1 of 1
      • Disconnect the fan and screen cables.

      Ask FixBot

      Add Comment

    5. Lockerstor AS6604T disassembly, Back panel 1: step 5, image 1 of 1
      • Remove the 4 smallest Philips screws from the back panel.

      Ask FixBot

      Add Comment

    6. Lockerstor AS6604T disassembly, Back panel 2: step 6, image 1 of 1
      • Remove the little Philips screws on the left and on the right.

      Ask FixBot

      Add Comment

    7. Lockerstor AS6604T disassembly, Back panel 3: step 7, image 1 of 1
      • Remove the two small Philips screws on the bottom that still hold the back panel.

      Ask FixBot

      Add Comment

    8. Lockerstor AS6604T disassembly, Removing the back panel: step 8, image 1 of 1
      • Carefully remove the back panel, making sure the fan cable doesn't get stuck.

      Ask FixBot

      Add Comment

    9. Lockerstor AS6604T disassembly, Harddisk controller: step 9, image 1 of 1
      • Remove the big Philips screw from the harddisk controller board.

      Ask FixBot

      Add Comment

    10. Lockerstor AS6604T disassembly, Removing the harddisk controller: step 10, image 1 of 1
      • Slide the harddisk controller left to de-attach it from the motherboard. Remove it.

      Ask FixBot

      Add Comment

    11. Lockerstor AS6604T disassembly, M.2 controller: step 11, image 1 of 1
      • Remove the Philips screw from the M.2 controller board.

      Ask FixBot

      Add Comment

    12. Lockerstor AS6604T disassembly, Removing M.2 controller board: step 12, image 1 of 1
      • Carefully detach the M.2 controller from the motherboard and remove it.

      Ask FixBot

      Add Comment

    13. Lockerstor AS6604T disassembly, Motherboard: step 13, image 1 of 1
      • Unscrew the 4 Philips screws.

      Ask FixBot

      Add Comment

    14. Lockerstor AS6604T disassembly, Removing the motherboard: step 14, image 1 of 1
      • Be careful when removing the motherboard! It's still connected on the right side. Carefully slide it out, making sure to not damage the connector or the motherboard.

      Ask FixBot

      Add Comment

Conclusion

To assemble the device again, follow these instructions in reverse order.

Cancel: I did not complete this guide.

One other person completed this guide.

Special thanks to these translators:

nl en

100%

Koen Vits is helping us fix the world! Want to contribute?
Start translating ›

Koen Vits

Member since: 03/05/25

393 Reputation

1 Guide authored

0 Guide Comments

Add Comment

View Statistics:

Past 24 Hours: 2

Past 7 Days: 12

Past 30 Days: 29

All Time: 130