
Lite-On LightScribe SHM-165H6S Chassis Replacement

James Biggs and
Last updated on Dec 3, 2019
Views: 3.8K
View statistics:
- Past 24 Hours:
- 4
- Past 7 Days:
- 19
- Past 30 Days:
- 84
- All Time:
- 3,831
Comments: 0
No one has left comments on this guide. Will you be first?
Go to guide commentsCompleted: 7 8
7 people have marked this guide "completed." Will you be next?
8 people have marked this guide "completed." Including you — great job!
Favorites: 2 3
2 people have favorited (and subscribed to) this guide. Will you be next?
3 people have favorited (and subscribed to) this guide — including you!
Action Shots
Be an action hero! This guide needs images that better demonstrate how to perform specific actions.
Bullets!
Better coordination with markups and the color/type of bullets will help make this guide more clear!
Community-Contributed Guide
An awesome member of our community made this guide. It was not created by iFixit staff.
Introduction
Go to step 1 ↓Remove the top cover of the optical drive to access the internals and replace any malfunctioning components.
What you need
Tools


-
-
-
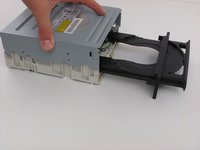
Insert an open paper clip into the small hole on the left side of the faceplate.
-
After the tray opens, extend it fully.
 Ask FixBot
-
-
-
Use an opening device to push in the black tabs on the left, right and bottom of the outer chassis to unhook the faceplate.
-
-
-
-
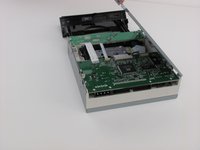
Unscrew the four 8.5 mm screws on the bottom chassis using a Philips #2 screwdriver.
-
-


To reassemble your device, follow these instructions in reverse order.
Cancel: I did not complete this guide.
7 other people completed this guide.

Team

Cal Poly, Team 6-5, Regan Fall 2011 Member of Cal Poly, Team 6-5, Regan Fall 2011
CPSU-REGAN-F11S6G5
2 Members
36 Guides authored
