Free Shipping on Domestic Orders $75+

Linear Rail CR10S Endstop Install

What you need

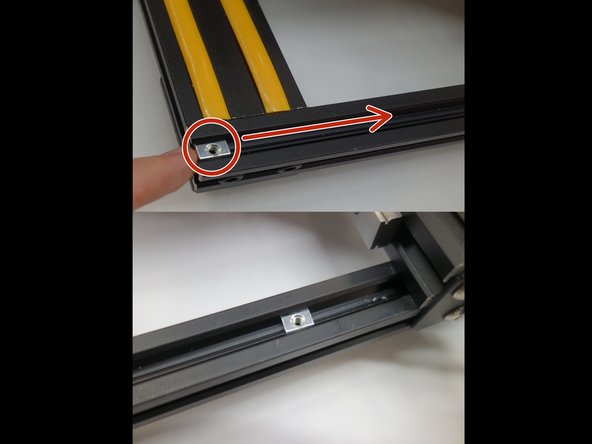
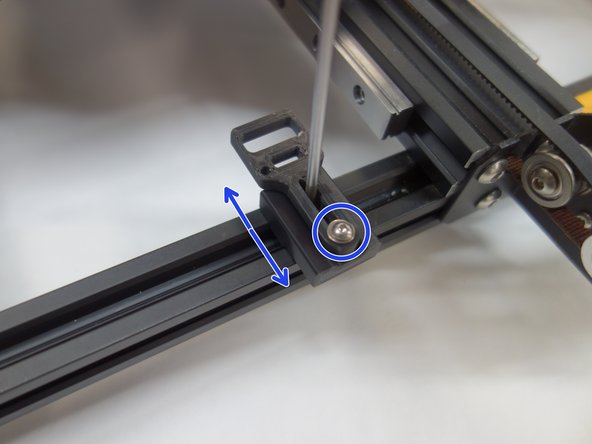
    1. Linear Rail CR10S Endstop Install, Endstop Bracket install: step 1, image 1 of 3 Linear Rail CR10S Endstop Install, Endstop Bracket install: step 1, image 2 of 3 Linear Rail CR10S Endstop Install, Endstop Bracket install: step 1, image 3 of 3
      • M3 Sliding T-Nut

      • Slide in the M3 T-Nut toward the middle of the printer

      • M3X12 BHCS & M3 FLAT WASHERS

      • M3x10 FHCS

      • Adjustable Endstop Mount A

      • Adjustable Endstop Mount B

      • Tighten the M3 screw into the T-Nut

      Ask FixBot

      Add Comment

    2. Linear Rail CR10S Endstop Install, Endstop install: step 2, image 1 of 3 Linear Rail CR10S Endstop Install, Endstop install: step 2, image 2 of 3 Linear Rail CR10S Endstop Install, Endstop install: step 2, image 3 of 3
      • Adjust endstop mount until it is square with the Linear rail

      • Remove stock endstop board form Creality mount and Reuse the stock screws to mount the endstop as shown

      Ask FixBot

      Add Comment

    3. Linear Rail CR10S Endstop Install, EndStop Adjustments: step 3, image 1 of 3 Linear Rail CR10S Endstop Install, EndStop Adjustments: step 3, image 2 of 3 Linear Rail CR10S Endstop Install, EndStop Adjustments: step 3, image 3 of 3
      • Use M3x12 BHCS to adjust the endstop position, so the nozzle tip is even with the front edge of the bed when the end stop is triggered

      Ask FixBot

      Add Comment

Finish Line

Cancel: I did not complete this guide.

AJ Pereira

Member since: 05/29/20

2,744 Reputation

16 Guides authored

Team

Tiny Machines 3D Member of Tiny Machines 3D

Community

5 Members

372 Guides authored

0 Guide Comments

Add Comment

View Statistics:

Past 24 Hours: 4

Past 7 Days: 22

Past 30 Days: 95

All Time: 2,635