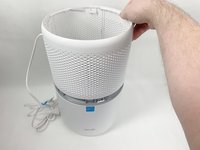
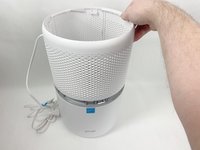
Levoit Core 300-RAC Fan Replacement

What you need

  1. Levoit Core 300-RAC Fan Replacement, Air Filter: step 1, image 1 of 2 Levoit Core 300-RAC Fan Replacement, Air Filter: step 1, image 2 of 2
    • Make sure your device is turned off and unplugged for safety.

    • Turn the Levoit Core 300-RAC over so the bottom is facing up.

  2. Levoit Core 300-RAC Fan Replacement: step 2, image 1 of 3 Levoit Core 300-RAC Fan Replacement: step 2, image 2 of 3 Levoit Core 300-RAC Fan Replacement: step 2, image 3 of 3
    • Turn the bottom cover counterclockwise and lift it off to remove it.

    • The cover does not "snap" on or off when turned.

  3. Levoit Core 300-RAC Fan Replacement: step 3, image 1 of 3 Levoit Core 300-RAC Fan Replacement: step 3, image 2 of 3 Levoit Core 300-RAC Fan Replacement: step 3, image 3 of 3
    • Lift the filter straight up and out of the device.

  4. Levoit Core 300-RAC Fan Replacement, Fan: step 4, image 1 of 3 Levoit Core 300-RAC Fan Replacement, Fan: step 4, image 2 of 3 Levoit Core 300-RAC Fan Replacement, Fan: step 4, image 3 of 3
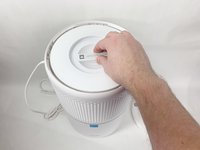
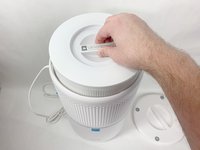
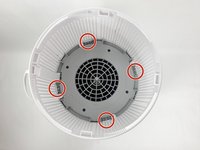
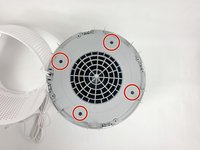
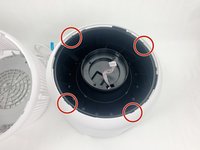
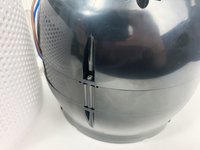
    • Use a Phillips #2 screwdriver to remove the four screws that secure the gray lid towards the base of the device.

    • Set the screws aside in a safe place.

  5. Levoit Core 300-RAC Fan Replacement: step 5, image 1 of 3 Levoit Core 300-RAC Fan Replacement: step 5, image 2 of 3 Levoit Core 300-RAC Fan Replacement: step 5, image 3 of 3
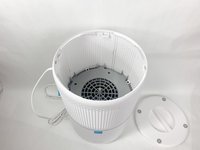
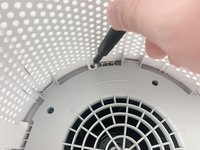
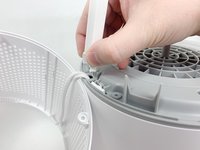
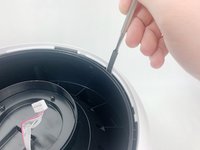
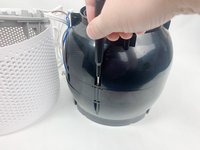
    • Use a metal spudger or Jimmy to gently pry between the four white tabs and the white housing to release the outer housing.

    • Gently pulling up on the outer housing can prevent the clips from resetting.

  6. Levoit Core 300-RAC Fan Replacement: step 6, image 1 of 2 Levoit Core 300-RAC Fan Replacement: step 6, image 2 of 2
    • Remove the outer white housing and set it to the side.

    • The power cord is fed through a hole in the side of this housing, so it has to sit right next to the device.

  7. Levoit Core 300-RAC Fan Replacement: step 7, image 1 of 3 Levoit Core 300-RAC Fan Replacement: step 7, image 2 of 3 Levoit Core 300-RAC Fan Replacement: step 7, image 3 of 3
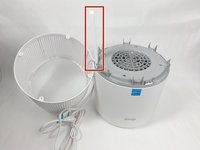
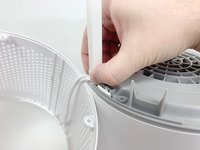
    • Grab the cable channel by its base, squeeze, and pull up at the same time to remove it.

  8. Levoit Core 300-RAC Fan Replacement: step 8, image 1 of 2 Levoit Core 300-RAC Fan Replacement: step 8, image 2 of 2
    • Remove the four Phillips #2 screws securing the gray face plate.

    • Set the screws aside in a safe place.

  9. Levoit Core 300-RAC Fan Replacement: step 9, image 1 of 3 Levoit Core 300-RAC Fan Replacement: step 9, image 2 of 3 Levoit Core 300-RAC Fan Replacement: step 9, image 3 of 3
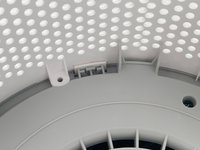
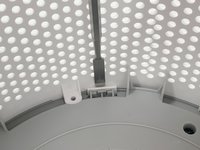
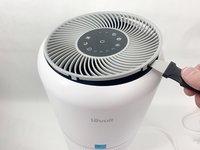
    • Insert a Jimmy or spudger between the white tab and the gray faceplate body to release the faceplate.

    • Lift it out.

  10. Levoit Core 300-RAC Fan Replacement: step 10, image 1 of 1
    • Turn your device over so it is upright again.

  11. Levoit Core 300-RAC Fan Replacement: step 11, image 1 of 3 Levoit Core 300-RAC Fan Replacement: step 11, image 2 of 3 Levoit Core 300-RAC Fan Replacement: step 11, image 3 of 3
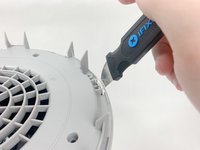
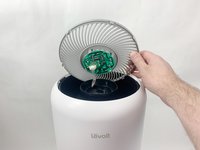
    • Insert the Jimmy between the gray grille cover and the top of the device.

    • Work your way around the grille cover with the Jimmy to release the clips holding it in place.

    • Take note of the placement of the tabs, as they are keyed and need to go back in the exact way they came out.

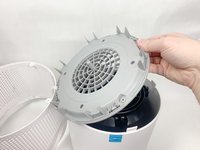
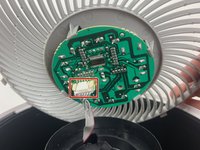
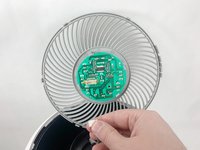
    • Remove the grille cover gently as it is connected by a ribbon cable.

    • Be careful not to put too much strain on the ribbon cable as it may break.

  12. Levoit Core 300-RAC Fan Replacement: step 12, image 1 of 3 Levoit Core 300-RAC Fan Replacement: step 12, image 2 of 3 Levoit Core 300-RAC Fan Replacement: step 12, image 3 of 3
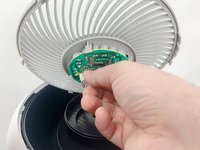
    • Squeeze the tab on the connector to release the bundled cable from the control board.

    • The connector should come out fairly easily, do not force it. Pulling too hard could damage the connector.

  13. Levoit Core 300-RAC Fan Replacement: step 13, image 1 of 3 Levoit Core 300-RAC Fan Replacement: step 13, image 2 of 3 Levoit Core 300-RAC Fan Replacement: step 13, image 3 of 3
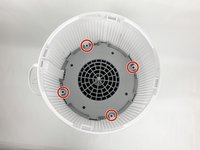
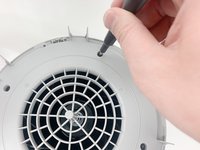
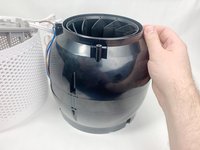
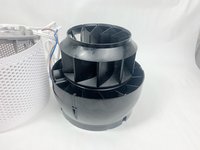
    • Insert a spudger or Jimmy into the four tabs to release them from holding the outer white housing to the inner black core.

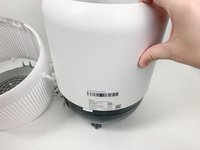
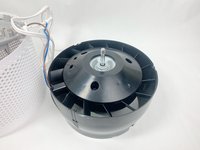
    • Remove the white outer housing.

  14. Levoit Core 300-RAC Fan Replacement: step 14, image 1 of 1
    • Flip your device over again so the fan is facing up.

  15. Levoit Core 300-RAC Fan Replacement: step 15, image 1 of 2 Levoit Core 300-RAC Fan Replacement: step 15, image 2 of 2
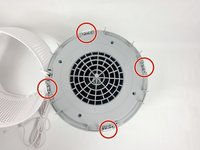
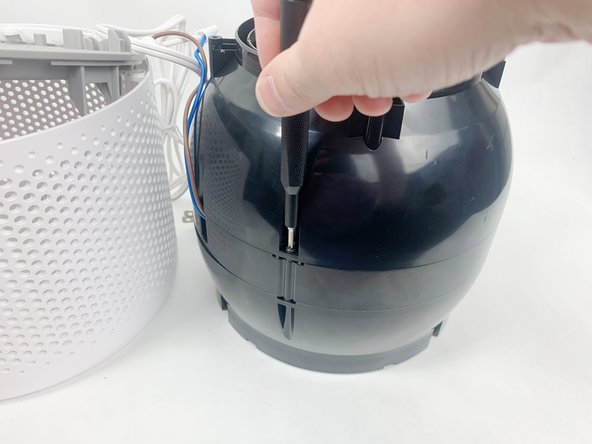
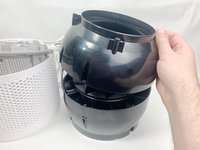
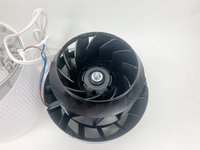
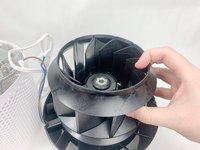
    • Use a Phillips #2 screwdriver to remove the three screws on the upper portion of the black housing.

    • Set the screws aside in a safe place.

  16. Levoit Core 300-RAC Fan Replacement: step 16, image 1 of 3 Levoit Core 300-RAC Fan Replacement: step 16, image 2 of 3 Levoit Core 300-RAC Fan Replacement: step 16, image 3 of 3
    • Remove the upper portion of the black housing.

  17. Levoit Core 300-RAC Fan Replacement: step 17, image 1 of 3 Levoit Core 300-RAC Fan Replacement: step 17, image 2 of 3 Levoit Core 300-RAC Fan Replacement: step 17, image 3 of 3
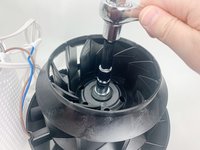
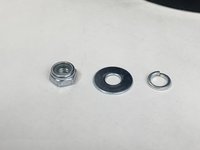
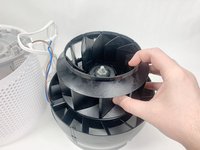
    • Use a 13mm socket wrench with an extension to remove the nut holding the fan in place and remove all hardware from the threaded shaft.

    • There should be a nylon-insert lock nut, a flat washer, and a split ring washer. Set these aside in a safe location.

  18. Levoit Core 300-RAC Fan Replacement: step 18, image 1 of 3 Levoit Core 300-RAC Fan Replacement: step 18, image 2 of 3 Levoit Core 300-RAC Fan Replacement: step 18, image 3 of 3
    • Lift the fan up and off of the threaded shaft.

    • There is another washer underneath the fan, leave it in place for the replacement fan.

Conclusion

To reassemble your device, follow these instructions in reverse order.

Stephen Carrozza

Member since: 11/01/23

241 Reputation

1 Guide authored

Team

UMass Dartmouth, Team 1-6, Petersen Fall 2023 Member of UMass Dartmouth, Team 1-6, Petersen Fall 2023

UMASSD-PETERSEN-F23S1G6

5 Members

6 Guides authored

0 Comments

Add Comment

View Statistics:

Past 24 Hours: 2

Past 7 Days: 24

Past 30 Days: 117

All Time: 552