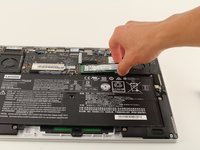
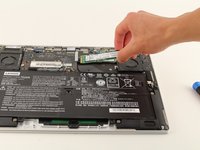
Lenovo Yoga 910-13IKB SSD Replacement

What you need

  1. Lenovo Yoga 910-13IKB SSD Replacement, Bottom Panel: step 1, image 1 of 2 Lenovo Yoga 910-13IKB SSD Replacement, Bottom Panel: step 1, image 2 of 2
    • Before you begin, be sure to turn off your laptop and unplug it from the outlet.

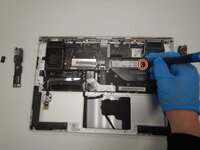
    • Turn the laptop over and remove the ten Torx T5 screws along the perimeter of the bottom panel.
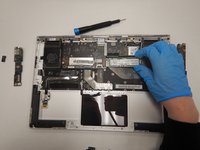
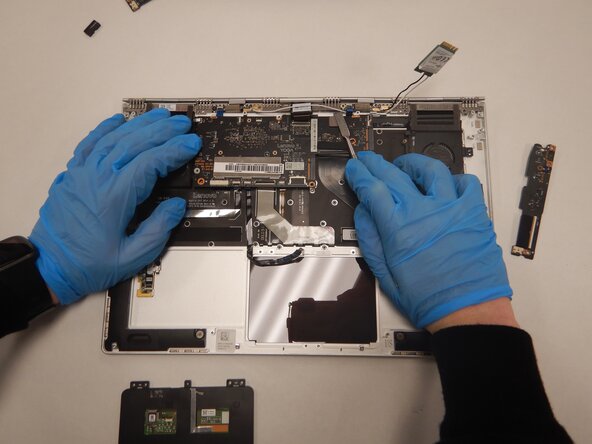
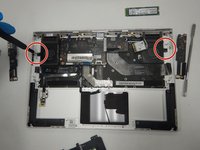
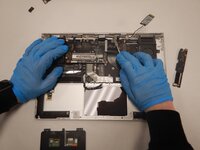
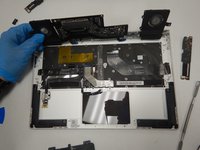
    • Remove the panel.

  2. Lenovo Yoga 910-13IKB SSD Replacement: step 2, image 1 of 1
    • Use a Phillips screwdriver to remove the four M2 x 1.7 mm screws securing the battery to the laptop.

    • Remove the battery.

  3. Lenovo Yoga 910-13IKB SSD Replacement: step 3, image 1 of 1
    • Remove the six Phillips screws that attach the trackpad to the device.

    • Use a spudger to disconnect the ribbon cable connector from the trackpad.

    • Remove the trackpad using a spudger.

  4. Lenovo Yoga 910-13IKB SSD Replacement: step 4, image 1 of 1
    • Use a Phillips screwdriver to remove six screws attached to the USB ports on both sides of the device.

    • Detach both ribbon cables attached to each USB port with a spudger, then detach the USB ports.

  5. Lenovo Yoga 910-13IKB SSD Replacement: step 5, image 1 of 2 Lenovo Yoga 910-13IKB SSD Replacement: step 5, image 2 of 2
    • Use a small Phillips screwdriver to remove all single screw securing the SSD stick to the motherboard.

    • Slide the SSD stick from the port on the motherboard.

  6. Lenovo Yoga 910-13IKB SSD Replacement: step 6, image 1 of 3 Lenovo Yoga 910-13IKB SSD Replacement: step 6, image 2 of 3 Lenovo Yoga 910-13IKB SSD Replacement: step 6, image 3 of 3
    • Use a small Phillips screwdriver to remove four screws from the fans.

    • Remove the back connector strip using a spudger to pry it off of the device.

    • Remove the fans.

    • Now, only the bottom panel should remain.

  7. Lenovo Yoga 910-13IKB SSD Replacement, SSD: step 7, image 1 of 1
    • Remove the 3mm JIS #00 screw holding the storage in place.

  8. Lenovo Yoga 910-13IKB SSD Replacement: step 8, image 1 of 2 Lenovo Yoga 910-13IKB SSD Replacement: step 8, image 2 of 2
    • Pull up lightly on the drive and gently pull it out of the connector.

Conclusion

To reassemble your device, follow these instructions in reverse order.

Nikhil Nagarajan

Member since: 01/23/20

97 Reputation

1 Guide authored

Team

Cal Poly, Team S1-G5, White Winter 2020 Member of Cal Poly, Team S1-G5, White Winter 2020

CPSU-WHITE-W20S1G5

4 Members

14 Guides authored

1 Guide Comment

Just one question: if I want to replace just the SSD, surely one goes straight from step one to step seven?

Bessi Aðalsteinsson - Reply

Add Comment

View Statistics:

Past 24 Hours: 2

Past 7 Days: 16

Past 30 Days: 39

All Time: 7,059