
Lenovo Yoga 700-11ISK Touchpad Replacement

What you need

  1. Lenovo Yoga 700-11ISK Touchpad Replacement, Back Panel: step 1, image 1 of 2 Lenovo Yoga 700-11ISK Touchpad Replacement, Back Panel: step 1, image 2 of 2
    • Flip your device so that the bottom panel is facing up.

    • Remove the eleven 5mm Torx T5 screws from the back panel.

  2. Lenovo Yoga 700-11ISK Touchpad Replacement: step 2, image 1 of 1
    • Use a spudger to unclip clips on the front and near the USB ports on each side

    • Lift the back panel off

  3. Lenovo Yoga 700-11ISK Touchpad Replacement, Battery: step 3, image 1 of 1
    • Remove the two 3mm Phillips #1 screws holding the battery to the laptop chassis.

    • Disconnect the battery from the IO board by holding the connector by the sides and gently pulling the connector out.

  4. Lenovo Yoga 700-11ISK Touchpad Replacement: step 4, image 1 of 1
    • Carefully remove the battery from the laptop.

    • Make sure that all wires still connected to the laptop are out of the way and not pulled out with the battery.

  5. Lenovo Yoga 700-11ISK Touchpad Replacement, Touchpad: step 5, image 1 of 3 Lenovo Yoga 700-11ISK Touchpad Replacement, Touchpad: step 5, image 2 of 3 Lenovo Yoga 700-11ISK Touchpad Replacement, Touchpad: step 5, image 3 of 3
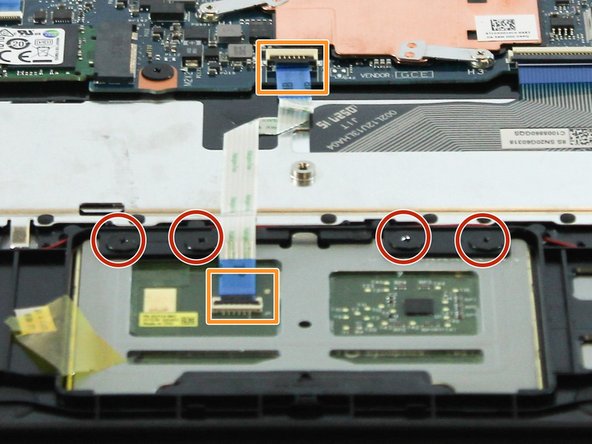
    • Remove the four 4mm Phillips #1 screws holding the touchpad onto the laptop.

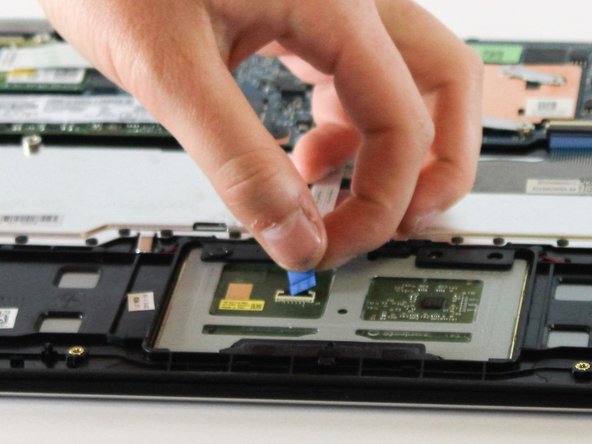
    • Use a spudger to lift up the two black tabs on the ZIF connectors and then pull the cable out by the blue tab.

    • The cable should slide in and out effortlessly. If there is resistance when pulling the cable, double check the black tabs.

  6. Lenovo Yoga 700-11ISK Touchpad Replacement: step 6, image 1 of 1
    • Slightly separate the two halves of the laptop with one hand and slide the touchpad out from the laptop with the other.

    • There may be silver tape holding the touchpad to the laptop. You do not need to replace the tape when reassembling the device.

Conclusion

To reassemble your device, follow these instructions in reverse order.

2 other people completed this guide.

Sean Wong

Member since: 10/06/16

859 Reputation

3 Guides authored

Team

Cal Poly, Team 15-6, Livingston Fall 2016 Member of Cal Poly, Team 15-6, Livingston Fall 2016

CPSU-LIVINGSTON-F16S15G6

4 Members

7 Guides authored

One Comment

The “Tools Required” section says “Torx T7” but Step 1 lists, and (more importantly) the actual device has Torx T5 screws.

Step 5 suggests using a spudger, so perhaps that should be listed too.

alan - Reply

Add Comment

View Statistics:

Past 24 Hours: 0

Past 7 Days: 4

Past 30 Days: 12

All Time: 2,174