Introduction
Here it is explained step by step how to replace a M2 SSD of the Lenovo Thinkpad Yoga 370. The specific model code can be found in the sticker with the serial number. In my case it is 20JJ. The materials I have used are:
- New M2 SSD compatible with your model
- Screw like Phillips #1 Screwdriver or the tool provided on iFixit Tool.
I recommend to download also from Lenovo the official guides of your laptop as they have diagrams with the description of the motherboards and its components. In my case:
What you need
-
-
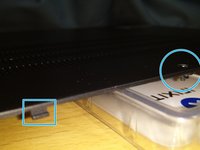
Before remove the back-case of the laptop we have to remove the Pen Pro and the SD card if it is in your model (two boxes in orange on one of the photos).
-
Circles show the screws to loose. The yellow square indicates where the information about Model is found (20JJ in this case).
-
-
-
Note that after loose the screws we have to remove the case from the bottom part.
-
The all the screws remain attached to the back-cover as shown in the photos.
-
Note that the top part of the laptop back cover has several hooks done with plastic (see the photos with blue squares)
-
-
-
-
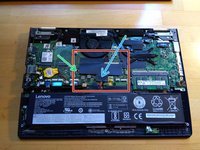
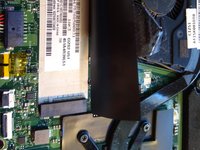
Laptop after remove the back-cover. The area in red has the M2.SSD.
-
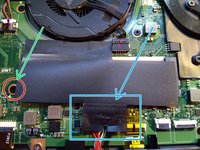
The blue arrow shows where is the adhesive part of the M2.SSD that we have to carefully lift off but keeping attached the other part of the cover.
-
The green arrow shows the screw that we would have to remove to take away the M2.SSD.
-
-
-
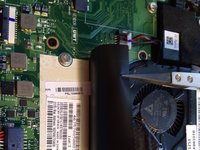
First step is remove the screw (this one has to be full removed).
-
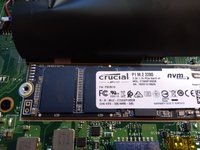
Then we can introduce the new M2.SSD, with a little bit of pressure.
-
Finally we can fix it with the previously removed screw. Everything should fit well without forcing any component.
-
-
-
To close the back case of the laptop we have to remember the position of the small hooks. Then apply some pressure and screw first the screws on top
-
After screw again all the 9 screws, we can attach again the Pen Pro and the SD card.
-
Its done.
-


To reassemble your device, follow these instructions in reverse order.
Cancel: I did not complete this guide.
2 other people completed this guide.