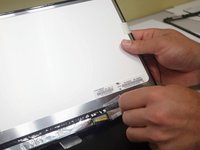
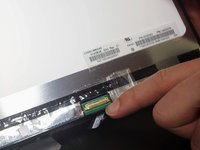
Lenovo ThinkPad S431 Screen Assembly Replacement

What you need

  1. Lenovo ThinkPad S431 Screen Assembly Replacement, Screen Assembly: step 1, image 1 of 1
    • Place an opening tool under the screen cover, and pop it off.

    • Using a metal object to open fragile parts of your laptop could cause damage! Instead use the opening tool listed in the tools section above.

  2. Lenovo ThinkPad S431 Screen Assembly Replacement: step 2, image 1 of 2 Lenovo ThinkPad S431 Screen Assembly Replacement: step 2, image 2 of 2
    • Take off the 6 screws using the Philips head #1.

  3. Lenovo ThinkPad S431 Screen Assembly Replacement: step 3, image 1 of 1
    • Lift the screen out from the top.

  4. Lenovo ThinkPad S431 Screen Assembly Replacement: step 4, image 1 of 2 Lenovo ThinkPad S431 Screen Assembly Replacement: step 4, image 2 of 2
    • Remove the connector located at the bottom of the back of the screen.

Conclusion

To reassemble your device, follow these instructions in reverse order.

0 Comments

Add Comment

View Statistics:

Past 24 Hours: 1

Past 7 Days: 5

Past 30 Days: 7

All Time: 361