Introduction
Through this guide, you will be able to remove the Chromebook's keyboard from the back casing and expose the battery and motherboard underneath. The keyboard may need to be replaced if several keys are unresponsive, the keyboard as a whole is unresponsive, or the mouse/touchpad is unresponsive.
What you need
-
-
Flip the Chromebook so that the bottom is facing up.
-
Use a Phillips #1 screwdriver to remove the six 6.6 mm screws on the bottom.
-
Use a spudger to remove each of the 4 rubber feet.
-
Use a Phillips #1 screwdriver to remove the four additional screws under the rubber feet.
-
-
-
Flip the Chromebook back over and open the screen.
-
Wedge the plastic opening tool between the keyboard and the bottom of the Chromebook.
-
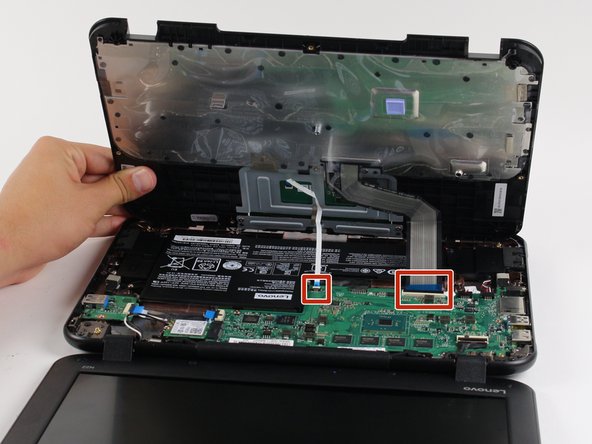
Run the plastic opening tool along the seam between the keyboard and the bottom of the Chromebook until the keyboard moves freely. Several tabs will pop out.
-
-


To reassemble your device, follow these instructions in reverse order.
To reassemble your device, follow these instructions in reverse order.
Cancel: I did not complete this guide.
8 other people completed this guide.
Team

Cal Poly, Team S21-G1, Livingston Spring 2017 Member of Cal Poly, Team S21-G1, Livingston Spring 2017
CPSU-LIVINGSTON-S17S21G1
4 Members
14 Guides authored
6 Comments
I have this laptop. The top right corner of the keyboard has popped out. How do I fix this?
Try removing the rubber foot under the popped corner, remove the screw, push down on the corner and replace the screw while holding the corner down.
Just a note: the little rubber feet are all lettered (A-D) and you do need to match them to their proper corners when re-assembling.
I have several keys that have stopped working. Replace the keyboard or is there a fix?
This happen when the ribbon cable that connects the keyboard gets squashed too hard.
See [1] below for a decription and fix.
Jan -