
Lenovo N20p Chromebook I/O Board Replacement

What you need

  1. Lenovo N20p Chromebook  I/O Board Replacement, Keyboard: step 1, image 1 of 2 Lenovo N20p Chromebook  I/O Board Replacement, Keyboard: step 1, image 2 of 2
    • Power down the Chromebook before starting any repair.

    • Remove the two 3.5 mm Phillips #0 screws using a screwdriver.

    • It is only necessary to remove these two screws to complete this step.

  2. Lenovo N20p Chromebook  I/O Board Replacement: step 2, image 1 of 2 Lenovo N20p Chromebook  I/O Board Replacement: step 2, image 2 of 2
    • Use the hook of the metal spudger to carefully lift up the keyboard.

    • Lift the keyboard carefully. If you lift too quickly, it might break the two cables that connect the keyboard to the motherboard.

  3. Lenovo N20p Chromebook  I/O Board Replacement: step 3, image 1 of 3 Lenovo N20p Chromebook  I/O Board Replacement: step 3, image 2 of 3 Lenovo N20p Chromebook  I/O Board Replacement: step 3, image 3 of 3
    • Carefully, disconnect the keyboard cable from the motherboard carefully by pulling on the blue tab of the cable.

    • You will now be able to replace the keyboard.

  4. Lenovo N20p Chromebook  I/O Board Replacement, Battery: step 4, image 1 of 3 Lenovo N20p Chromebook  I/O Board Replacement, Battery: step 4, image 2 of 3 Lenovo N20p Chromebook  I/O Board Replacement, Battery: step 4, image 3 of 3
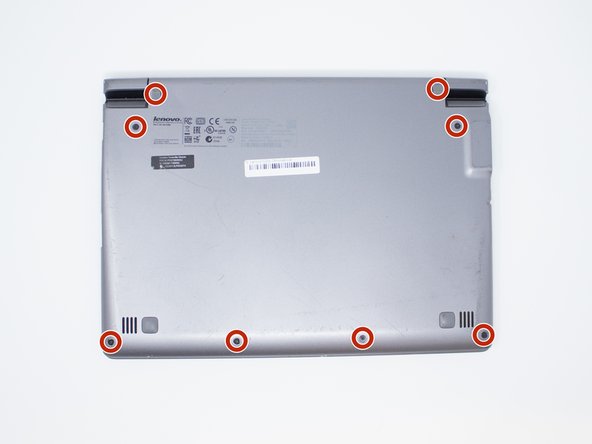
    • Remove the two rubber feet of the back of the Chromebook using a metal spudger.

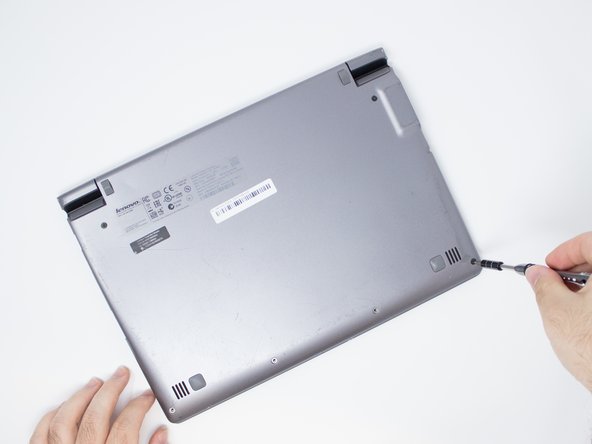
    • Remove six bottom 3.5 mm Phillips #0 screws and two top 5 mm Phillips #1 screws.

  5. Lenovo N20p Chromebook  I/O Board Replacement: step 5, image 1 of 1
    • Remove all nine 3.5 mm Phillips #00 screws using a screwdriver.

  6. Lenovo N20p Chromebook  I/O Board Replacement: step 6, image 1 of 2 Lenovo N20p Chromebook  I/O Board Replacement: step 6, image 2 of 2
    • Disconnect the battery cable from the motherboard.

    • Disconnect the touch-pad cable from the motherboard.

  7. Lenovo N20p Chromebook  I/O Board Replacement: step 7, image 1 of 2 Lenovo N20p Chromebook  I/O Board Replacement: step 7, image 2 of 2
    • Use the metal spudger along the seam between the keyboard and the bottom of the Chromebook to lift up and remove the palm rest assembly.

    • It is normal for it to click loudly when it is released. Corner tags will be harder to release than other tags and will make a loud sound.

  8. Lenovo N20p Chromebook  I/O Board Replacement: step 8, image 1 of 3 Lenovo N20p Chromebook  I/O Board Replacement: step 8, image 2 of 3 Lenovo N20p Chromebook  I/O Board Replacement: step 8, image 3 of 3
    • Disconnect the USB cable from the motherboard by pulling the blue tab out of the cable.

    • Remove all five 3.0 mm Phillips #00 screws which connect the battery and motherboard.

  9. Lenovo N20p Chromebook  I/O Board Replacement: step 9, image 1 of 2 Lenovo N20p Chromebook  I/O Board Replacement: step 9, image 2 of 2
    • Remove the battery.

    • It is helpful to lift and hold the battery as shown.

  10. Lenovo N20p Chromebook  I/O Board Replacement, I/O Board: step 10, image 1 of 1
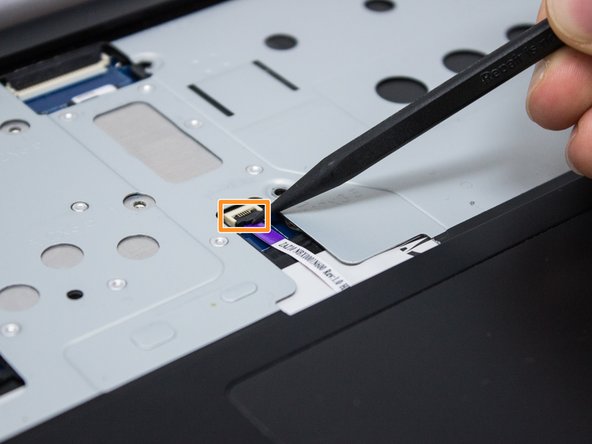
    • Once the battery has been removed, you need make sure that you have removed the I/O cable that is attached to the I/O Board.

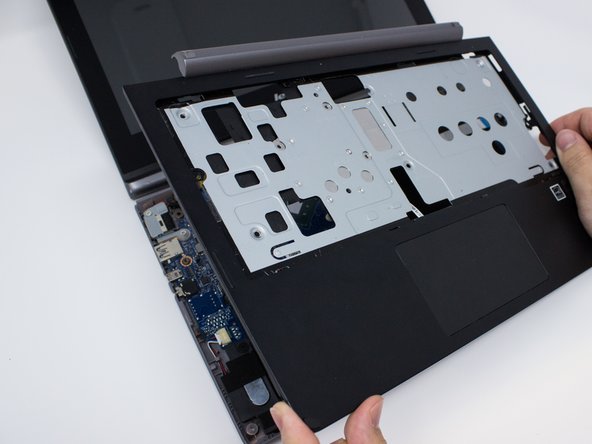
    • Using the flat end of the Spudger tool, carefully lift the I/O Board.

  11. Lenovo N20p Chromebook  I/O Board Replacement: step 11, image 1 of 1
    • You will now be able to replace the I/O Board.

Conclusion

To reassemble your device, follow these instructions in reverse order.

Shihao Cao

Member since: 07/12/18

497 Reputation

4 Guides authored

Team

UW Tacoma, Team S1-G2, Cardinal Summer 2018 Member of UW Tacoma, Team S1-G2, Cardinal Summer 2018

UWT-CARDINAL-SU18S1G2

3 Members

8 Guides authored

0 Comments

Add Comment

View Statistics:

Past 24 Hours: 2

Past 7 Days: 4

Past 30 Days: 6

All Time: 233