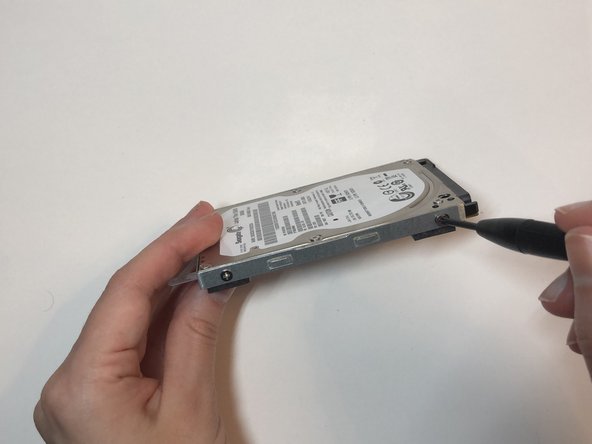
Lenovo Flex 2-14 Hard Drive Replacement

What you need

  1. Lenovo Flex 2-14 Hard Drive Replacement, Hard Drive: step 1, image 1 of 3 Lenovo Flex 2-14 Hard Drive Replacement, Hard Drive: step 1, image 2 of 3 Lenovo Flex 2-14 Hard Drive Replacement, Hard Drive: step 1, image 3 of 3
    • Make sure your laptop is off before you begin.

    • Flip the laptop over so the bottom is facing upwards.

    • Remove all nine 6mm Phillips #0 screws located along the edges and in the centre of the back panel.

  2. Lenovo Flex 2-14 Hard Drive Replacement: step 2, image 1 of 2 Lenovo Flex 2-14 Hard Drive Replacement: step 2, image 2 of 2
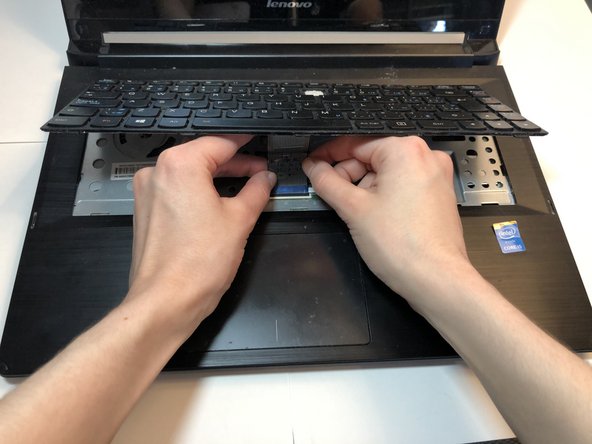
    • Using a prying tool, carefully lift up the keyboard.

  3. Lenovo Flex 2-14 Hard Drive Replacement: step 3, image 1 of 3 Lenovo Flex 2-14 Hard Drive Replacement: step 3, image 2 of 3 Lenovo Flex 2-14 Hard Drive Replacement: step 3, image 3 of 3
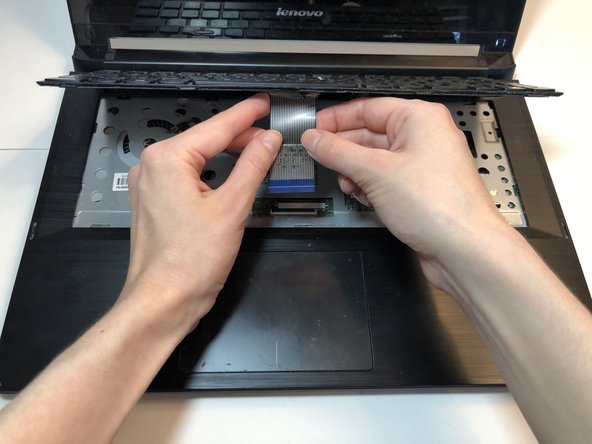
    • Take out the keyboard by disconnecting the cable.

  4. Lenovo Flex 2-14 Hard Drive Replacement: step 4, image 1 of 2 Lenovo Flex 2-14 Hard Drive Replacement: step 4, image 2 of 2
    • Remove all four 3.5 mm Phillips screws underneath the keyboard.

  5. Lenovo Flex 2-14 Hard Drive Replacement: step 5, image 1 of 3 Lenovo Flex 2-14 Hard Drive Replacement: step 5, image 2 of 3 Lenovo Flex 2-14 Hard Drive Replacement: step 5, image 3 of 3
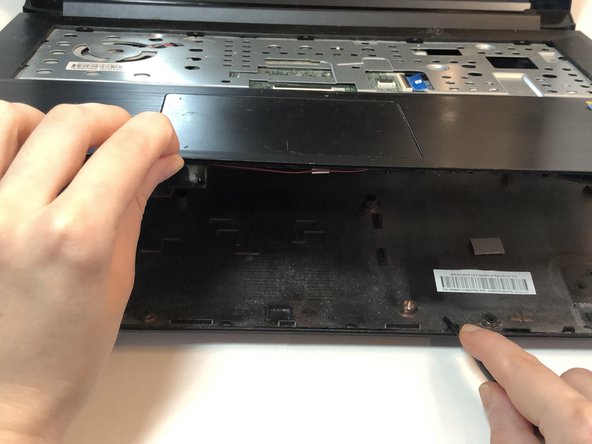
    • Separate the top and bottom panels of the laptop using a prying tool.

    • Slide the prying tool along the edges of the laptop until the bottom panel is completely separated.

    • Remove the back cover of the laptop once you have finished prying it open.

  6. Lenovo Flex 2-14 Hard Drive Replacement: step 6, image 1 of 1
    • Remove the two 4 mm Phillips screws holding the hard drive adapter in place.

  7. Lenovo Flex 2-14 Hard Drive Replacement: step 7, image 1 of 3 Lenovo Flex 2-14 Hard Drive Replacement: step 7, image 2 of 3 Lenovo Flex 2-14 Hard Drive Replacement: step 7, image 3 of 3
    • Take out the adapter containing the hard drive from the laptop.

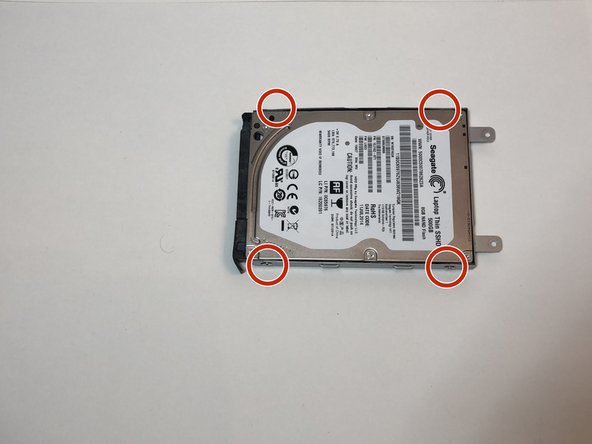
    • Remove all four 4mm Phillips screws from the adapter.

  8. Lenovo Flex 2-14 Hard Drive Replacement: step 8, image 1 of 3 Lenovo Flex 2-14 Hard Drive Replacement: step 8, image 2 of 3 Lenovo Flex 2-14 Hard Drive Replacement: step 8, image 3 of 3
    • Remove the hard drive from the adapter.

    • Insert the new hard drive into the adapter.

  9. Lenovo Flex 2-14 Hard Drive Replacement: step 9, image 1 of 3 Lenovo Flex 2-14 Hard Drive Replacement: step 9, image 2 of 3 Lenovo Flex 2-14 Hard Drive Replacement: step 9, image 3 of 3
    • Put all four 4mm Phillips screws back into the adapter with the hard drive, in order to hold it in place.

    • Put the adapter back in and reassemble the laptop.

    • Before reassembling, make sure the hard drive is securely in the case.

Conclusion

To reassemble your device, follow these instructions in reverse order.

2 other people completed this guide.

Eva Beilin

Member since: 05/10/20

223 Reputation

1 Guide authored

0 Comments

Add Comment

View Statistics:

Past 24 Hours: 1

Past 7 Days: 5

Past 30 Days: 47

All Time: 3,816