LeapFrog LeapPad Ultra XDi Home Button Replacement

What you need

  1. LeapFrog LeapPad Ultra XDi Home Button Replacement, Battery: step 1, image 1 of 2 LeapFrog LeapPad Ultra XDi Home Button Replacement, Battery: step 1, image 2 of 2
    • Orient the tablet so it’s laying screen down and the barcode sticker is facing up.

    • Remove the barcode sticker to expose the two screws.

  2. LeapFrog LeapPad Ultra XDi Home Button Replacement: step 2, image 1 of 2 LeapFrog LeapPad Ultra XDi Home Button Replacement: step 2, image 2 of 2
    • Remove the two 5.0mm Phillips #0 screws.

  3. LeapFrog LeapPad Ultra XDi Home Button Replacement: step 3, image 1 of 3 LeapFrog LeapPad Ultra XDi Home Button Replacement: step 3, image 2 of 3 LeapFrog LeapPad Ultra XDi Home Button Replacement: step 3, image 3 of 3
    • Using the iFixit opening tool, pry off the purple and white child-proof casing to expose the twelve screws.

  4. LeapFrog LeapPad Ultra XDi Home Button Replacement: step 4, image 1 of 2 LeapFrog LeapPad Ultra XDi Home Button Replacement: step 4, image 2 of 2
    • Remove all twelve 7mm Phillips #1 screws located along the edges of the device.

  5. LeapFrog LeapPad Ultra XDi Home Button Replacement: step 5, image 1 of 2 LeapFrog LeapPad Ultra XDi Home Button Replacement: step 5, image 2 of 2
    • Remove the purple case, exposing the motherboard and battery.

  6. LeapFrog LeapPad Ultra XDi Home Button Replacement: step 6, image 1 of 3 LeapFrog LeapPad Ultra XDi Home Button Replacement: step 6, image 2 of 3 LeapFrog LeapPad Ultra XDi Home Button Replacement: step 6, image 3 of 3
    • Use the Spudger to remove the glued down battery.

    • Using your fingers, grab the battery wires and carefully unplug them from the motherboard.

    • Replace the battery with a new one.

  7. LeapFrog LeapPad Ultra XDi Home Button Replacement, Home Button: step 7, image 1 of 3 LeapFrog LeapPad Ultra XDi Home Button Replacement, Home Button: step 7, image 2 of 3 LeapFrog LeapPad Ultra XDi Home Button Replacement, Home Button: step 7, image 3 of 3
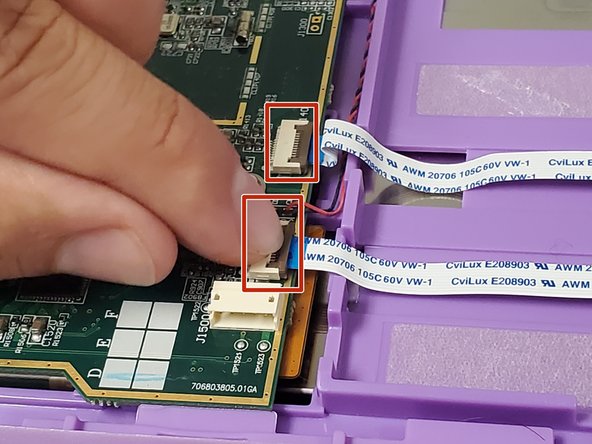
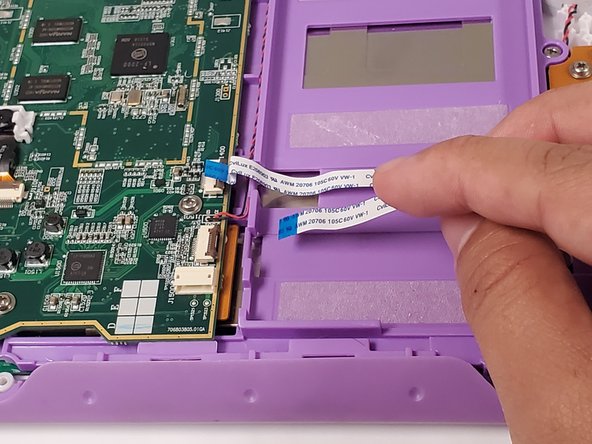
    • Locate the three ribbon cables on top of the motherboard.

    • Flip up the locking clip on the ribbon cable connector to release the cable.

    • Disconnect the cables from their connectors.

  8. LeapFrog LeapPad Ultra XDi Home Button Replacement: step 8, image 1 of 3 LeapFrog LeapPad Ultra XDi Home Button Replacement: step 8, image 2 of 3 LeapFrog LeapPad Ultra XDi Home Button Replacement: step 8, image 3 of 3
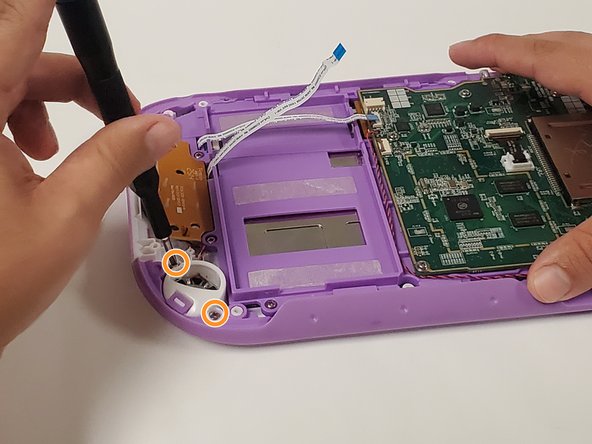
    • Unscrew the four 5mm Phillips #1 screws.

    • Unscrew the two 5mm Phillips #1 screws.

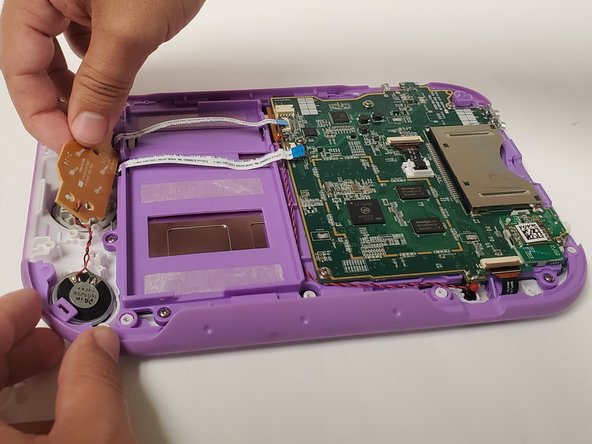
    • Lift the home button circuit board up. Replace the home button circuit board.

    • The entire home button circuit board must be replaced.

    • Do not dispose of rubber padding on home button circuit board.

Conclusion

To reassemble your device, follow these instructions in reverse order.

0 Comments

Add Comment

View Statistics:

Past 24 Hours: 0

Past 7 Days: 1

Past 30 Days: 2

All Time: 253