Free Shipping on Domestic Orders $75+

LG VX8300 Number Pad Removal for Replacement or Cleaning

What you need

  1. LG VX8300 Number Pad Removal for Replacement or Cleaning, Disassembling LG VX8300 Body: step 1, image 1 of 3 LG VX8300 Number Pad Removal for Replacement or Cleaning, Disassembling LG VX8300 Body: step 1, image 2 of 3 LG VX8300 Number Pad Removal for Replacement or Cleaning, Disassembling LG VX8300 Body: step 1, image 3 of 3
    • Power off the device by holding down the red button labeled PWR.

    • Be sure that the phone is powered off before touching the battery to avoid danger.

    • Remove the battery pack cover by pushing down on the solid lines at the top end of the cover. Slide the cover down while applying the pushing force at the top to remove the cover completely.

    Ask FixBot

    Add Comment

  2. LG VX8300 Number Pad Removal for Replacement or Cleaning: step 2, image 1 of 2 LG VX8300 Number Pad Removal for Replacement or Cleaning: step 2, image 2 of 2
    • Place your finger into the semicircle gap on top of the battery.

    • Apply force downward and out, so the battery pops out of the phone.

    Ask FixBot

    Add Comment

  3. LG VX8300 Number Pad Removal for Replacement or Cleaning: step 3, image 1 of 3 LG VX8300 Number Pad Removal for Replacement or Cleaning: step 3, image 2 of 3 LG VX8300 Number Pad Removal for Replacement or Cleaning: step 3, image 3 of 3
    Tool used on this step:
    Tweezers
    $4.99
    Buy
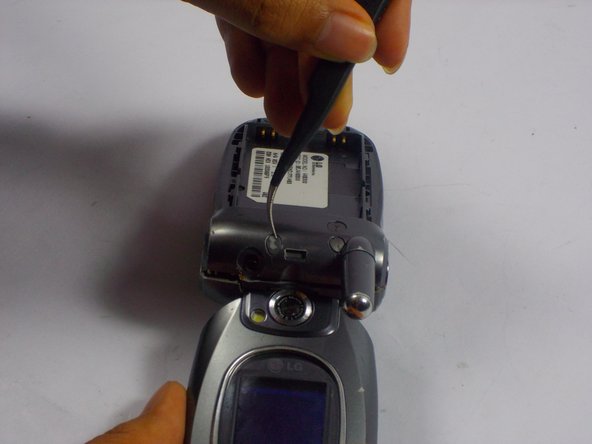
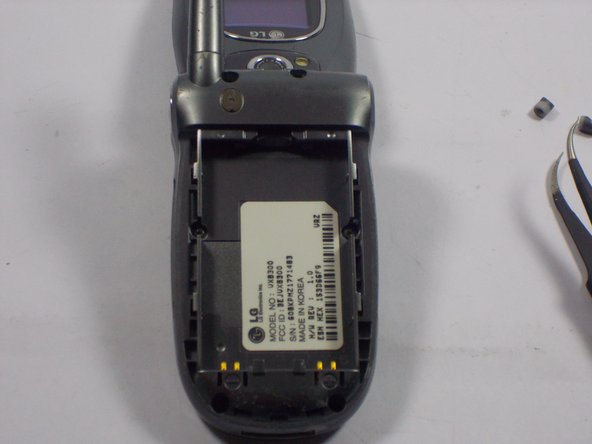
    • Locate the two rubber pads covering the screws at the top of the phone near the hinge.

    • Use tweezers to lift and remove the rubber pads.

    Ask FixBot

    Add Comment

  4. LG VX8300 Number Pad Removal for Replacement or Cleaning: step 4, image 1 of 2 LG VX8300 Number Pad Removal for Replacement or Cleaning: step 4, image 2 of 2
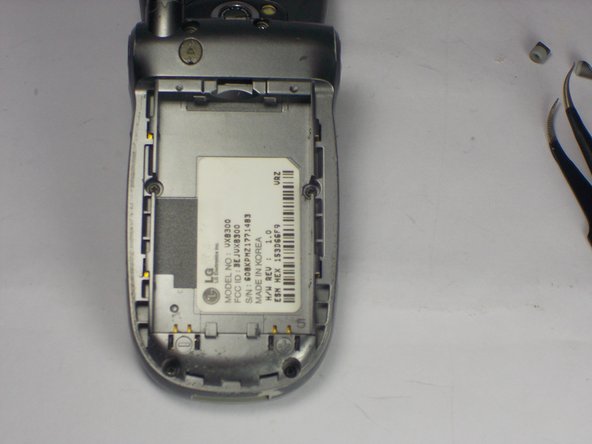
    • Use a Phillips #00 screwdriver to remove all four 3mm screws from the back of the phone.

    Ask FixBot

    Add Comment

  5. LG VX8300 Number Pad Removal for Replacement or Cleaning: step 5, image 1 of 2 LG VX8300 Number Pad Removal for Replacement or Cleaning: step 5, image 2 of 2
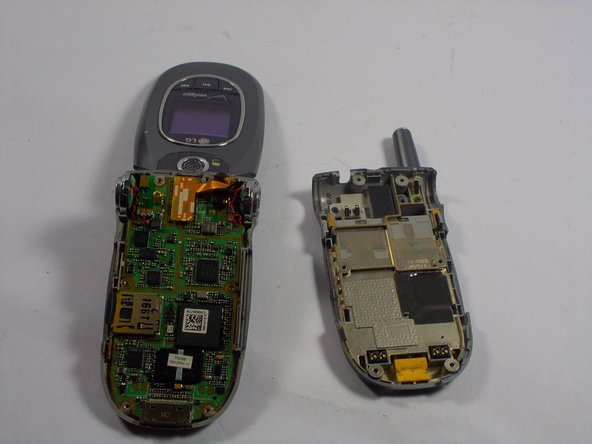
    • Use your fingers to gently separate the front plate from the phone. You may need to slide a plastic opening tool along the crevice between the faces to separate it more easily.

    • Remove the casing after it has been detached. The logic board is now fully accessible.

    • Once the body case is removed, the volume and camera buttons move freely. Ensure all loose pieces remain accounted for.

    Ask FixBot

    Add Comment

  6. LG VX8300 Number Pad Removal for Replacement or Cleaning, Number Pad: step 6, image 1 of 1
    • Holding the chassis firmly in one hand, then lift up on the charging port with the edge of an opening tool to separate the logic board from the front body case.

    • Use the spudger tool to gently lift the board out of the case. The board is secured by six holes around its perimeter and will become free when pried from the supports.

    Ask FixBot

    Add Comment

  7. LG VX8300 Number Pad Removal for Replacement or Cleaning: step 7, image 1 of 3 LG VX8300 Number Pad Removal for Replacement or Cleaning: step 7, image 2 of 3 LG VX8300 Number Pad Removal for Replacement or Cleaning: step 7, image 3 of 3
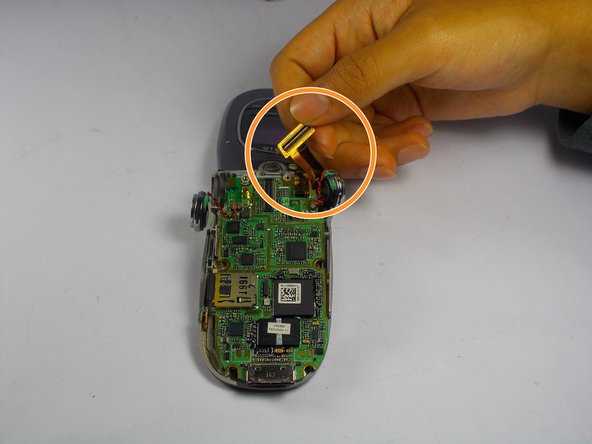
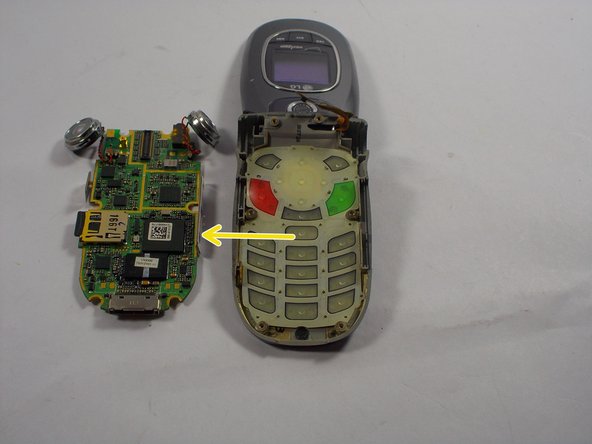
    • Without putting tension on the wiring, remove the speakers one at a time.

    • Remove the ribbon cable by lifting it up with your finger. Set it aside.

    • Remove the logic board completely from the case and set it aside. You can now remove the button pad with your fingers or the spudger tool.

    Ask FixBot

    Add Comment

  8. LG VX8300 Number Pad Removal for Replacement or Cleaning: step 8, image 1 of 2 LG VX8300 Number Pad Removal for Replacement or Cleaning: step 8, image 2 of 2
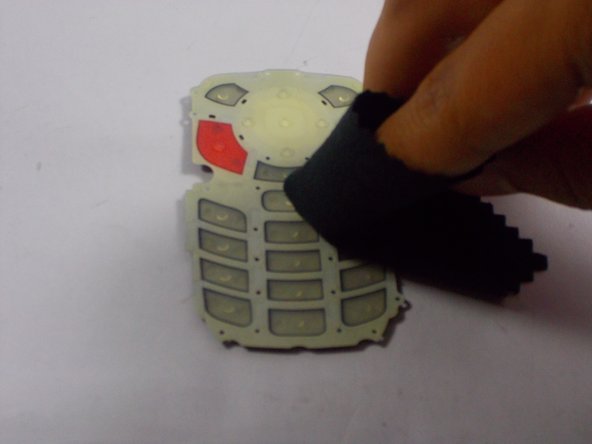
    • Cleaning: You may use a brush to remove debris between individual buttons. Use a soft cloth to clean the underside of the pad.

    • Replacing: Remove the old pad and insert the new pad into the case.

    Ask FixBot

    Add Comment

Conclusion

Follow these instructions in reverse order to reassemble the device.

Cancel: I did not complete this guide.

nvalm

Member since: 03/23/15

448 Reputation

4 Guides authored

Team

0 Guide Comments

Add Comment

View Statistics:

Past 24 Hours: 1

Past 7 Days: 5

Past 30 Days: 26

All Time: 597