
LG Optimus L9 P769 Display Screen Replacement

What you need

  1. LG Optimus L9 P769 Display Screen Replacement, Motherboard: step 1, image 1 of 3 LG Optimus L9 P769 Display Screen Replacement, Motherboard: step 1, image 2 of 3 LG Optimus L9 P769 Display Screen Replacement, Motherboard: step 1, image 3 of 3
    • Start by placing the device face down and remove the back cove.

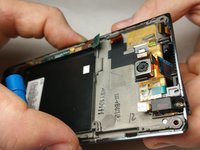
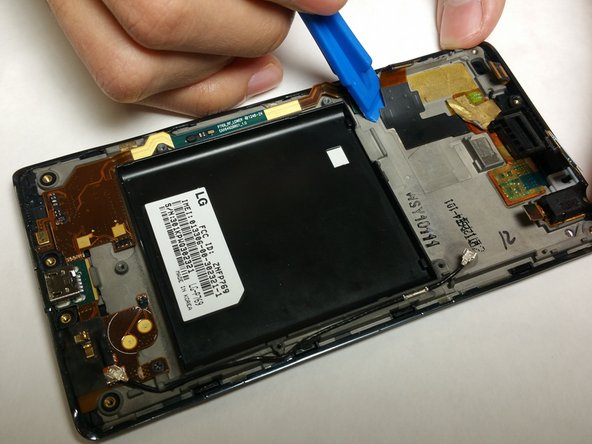
    • Remove the battery from the phone by lifting it using your finger or the prying tool

  2. LG Optimus L9 P769 Display Screen Replacement: step 2, image 1 of 3 LG Optimus L9 P769 Display Screen Replacement: step 2, image 2 of 3 LG Optimus L9 P769 Display Screen Replacement: step 2, image 3 of 3
    • Remove all 10 of the 4.5mm Phillips screws that holds the back frame to the case of the phone

    • Using a small plastic prying tool, carefully remove the back frame by prying on the sides of the device.

    • Do be careful when prying back frame and removing it as too much force may result in damaging the frame.

  3. LG Optimus L9 P769 Display Screen Replacement: step 3, image 1 of 3 LG Optimus L9 P769 Display Screen Replacement: step 3, image 2 of 3 LG Optimus L9 P769 Display Screen Replacement: step 3, image 3 of 3
    • Using tweezers, pinch the sides of the antenna node and pull straight up.

    • Using a small prying tool, carefully remove the ribbon cables attached to the motherboard.

  4. LG Optimus L9 P769 Display Screen Replacement: step 4, image 1 of 2 LG Optimus L9 P769 Display Screen Replacement: step 4, image 2 of 2
    • Using a spudger or small prying tool, lift up the motherboard from the chassis of the device.

  5. LG Optimus L9 P769 Display Screen Replacement, Display Screen: step 5, image 1 of 1
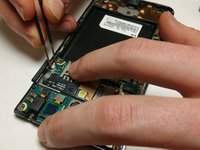
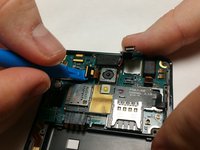
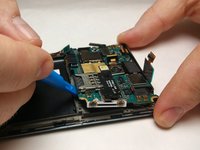
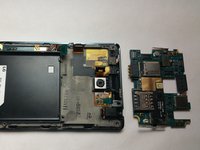
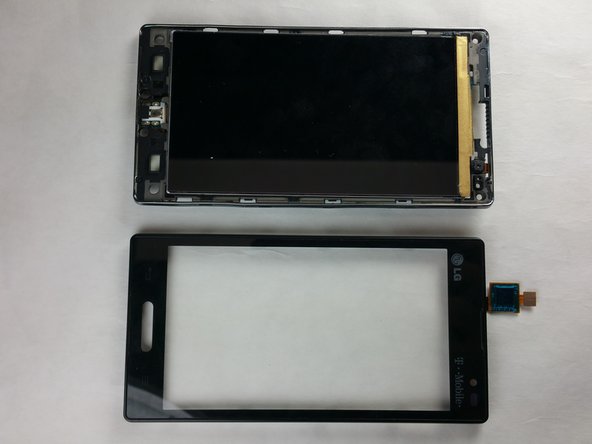
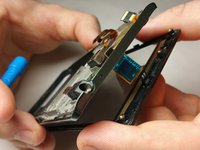
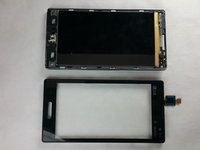
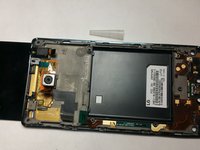
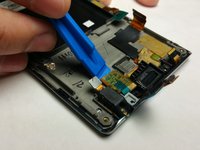
    • Using a spudger or small prying tool, pry off the latches that connects the digitizer to the chassis carefully.

    • Do not force open as the latches attaching the digitizer to the chassis as they are easily damaged.

  6. LG Optimus L9 P769 Display Screen Replacement: step 6, image 1 of 1
    • Once the digitizer has been removed, turn the phone face down and remove the plastic housing for the front speaker. It should come off easily.

  7. LG Optimus L9 P769 Display Screen Replacement: step 7, image 1 of 3 LG Optimus L9 P769 Display Screen Replacement: step 7, image 2 of 3 LG Optimus L9 P769 Display Screen Replacement: step 7, image 3 of 3
    • Slide off the connector through the hole of the chassis slowly to avoid damaging it.

  8. LG Optimus L9 P769 Display Screen Replacement: step 8, image 1 of 3 LG Optimus L9 P769 Display Screen Replacement: step 8, image 2 of 3 LG Optimus L9 P769 Display Screen Replacement: step 8, image 3 of 3
    • Remove the primary or rear camera using a small opening tool to remove the adhesive and lift the camera up using a pair of tweezers.

    • Using the same small opening tool, remove the connector that is taped to the chassis of the phone.

    • Make sure that every bit of the connector is no longer sticking to the chassis of the phone.

    • Similar to the digitizer, the connector should be able to slide through the hole of the chassis, completely detaching the LCD screen from the phone.

Conclusion

To reassemble your device, follow these instructions in reverse order.

One other person completed this guide.

Ammar Rizal

Member since: 03/01/17

225 Reputation

2 Guides authored

Team

IUPUI, Team S2-G1, Harley Spring 2017 Member of IUPUI, Team S2-G1, Harley Spring 2017

IUPUI-HARLEY-S17S2G1

4 Members

6 Guides authored

0 Comments

Add Comment

View Statistics:

Past 24 Hours: 0

Past 7 Days: 0

Past 30 Days: 1

All Time: 537