Introduction
If your phone's camera breaks or you would like to update it, this guide will show you how to install your phone's camera.
What you need
-
-
Place a thumb below the camera, apply a little pressure, and slide the cover toward the bottom of the phone.
-
-
-
Place the plastic opening tool in the small slot below and to the left of the battery.
-
Pry the battery upward to remove it.
-
-
-
-
Using the #00 Philips screw driver, unscrew the four 4.5mm screws located around the battery compartment.
-
-
-
Wedge the plastic opening tool between the screen and the body of the device, using care to avoid damaging internal components.
-
Gently move the tool around the perimeter of the screen to separate it from the body.
-
-
-
Flip the device over so the battery compartment faces up.
-
Press the scroll wheel, located in the upper-left corner, into the device to avoid damage.
-
Gently insert the plastic opening tool into the seam between the frame and front cover to separate the back panel from the device.
-
-
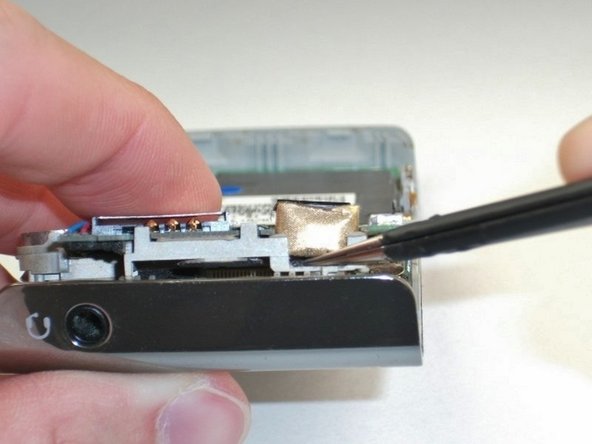
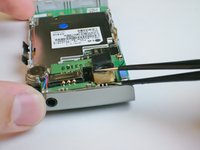
Tool used on this step:Tweezers$4.99
-
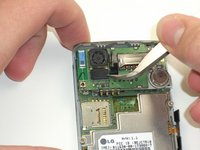
Locate the camera near the upper-left corner and use the metal tweezers to carefully detach the black tab.
-
-
-
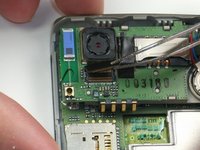
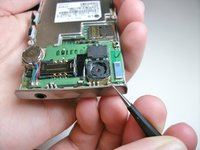
Carefully slide the metal tweezers underneath the camera in order to lift it out.
-


To reassemble your device, follow these instructions in reverse order.
Cancel: I did not complete this guide.
One other person completed this guide.
Team

Cal Poly, Team 2-18, Maness Spring 2013 Member of Cal Poly, Team 2-18, Maness Spring 2013
CPSU-MANESS-S13S2G18
4 Members
23 Guides authored