Shop the Holiday Gift Guide
Free Shipping on Domestic Orders $75+

LG G4 Screen Assembly Replacement

Views: 2.4K

View statistics:

Past 24 Hours:
7
Past 7 Days:
28
Past 30 Days:
78
All Time:
2,400
Comments: 7

7 comments on steps.

Completed: 4

4 people have marked this guide "completed." Will you be next?

Favorites: 0

No one has favorited (and subscribed to) this guide. Will you be the first?

Time Required: 30 minutes
Difficulty: Moderate
Featured Guide

This guide has been found to be exceptionally cool by the iFixit staff.

LG G4 Screen Assembly Replacement

Introduction

Go to step 1 ↓

Learn how to replace the full screen assembly, including the LCD, digitizer, and display frame.

This guide does not cover removing the fused glass display and digitizer from the display frame, so if your part is missing the supporting frame, follow the more complicated LCD Digitizer replacement guide instead.

What you need

Parts

Tools

    1. LG G4 Screen Assembly Replacement, Back Cover: step 1, image 1 of 1
      • Make sure the phone is powered off.

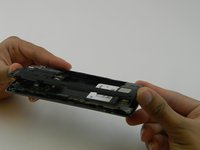
      • Remove the rear cover by placing the plastic opening tool in the groove on the bottom left side of the LG G4 and gently prying up.

      Ask FixBot

      Add Comment

    2. LG G4 Screen Assembly Replacement: step 2, image 1 of 2 LG G4 Screen Assembly Replacement: step 2, image 2 of 2
      • Place the plastic opening tool at the bottom edge of the battery and lift up. Carefully remove battery with your hands.

      Ask FixBot

      Add Comment

    3. LG G4 Screen Assembly Replacement: step 3, image 1 of 3 LG G4 Screen Assembly Replacement: step 3, image 2 of 3 LG G4 Screen Assembly Replacement: step 3, image 3 of 3
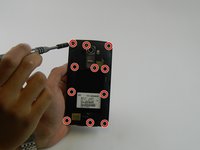
      • Remove the eleven 3.9 mm Phillips #00 screws found at the back of the phone.

      Ask FixBot

      Add Comment

    4. LG G4 Screen Assembly Replacement: step 4, image 1 of 3 LG G4 Screen Assembly Replacement: step 4, image 2 of 3 LG G4 Screen Assembly Replacement: step 4, image 3 of 3
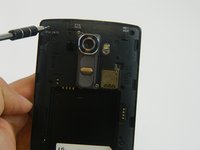
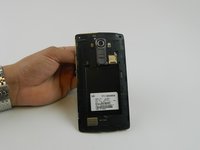
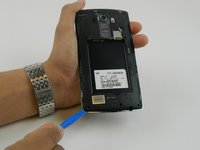
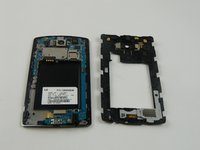
      • Once all the screws have been removed, place the plastic opening tool in the lower left corner and firmly lift the cover up.

      • Detach the cover with your fingers

      Ask FixBot

      Add Comment

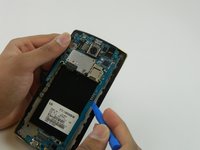
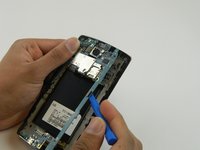
    1. LG G4 Screen Assembly Replacement, Motherboard: step 5, image 1 of 2 LG G4 Screen Assembly Replacement, Motherboard: step 5, image 2 of 2
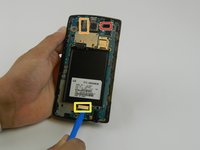
      • Remove the following four press-fit connectors with the flat edge of a plastic spudger or opening tool:

      • Front-facing camera connector.

      • Rear-facing camera connector.

      • Digitizer connector.

      • The rear-facing camera may be held down to the frame with two sided tape. Try to move the camera with the spudger prior to lifting the motherboard If it does not budge, use the same tool to pry it from the frame to avoid damaging the connector cable in the next step.

      Ask FixBot

      Add Comment

    2. LG G4 Screen Assembly Replacement: step 6, image 1 of 2 LG G4 Screen Assembly Replacement: step 6, image 2 of 2
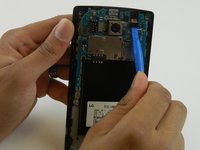
      • Remove the motherboard by lifting it up using the plastic opening tool and your fingers .

      Ask FixBot

      Add Comment

    1. LG G4 Screen Assembly Replacement, Screen Assembly: step 7, image 1 of 1
      • Use a heat gun or iOpener over the auxiliary port to soften the adhesive that secures it to the plastic housing.

      Ask FixBot

      Add Comment

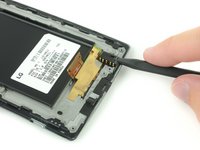
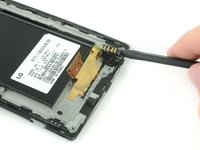
    2. LG G4 Screen Assembly Replacement: step 8, image 1 of 2 LG G4 Screen Assembly Replacement: step 8, image 2 of 2
      Tool used on this step:
      Spudger
      $2.99
      Buy
      • Insert a nylon spudger into the auxiliary port and gently pry upward to free the port.

      Ask FixBot

      Add Comment

    3. LG G4 Screen Assembly Replacement, Other components: step 9, image 1 of 1
      • You may also need to remove the vibration motor (the small circular component with two gold contacts), ear-speaker, and two rubber covers on either side of the ear-speaker to transfer these over to the new display assembly.

      • Use a spudger to carefully remove these components and then place them in the new display assembly..

      Ask FixBot

      Add Comment

Conclusion

To reassemble your device, follow these instructions in reverse order.

Cancel: I did not complete this guide.

4 other people completed this guide.

Author

with

Sam Goldheart

Member since: 10/18/12

478,949 Reputation

538 Guides authored

Team

iFixit Member of iFixit

Staff

119 Members

72,954 Guides authored

0 Guide Comments

Add Comment

View Statistics:

Past 24 Hours: 7

Past 7 Days: 28

Past 30 Days: 78

All Time: 2,400