
LG G Pad X 8.3 Rear-facing camera Replacement

What you need

  1. LG G Pad X 8.3 Rear-facing camera Replacement, Battery: step 1, image 1 of 1
    • Remove the cover of the SD card. Find it on the right side of the back of the tablet.

    • Press the SD card in to make it pop out.

  2. LG G Pad X 8.3 Rear-facing camera Replacement: step 2, image 1 of 1
    • Slide the stylus out from the bottom left corner of the back panel.

  3. LG G Pad X 8.3 Rear-facing camera Replacement: step 3, image 1 of 1
    • Start at a corner and pry the screen up with a plastic opening tool.

    • You can also use a plastic spudger for this task, but do not use metal tools. They can be dangerous to you and the device.

    • Slide the tool in the seam at the edge of the screen.

    • Wedge additional plastic opening tools in the seam to help lift the screen.

    • Slide both wedged plastic opening tools towards the bottom to pop the screen loose.

    • If your screen is cracked, work slowly to avoid flinging glass shards when prying.

  4. LG G Pad X 8.3 Rear-facing camera Replacement: step 4, image 1 of 3 LG G Pad X 8.3 Rear-facing camera Replacement: step 4, image 2 of 3 LG G Pad X 8.3 Rear-facing camera Replacement: step 4, image 3 of 3
    • With a Phillips #000 screwdriver, unscrew the six 4.0 mm screws that hold down the battery.

    • With the Phillips #000 screwdriver, unscrew the two 4.0 mm screws that hold down the battery ribbon connector.

    • Use a magnetic mat to keep track of these tiny screws for later reassembly.

  5. LG G Pad X 8.3 Rear-facing camera Replacement: step 5, image 1 of 1
    • Lift the battery ribbon connector with your finger.

  6. LG G Pad X 8.3 Rear-facing camera Replacement: step 6, image 1 of 1
    • Lift the battery with your fingers and remove it from the device.

  7. LG G Pad X 8.3 Rear-facing camera Replacement, Speaker: step 7, image 1 of 1
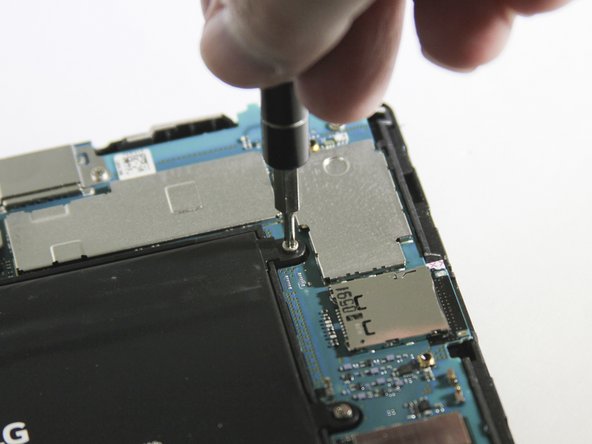
    • With a Phillips #000 screwdriver, unscrew the one 4.0 mm screw that is holding down the speaker.

    • Use the magnetic mat to keep track of the tiny screw(s).

  8. LG G Pad X 8.3 Rear-facing camera Replacement: step 8, image 1 of 1
    • Lift and remove the speaker with your finger.

  9. LG G Pad X 8.3 Rear-facing camera Replacement, Motherboard: step 9, image 1 of 2 LG G Pad X 8.3 Rear-facing camera Replacement, Motherboard: step 9, image 2 of 2
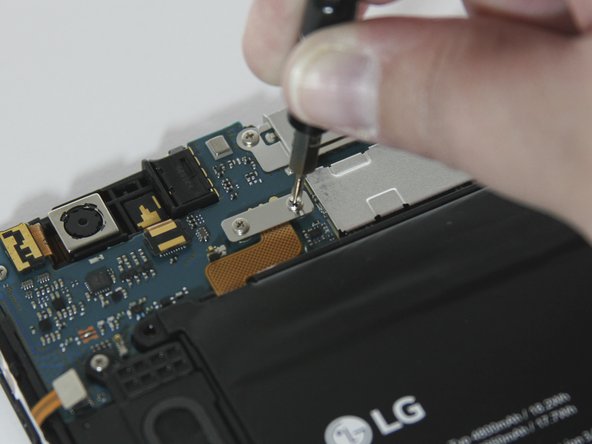
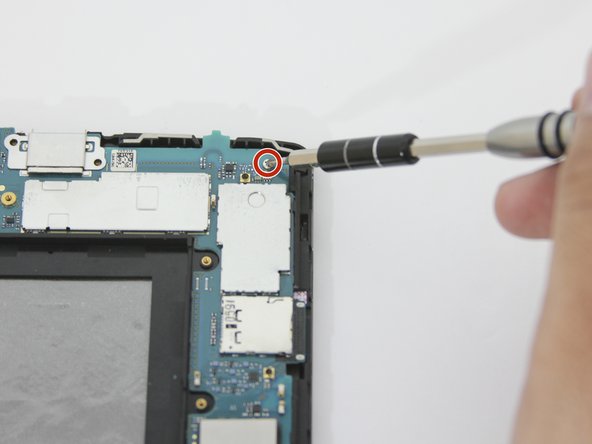
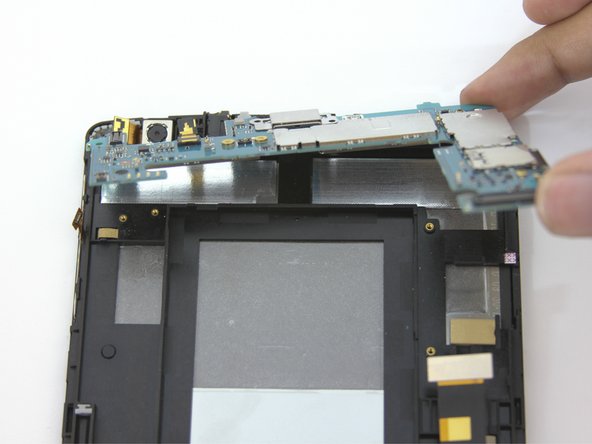
    • With the Phillips #000 screwdriver, unscrew the four 4.0 mm screw that are holding down the motherboard.

  10. LG G Pad X 8.3 Rear-facing camera Replacement: step 10, image 1 of 2 LG G Pad X 8.3 Rear-facing camera Replacement: step 10, image 2 of 2
    • Use a plastic opening tool to lift up the ribbon connector at the bottom of the motherboard.

    • Only lift up the end of the ribbon connector that is attached to the motherboard. The end at the base of the tablet should stay attached.

  11. LG G Pad X 8.3 Rear-facing camera Replacement: step 11, image 1 of 3 LG G Pad X 8.3 Rear-facing camera Replacement: step 11, image 2 of 3 LG G Pad X 8.3 Rear-facing camera Replacement: step 11, image 3 of 3
    • Lift and release the remaining ribbon connectors in the upper left corner of the motherboard with a plastic opening tool.

    • Avoid bending the tips of the ribbon connectors to prevent damage.

  12. LG G Pad X 8.3 Rear-facing camera Replacement: step 12, image 1 of 2 LG G Pad X 8.3 Rear-facing camera Replacement: step 12, image 2 of 2
    • With your fingers, lift up the motherboard from the upper right corner.

    • Carefully remove the fragile motherboard from the device.

  13. LG G Pad X 8.3 Rear-facing camera Replacement, Rear-facing camera: step 13, image 1 of 1
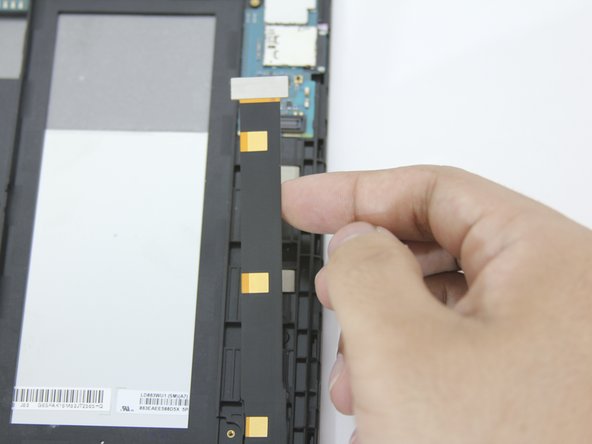
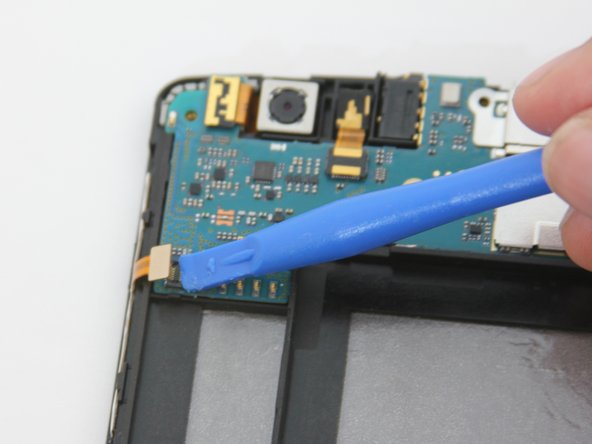
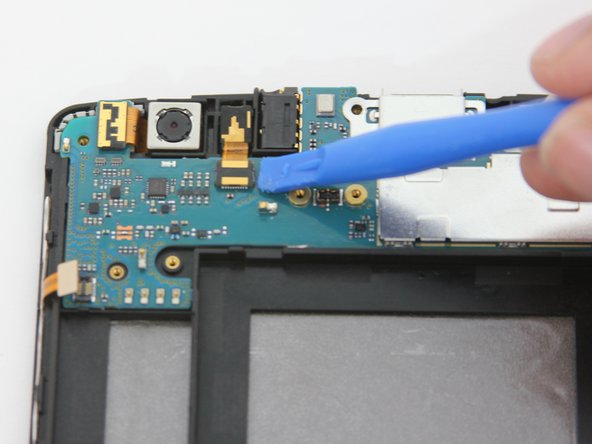
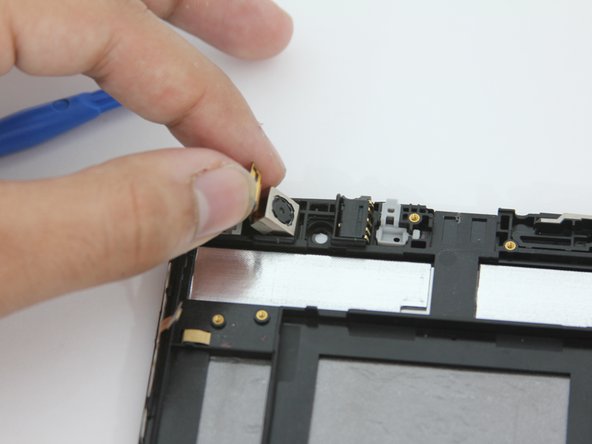
    • Insert the plastic opening tool under the ribbon connector that is holding the rear-facing camera down and lift it up.

  14. LG G Pad X 8.3 Rear-facing camera Replacement: step 14, image 1 of 2 LG G Pad X 8.3 Rear-facing camera Replacement: step 14, image 2 of 2
    • After prying ribbon connector, the rear-facing camera should be ready for removal.

    • Gently lift the rear-facing camera with your fingers and remove.

Conclusion

To reassemble your device, follow these instructions in reverse order.

0 Comments

Add Comment

View Statistics:

Past 24 Hours: 1

Past 7 Days: 1

Past 30 Days: 2

All Time: 94