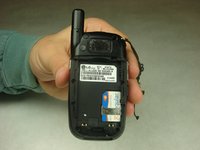
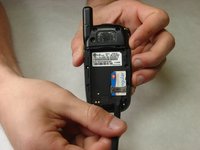
LG CU400 Bottom Half Assembly Replacement

Prerequisite Only
This guide is only intended to be used as a prerequisite for other guides. It's incomplete by itself.

What you need

  1. LG CU400 Bottom Half Assembly  Replacement, Battery: step 1, image 1 of 2 LG CU400 Bottom Half Assembly  Replacement, Battery: step 1, image 2 of 2
    • Push the button labeled 'PUSH' on the rear cover.

  2. LG CU400 Bottom Half Assembly  Replacement: step 2, image 1 of 3 LG CU400 Bottom Half Assembly  Replacement: step 2, image 2 of 3 LG CU400 Bottom Half Assembly  Replacement: step 2, image 3 of 3
    • Slide the rear cover towards you.

  3. LG CU400 Bottom Half Assembly  Replacement: step 3, image 1 of 2 LG CU400 Bottom Half Assembly  Replacement: step 3, image 2 of 2
    • To remove the battery, grasp the top front edge of the battery and pull the battery away from the phone.

    • When installing the new battery, have the metal contacts of the phone match up with the metal contacts of the battery.

  4. LG CU400 Bottom Half Assembly  Replacement, Bottom Half Assembly: step 4, image 1 of 2 LG CU400 Bottom Half Assembly  Replacement, Bottom Half Assembly: step 4, image 2 of 2
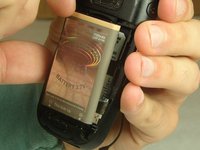
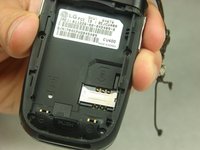
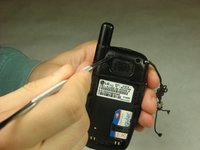
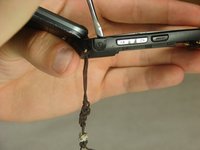
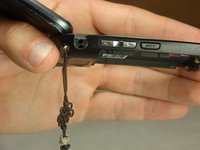
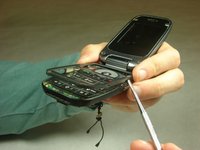
    • Remove the sim card by sliding the card out from under the retainer using either your fingers or a spudger.

  5. LG CU400 Bottom Half Assembly  Replacement: step 5, image 1 of 2 LG CU400 Bottom Half Assembly  Replacement: step 5, image 2 of 2
    • Remove the rubber covers in the highlighted locations using a metal spudger.

  6. LG CU400 Bottom Half Assembly  Replacement: step 6, image 1 of 2 LG CU400 Bottom Half Assembly  Replacement: step 6, image 2 of 2
    • Remove the six 3mm #000 flat Phillips head screws from the back of the phone using a Phillips #000 Screwdriver.

  7. LG CU400 Bottom Half Assembly  Replacement: step 7, image 1 of 2 LG CU400 Bottom Half Assembly  Replacement: step 7, image 2 of 2
    • Remove the headphone jack cover with your finger or metal spudger.

  8. LG CU400 Bottom Half Assembly  Replacement: step 8, image 1 of 3 LG CU400 Bottom Half Assembly  Replacement: step 8, image 2 of 3 LG CU400 Bottom Half Assembly  Replacement: step 8, image 3 of 3
    • Insert the metal spudger between the keypad assembly and back cover assembly and pry the two assemblies apart.

    • Pry gently as to not break the plastic clips that hold the two assemblies together.

    • Work your way around the perimeter of the phone with the metal spudger to separate the two assemblies.

  9. LG CU400 Bottom Half Assembly  Replacement: step 9, image 1 of 2 LG CU400 Bottom Half Assembly  Replacement: step 9, image 2 of 2
    • Once you have worked your way around the perimeter of the phone, you will have access to the components in the bottom half assembly.

Conclusion

To reassemble your device, follow these instructions in reverse order.

Dan Hughes

Member since: 10/03/16

1 Reputation

1 Guide authored

Team

IUPUI, Team 1-3, Harley Fall 2016 Member of IUPUI, Team 1-3, Harley Fall 2016

IUPUI-HARLEY-F16S1G3

4 Members

14 Guides authored

0 Comments

Add Comment

View Statistics:

Past 24 Hours: 0

Past 7 Days: 0

Past 30 Days: 0

All Time: 72