
Krups F203 Coffee Grinder Motor Replacement

Ian Hancock and 3 other contributors
Last updated on May 30, 2016
Views: 31K
View statistics:
- Past 24 Hours:
- 8
- Past 7 Days:
- 48
- Past 30 Days:
- 195
- All Time:
- 30,926
Comments: 24
16 comments on steps, 8 guide comments.
Go to guide commentsCompleted: 8 9
8 people have marked this guide "completed." Will you be next?
9 people have marked this guide "completed." Including you — great job!
Favorites: 1 2
1 person has favorited (and subscribed to) this guide. Will you be next?
2 people have favorited (and subscribed to) this guide — including you!
Introduction
Go to step 1 ↓If the motor in your Krups F203 coffee grinder is faulty, you will need to replace it. This guide will explain how to access the motor in order to replace it.
What you need
Tools
-
Spudger4.9
-


-
-
-
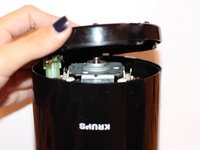
In each of the four rectangular slots on the bottom of the device, there is an E-shaped clip.
 Ask FixBot
-
-
-
Wedge the spudger between the flat side of the E-clip and the outside wall of the slot. Then, loosen up the clip by prying it inward with the spudger.
-
-
-
Work your way around the four clips, loosening each a little at a time. Eventually, all four clips will be loose enough to remove the base plate.
-
-
-
-
-
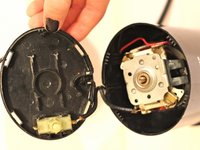
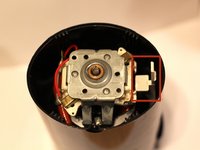
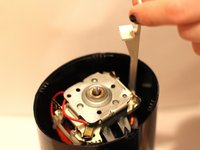
The trigger button is held in with light tension clips. Gently pry them back to release.
-
-
-
Desolder the contact points between the trigger button and the red wire and also where the plug attaches to the trigger button
-
-
-
-
-
-
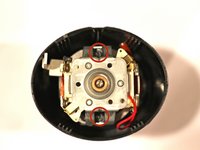
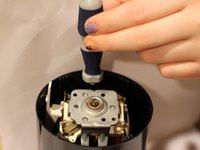
Using a Phillips screwdriver, remove the two screws holding the motor in place.
-







To reassemble your device, follow these instructions in reverse order.
Cancel: I did not complete this guide.
8 other people completed this guide.

Team

Baylor, Team 4-2, Williams Fall 2014 Member of Baylor, Team 4-2, Williams Fall 2014
BU-WILLIAMS-F14S4G2
3 Members
48 Guides authored
8 Guide Comments
thank you so much
The first photo of the bottom plate is too dark to show details. I have type 203 B Made in France and the clips didn’t budge without first breaking/stretching the thin outer walls of the base plate. No need to remove the wires. With mine, you have to turn the bottom shaft of the motor with a screwdriver (counter clockwise as usual) while holding the blade stationary which unscrews the blade from the motor enabling you to remove the motor after the two phillips screws are removed.
Hi Ian!
Nice explanation!
Can you provide a close up of the spudger that you used for opening the bottom plate?
I want to use the correct one, so I don ´t break that aged plastic cover.
Bengt
Where does one get the replacement motor?
