
Komplete Audio 2 USB Port Replacement

What you need

  1. Komplete Audio 2 USB Port Replacement, Bottom cover screws: step 1, image 1 of 3 Komplete Audio 2 USB Port Replacement, Bottom cover screws: step 1, image 2 of 3 Komplete Audio 2 USB Port Replacement, Bottom cover screws: step 1, image 3 of 3
    • The bottom cover is secured by six screws. We will remove them in this step.

    • The center screw is concealed behind the product label. You may need to pierce or peel back the label to access it.

    • Place the device upside down.

    • Use a Phillips #1 screwdriver to remove the six screws from the bottom cover.

  2. Komplete Audio 2 USB Port Replacement, Removing the bottom cover: step 2, image 1 of 1
    • In addition to the screws, the bottom cover is secured by four plastic clips (two on the front and two on the sides).

    • Gently pry the plastic clips open to release the bottom cover.

    • The cover should open without much force once all screws are removed. If you encounter resistance, double-check that the middle screw has been removed. Forcing the cover open will break the plastic clips!

  3. Komplete Audio 2 USB Port Replacement, Unlocking the ribbon cables: step 3, image 1 of 3 Komplete Audio 2 USB Port Replacement, Unlocking the ribbon cables: step 3, image 2 of 3 Komplete Audio 2 USB Port Replacement, Unlocking the ribbon cables: step 3, image 3 of 3
    • The main PCB has two ribbon cables connected to it. In this step, we will ensure they can be safely disconnected.

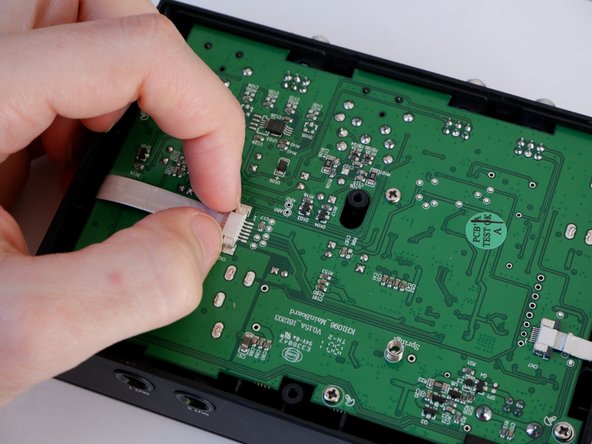
    • Unlock the ribbon cables by gently pulling the grey locking tabs of the connectors outwards (as indicated in the second image).

    • Newer models (often MK2) no longer use locking tabs; the cables are simply push-fit. If you have this version, do not try to unlock anything. Proceed directly to the next step to gently pull them out.

  4. Komplete Audio 2 USB Port Replacement, Disconnecting the ribbon cables: step 4, image 1 of 2 Komplete Audio 2 USB Port Replacement, Disconnecting the ribbon cables: step 4, image 2 of 2
    • Now that the connectors are ready, we can safely disconnect the cables from the main PCB.

    • Disconnect both ribbon cables by gently pulling them out of their connectors.

    • You may need to wiggle the cables slightly side-to-side to loosen them from the sockets.

  5. Komplete Audio 2 USB Port Replacement, Main PCB screws: step 5, image 1 of 3 Komplete Audio 2 USB Port Replacement, Main PCB screws: step 5, image 2 of 3 Komplete Audio 2 USB Port Replacement, Main PCB screws: step 5, image 3 of 3
    • The main PCB is secured by six screws. We will remove them in this step.

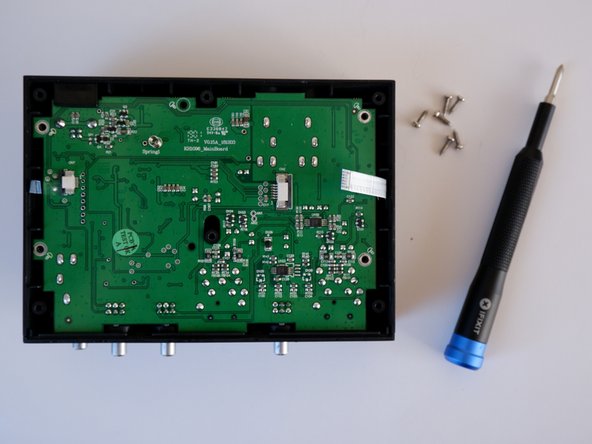
    • Use a Phillips #0 screwdriver to remove the six screws from the main PCB.

  6. Komplete Audio 2 USB Port Replacement, Front panel screws: step 6, image 1 of 3 Komplete Audio 2 USB Port Replacement, Front panel screws: step 6, image 2 of 3 Komplete Audio 2 USB Port Replacement, Front panel screws: step 6, image 3 of 3
    • There are two screws securing the front panel to the case. They are recessed deeply inside the enclosure and might not be immediately visible.

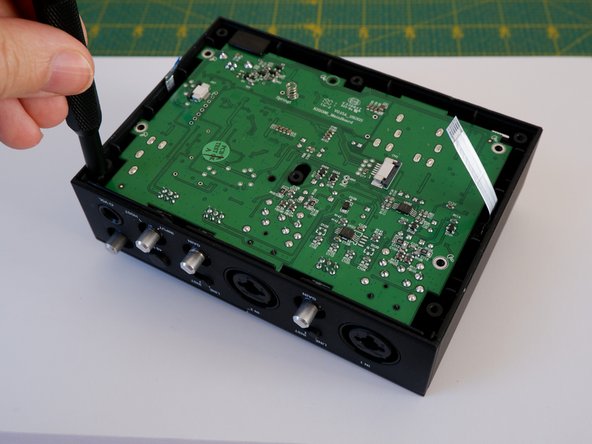
    • Use a Phillips #0 screwdriver to remove the two screws, as shown in the photos.

  7. Komplete Audio 2 USB Port Replacement, Detaching the front panel: step 7, image 1 of 3 Komplete Audio 2 USB Port Replacement, Detaching the front panel: step 7, image 2 of 3 Komplete Audio 2 USB Port Replacement, Detaching the front panel: step 7, image 3 of 3
    • With the screws removed, the front panel can now be unclipped from the top cover.

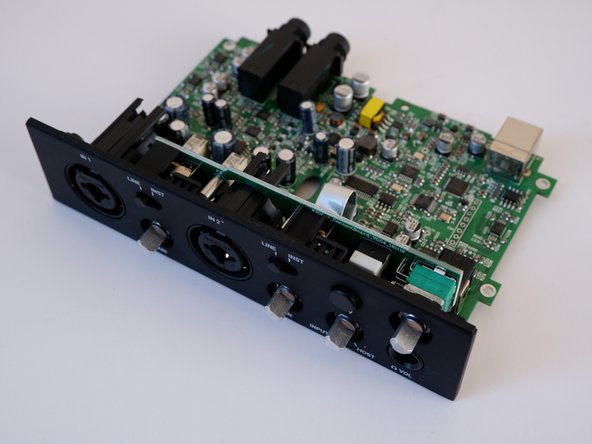
    • Gently pry the sides of the front panel as indicated by the arrows in the first image.

    • Pull the front panel upwards until it detaches from the top cover.

    • This step requires some patience and finesse. Take your time and avoid applying excessive force to prevent damage.

    • The USB port is fitted with a plastic cover that is only loosely attached to the main PCB. It is prone to falling out once the board is removed. Keep an eye on it to ensure it doesn't get lost!

  8. Komplete Audio 2 USB Port Replacement, USB port replacement: step 8, image 1 of 3 Komplete Audio 2 USB Port Replacement, USB port replacement: step 8, image 2 of 3 Komplete Audio 2 USB Port Replacement, USB port replacement: step 8, image 3 of 3
    • To replace the USB port, you will first need to desolder the existing one.

    • The locations of the relevant pins are indicated in pictures 2 and 3.

    • If you are new to desoldering, take a look at our guide on How To Solder and Desolder Connections.

    • Desolder the faulty USB port from the main PCB and then solder in the replacement part.

Conclusion

To reassemble your device, follow these instructions in reverse order.

6 other people completed this guide.

Kuba M

Member since: 03/13/22

359 Reputation

1 Guide authored

3 Guide Comments

Do you know where to find a replacement ribbon cable for the volume knob?

Razvan-Andrei Popescu - Reply

The cable seems to be an 8-pin Flexible Flat Cable (FFC) with a 0.5mm pitch. Maybe something similar to AWM 20706. I am not able to confirm that 100%, but after some research, that is the most promising result Google came up with. You may need to reuse/transfer the shielding though, I don't know if there is something similar with shielding included.

Marvin -

Thanks man. I dont have to replace te usb but you save me from braking the front cover. Did not see those 2 screws. I have to clean the master volume potentiometer

Gregory Leon - Reply

Add Comment

View Statistics:

Past 24 Hours: 0

Past 7 Days: 51

Past 30 Days: 104

All Time: 1,967