Introduction
This guide will show you how to replace the display of a Kobo Aura HD e-reader.
What you need
-
-
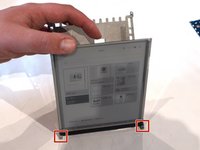
Starting at the bottom right corner, use a plastic spudger to separate the front bezel from the case.
-
Work along the bottom, then up the side, slowly going all the way around the device.
-
-
-
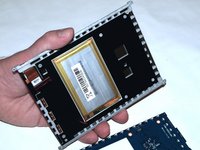
Using a Phillips #000 screwdriver, remove the 4 screws at the corners of the display.
-
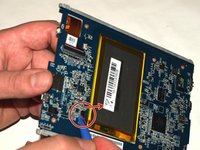
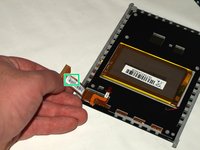
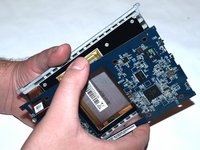
Remove the display and motherboard assembly from the back plate.
-
-
-
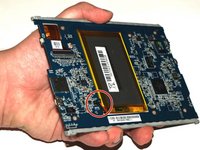
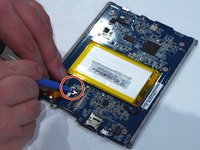
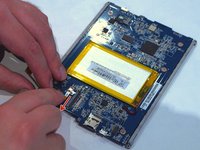
Pry the battery connector up, away from (i.e. perpendicular to) the board to disconnect it.
-
-
-
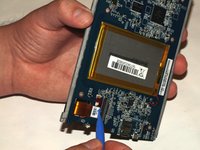
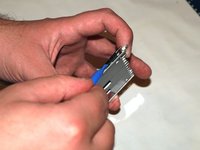
Gently open the Zero Insertion Force (ZIF) connector holding in the display cable.
-
You may find it easier to pry it open with your spudger.
-
Once the connector is open, gently pull the cable to the left to slide it out.
-
-
-
-
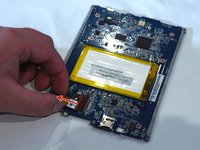
Gently open the second, smaller Zero Insertion Force connector by prying up the brown pressure-clip from the bottom.
-
Slide the cable down to disconnect it.
-
On the back of the display cable, you will find the full model number of your display, which you should use when searching for a replacement to ensure you get the correct part.
-
-
-
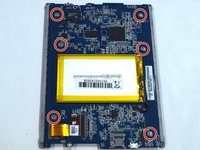
Using a Phillips #000 screwdriver, remove the 6 screws holding the display to the motherboard.
-
Separate the board from the display assembly.
-
-
-
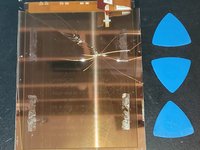
The glass backing of the display is secured to the metal frame with adhesive strips. Slowly and gently pry the two apart.
-
-
-
Fit the screen into the notches at the base of the frame to ensure it is correctly aligned.
-
Feed the display and power cables through the cutouts in the frame.
-
-
-
Carefully align the screen with the frame and press it in to place.
-
Apply gentle, even pressure for 5-10 minutes to adhere the screen in place.
-
-
-
Perform the above steps in reverse to reassemble the device
-
Once you have reconnected the display and power cables, and screwed the motherboard back in place, you can turn the device on to confirm the display is connected properly and working.
-


To reassemble your device, follow these instructions in reverse order.
Cancel: I did not complete this guide.
43 other people completed this guide.

59 Guide Comments
Hi,
Many thanks for your tutorial.
One quick question, where did you buy the replacement screen?
Many thanks in advance for your help.
Kind regards
Hello, King Koton,
I already had another broken Kobo, so I could reuse the screen. I don’t think you can buy original parts, so maybe you will have to get a broken Kobo at an auction.
Good luck, John
Hi King Koton, I brought a brand new screen on AliExpress, look for ED0680G1 (the Kobo Aura HD uses the exact same screen as the Kobo Aura H2O).
Marc -
Hello John, Ur information did helped me for 100%. We reinstalled a screen to based on ur guide. But i have a question. After reinstalling the front bezel the touch screen is responding reliable. sometimes he doesnt turn a page or somtimes turn more then one page etc. I usend also there the existing adhesive. Can that be a the reason of less responding quality. I hope u have an advice. Kind regards, Jan de Jong
Sorry Jan, I don’t know either. Maybe someone else can give advice. Good luck. (This guide was written by Spencer Harding, I only added one comment), John