KitchenAid KHM512ER Motor Replacement

What you need

  1. KitchenAid KHM512ER Motor Replacement, Motor: step 1, image 1 of 2 KitchenAid KHM512ER Motor Replacement, Motor: step 1, image 2 of 2
    • Insert the back of a plastic opening tool into one of the beater holes

    • Apply force to pull the circular plastic part off.

    • If necessary, use the other side of the plastic opening tool to pry the circular plastic part off.

  2. KitchenAid KHM512ER Motor Replacement: step 2, image 1 of 2 KitchenAid KHM512ER Motor Replacement: step 2, image 2 of 2
    • Use a Phillips 2 screwdriver to remove the two 20mm screws holding the bottom plastic piece in place.

    • Remove the bottom plastic piece using a plastic opening tool.

    • Your screwdriver may not be long or narrow enough to reach the screws in these holes. If that's the case, use another screwdriver.

  3. KitchenAid KHM512ER Motor Replacement: step 3, image 1 of 2 KitchenAid KHM512ER Motor Replacement: step 3, image 2 of 2
    • Using a Phillips 2 screwdriver, remove the three 20mm screws holding the motor assembly in place.

    • Use your hands to remove the motor assembly and circuit board.

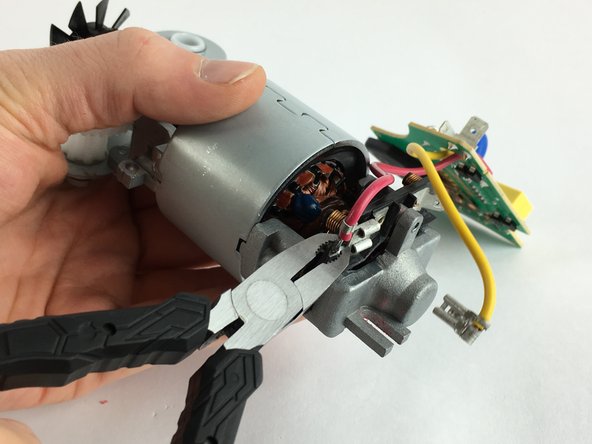
  4. KitchenAid KHM512ER Motor Replacement: step 4, image 1 of 3 KitchenAid KHM512ER Motor Replacement: step 4, image 2 of 3 KitchenAid KHM512ER Motor Replacement: step 4, image 3 of 3
    • Firmly grip the motor in your hand. Using pliers, pull the connectors off the motors.

    • Some force may be required. Be careful not to cut yourself on any electrical components.

Conclusion

To reassemble your device, follow these instructions in reverse order.

2 other people completed this guide.

[deleted]

Member since: 02/10/16

134 Reputation

1 Guide authored

0 Comments

Add Comment

View Statistics:

Past 24 Hours: 1

Past 7 Days: 5

Past 30 Days: 26

All Time: 4,546