
Kindle 7th Generation LCD Circuit Board Replacement

What you need

  1. Kindle 7th Generation LCD Circuit Board Replacement, Front Panel: step 1, image 1 of 2 Kindle 7th Generation LCD Circuit Board Replacement, Front Panel: step 1, image 2 of 2
    • Power off your Kindle before beginning disassembly.

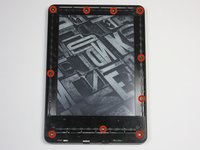
    • At each corner, use the blue plastic opening tool to unhook and separate the front panel from the adhesive.

    • Run the tool along the seams to pry open the front panel.

  2. Kindle 7th Generation LCD Circuit Board Replacement: step 2, image 1 of 1
    • Peel the front panel off to remove it from the Kindle.

    • If this is the first time the front panel has been removed, the adhesive may require a significant amount of force to undo.

    • To prevent damaging the front panel, peel the panel from the corners towards the middle of the Kindle.

    • When reassembling your device, if you are replacing the front panel, additional adhesive may be required.

  3. Kindle 7th Generation LCD Circuit Board Replacement, Back Panel: step 3, image 1 of 2 Kindle 7th Generation LCD Circuit Board Replacement, Back Panel: step 3, image 2 of 2
    • Remove the ten 5.0 mm T5 Torx screws.

    • A magnetized screw mat can help you keep track of your screws.

  4. Kindle 7th Generation LCD Circuit Board Replacement: step 4, image 1 of 1
    • Working evenly along the corners and edges, separate the internal contents from the back panel.

    • There are many clips securing the screen to the back panel. Force will be required to remove the back, but you should never feel that the Kindle may break.

  5. Kindle 7th Generation LCD Circuit Board Replacement, Motherboard: step 5, image 1 of 2 Kindle 7th Generation LCD Circuit Board Replacement, Motherboard: step 5, image 2 of 2
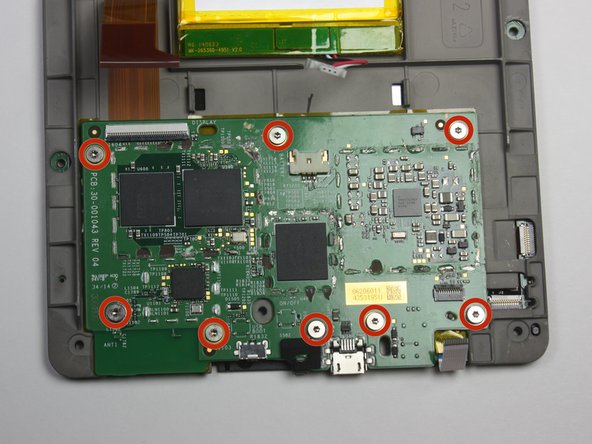
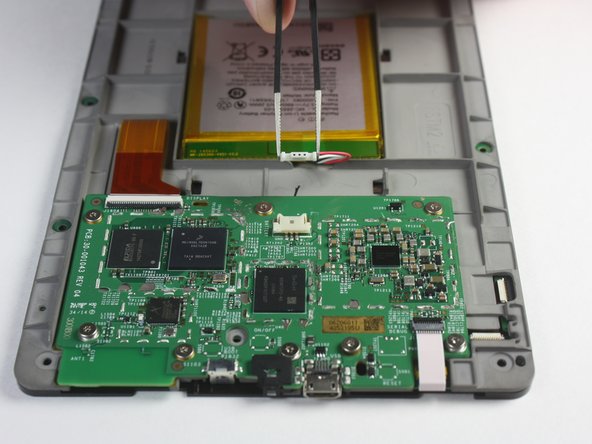
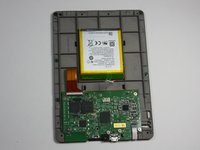
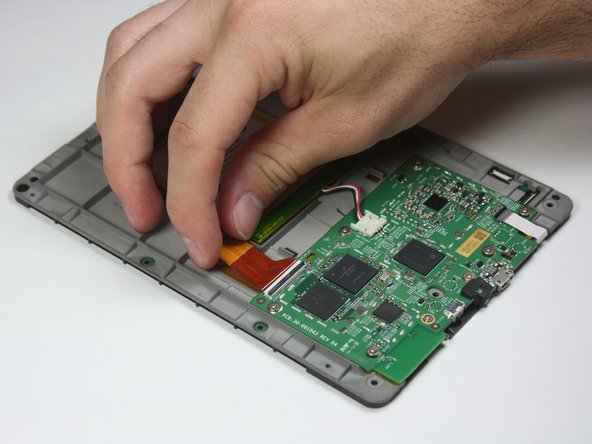
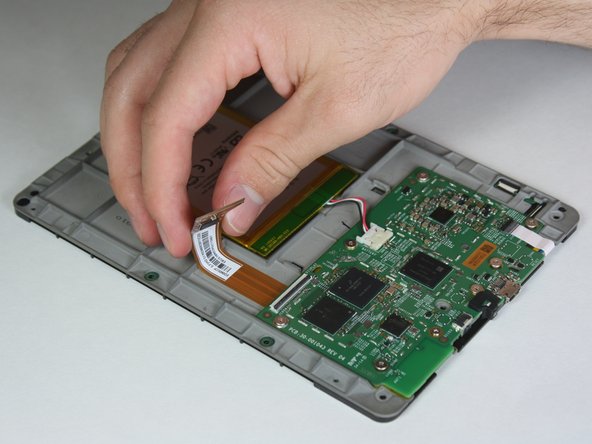
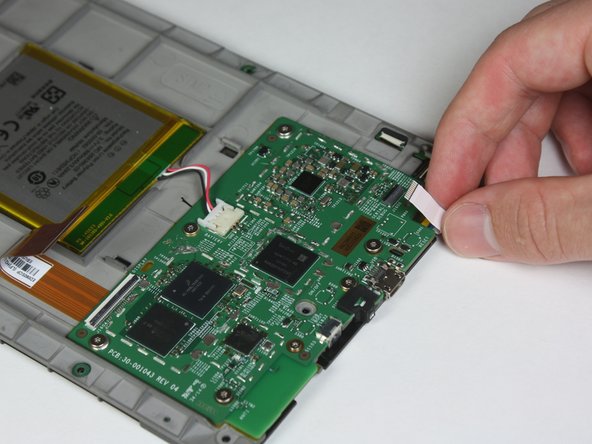
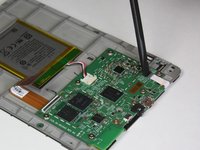
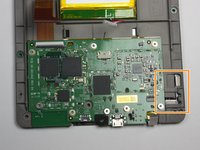
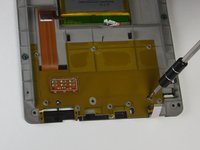
    • Flip the screen over to face the motherboard and battery pack.

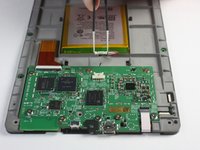
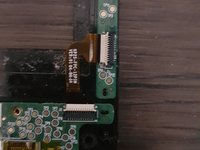
    • Use the blunted precision tweezers to gently unclip and detach the cable connecting the battery pack and motherboard.

  6. Kindle 7th Generation LCD Circuit Board Replacement: step 6, image 1 of 3 Kindle 7th Generation LCD Circuit Board Replacement: step 6, image 2 of 3 Kindle 7th Generation LCD Circuit Board Replacement: step 6, image 3 of 3
    • Use the tip of the spudger to flip up the small retaining flap on the copper colored zero insertion force (ZIF) connector.

    • Make sure to flip up the flap and not the connection itself.

    • Pull the cable from the connector.

    • No force is required to do this, as the name, ZIF, implies.

  7. Kindle 7th Generation LCD Circuit Board Replacement: step 7, image 1 of 2 Kindle 7th Generation LCD Circuit Board Replacement: step 7, image 2 of 2
    • Similar to the previous step, flip up the retaining flap on the white cable connector.

    • Pull the white cable from the connection.

    • During reassembly, make sure the retaining flaps for both the white and copper colored cable connections are secured. As these are zero insertion force connections, the cables could potentially slide out if this is not done.

  8. Kindle 7th Generation LCD Circuit Board Replacement: step 8, image 1 of 2 Kindle 7th Generation LCD Circuit Board Replacement: step 8, image 2 of 2
    • Disconnect the touch digitiser bridge cable by using your Spudger to lift up the white tabs on both connectors.

    • Use tweezers to pull out the cable.

    • The touch digitiser bridge cable is the one connecting between these two connectors.

  9. Kindle 7th Generation LCD Circuit Board Replacement: step 9, image 1 of 2 Kindle 7th Generation LCD Circuit Board Replacement: step 9, image 2 of 2
    • Use the T5 Torx screwdriver to remove the eight 3.0 mm Phillips Head screws.

    • Some screws have washers associated with them. It is important to keep track of the washers and remember which thread they came from.

  10. Kindle 7th Generation LCD Circuit Board Replacement: step 10, image 1 of 1
    • Remove the motherboard.

  11. Kindle 7th Generation LCD Circuit Board Replacement, LCD Circuit Board: step 11, image 1 of 2 Kindle 7th Generation LCD Circuit Board Replacement, LCD Circuit Board: step 11, image 2 of 2
    • Remove the two 2.5 mm Phillips Head screws using the T5 Torx screwdriver.

  12. Kindle 7th Generation LCD Circuit Board Replacement: step 12, image 1 of 1
    • Run the plastic opening tool around the edge to separate the bezel from the adhesive.

  13. Kindle 7th Generation LCD Circuit Board Replacement: step 13, image 1 of 1
    • Lift the bezel from the screen.

    • Use care, the bezel and circuit board are flimsy and the adhesive is strong.

  14. Kindle 7th Generation LCD Circuit Board Replacement: step 14, image 1 of 1
    • Flip the bezel over to view the circuit board.

    • Use the T5 Torx screwdriver to undo the six 2.0 mm screws holding the circuit board to the bezel.

    • Remove the LCD circuit board.

Conclusion

To reassemble your device, follow these instructions in reverse order.

One other person completed this guide.

Julien

Member since: 02/03/15

128 Reputation

1 Guide authored

Team

Cal Poly, Team 6-28, Amido Winter 2015 Member of Cal Poly, Team 6-28, Amido Winter 2015

CPSU-AMIDO-W15S6G28

4 Members

18 Guides authored

One Comment

Where do you buy the replacement parts?

Freedom Rose - Reply

Add Comment

View Statistics:

Past 24 Hours: 0

Past 7 Days: 11

Past 30 Days: 38

All Time: 4,416