Introduction
Having battery issues that require replacement? Well you're in the right place. You're also in luck: the battery is the easiest internal component of the Kindle 7th generation to replace. Follow this guide and your Kindle should be working in no time.
Note: this guide is a for a standard Kindle 7th Gen. This is NOT the same as Kindle Paperwhite 7th Gen, or Kindle Voyage 2014!
What you need
-
-
-
At each corner, use the blue plastic opening tool to unhook and separate the front panel from the adhesive.
-
Run the tool along the seams to pry open the front panel.
 Ask FixBot
-
-
-
Peel the front panel off to remove it from the Kindle.
-
To prevent damaging the front panel, peel the panel from the corners towards the middle of the Kindle.
-
-
-
-
-
-
Working evenly along the corners and edges, separate the internal contents from the back panel.
-
-
-
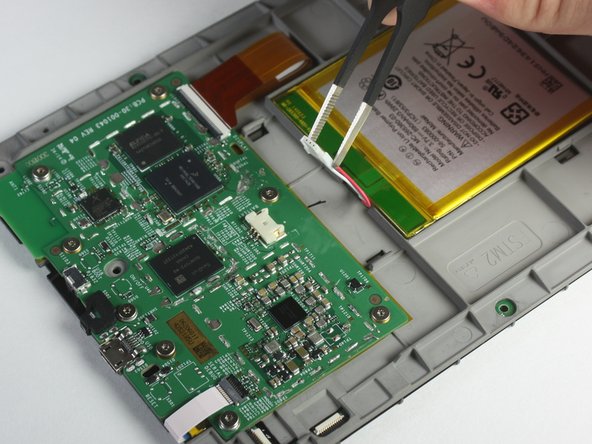
Tool used on this step:Tweezers$4.99
-
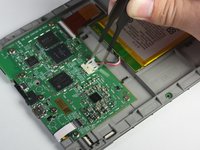
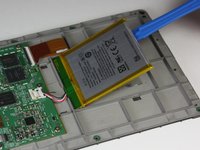
Use the blunted precision tweezers to pinch the ends of the clip securing the battery cord to the motherboard.
-
Gently slide the cord from the motherboard connection.
-
-
-
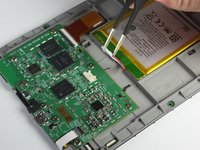
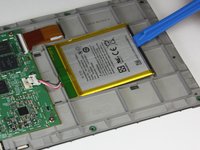
Use the plastic opening tool to pry the battery from the backside of the screen.
-
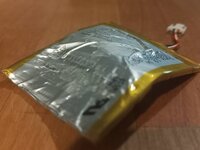
Set the battery aside.
-


To reassemble your device, follow these instructions in reverse order.
Cancel: I did not complete this guide.
35 other people completed this guide.
Team

Cal Poly, Team 6-28, Amido Winter 2015 Member of Cal Poly, Team 6-28, Amido Winter 2015
CPSU-AMIDO-W15S6G28
4 Members
26 Guides authored
27 Guide Comments
Fairly easy to do. Saves a lot of money compared to buying a whole new Kindle :) Thank you for this! A note: I've never seen batteries as...soft as these. Take care when using the removal tool. I could be easy to puncture the battery which could cause a big mess and possibly injury.
Where do I get a new battery from please?