Free Shipping on Domestic Orders $75+

Keyboard Assembly Removal

Prerequisite Only
This is a prerequisite-only guide! This guide is part of another procedure and isn’t meant to be used alone.

What you need

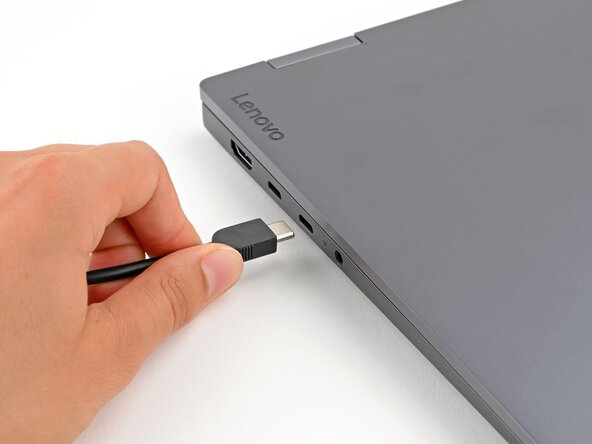
    1. Keyboard Assembly Removal, Prepare your laptop for disassembly: step 1, image 1 of 3 Keyboard Assembly Removal, Prepare your laptop for disassembly: step 1, image 2 of 3 Keyboard Assembly Removal, Prepare your laptop for disassembly: step 1, image 3 of 3
      • For your safety, discharge your battery below 25% before disassembling your laptop. A charged battery may catch fire if damaged.

      • Fully shut down your laptop and unplug all cables.

      • Remove the stylus from the case.

      Ask FixBot

      Add Comment

    2. Keyboard Assembly Removal, Unfasten the back cover: step 2, image 1 of 2 Keyboard Assembly Removal, Unfasten the back cover: step 2, image 2 of 2
      • Use a Phillips screwdriver to fully loosen the four captive screws securing the back cover.

      Ask FixBot

      Add Comment

    3. Keyboard Assembly Removal, Release the back cover clips: step 3, image 1 of 3 Keyboard Assembly Removal, Release the back cover clips: step 3, image 2 of 3 Keyboard Assembly Removal, Release the back cover clips: step 3, image 3 of 3
      • Lift the top edge of the cover to release the clips, starting at the corners and working towards the center.

      • If you are having trouble releasing the clips, make sure the screws are fully loosened.

      Ask FixBot

      Add Comment

    4. Keyboard Assembly Removal, Remove the back cover: step 4, image 1 of 1
      • Remove the back cover.

      • During reassembly, insert the bottom edge clips first, then press along the remaining edges to engage the clips.

      Ask FixBot

      Add Comment

    1. Keyboard Assembly Removal, Unfasten the battery: step 5, image 1 of 2 Keyboard Assembly Removal, Unfasten the battery: step 5, image 2 of 2
      • Given the design of the battery connector, the only way to disconnect the battery is to physically remove it.

      • Use a Phillips screwdriver to fully loosen the three captive screws securing the battery.

      Ask FixBot

      Add Comment

    2. Keyboard Assembly Removal, Remove the battery: step 6, image 1 of 3 Keyboard Assembly Removal, Remove the battery: step 6, image 2 of 3 Keyboard Assembly Removal, Remove the battery: step 6, image 3 of 3
      • Try not to bend, crease, deform, poke, or puncture the battery—a damaged battery is a potential fire hazard.

      • Gently lift the upper edge of the battery to disconnect it from the motherboard.

      • Remove the battery.

      • During reassembly, insert the bottom of the battery first and then press down on the socket to secure it.

      • Never reuse a deformed or damaged battery. Replace it with a new battery.

      Ask FixBot

      Add Comment

    1. Keyboard Assembly Removal, Disconnect the USB IO board: step 7, image 1 of 3 Keyboard Assembly Removal, Disconnect the USB IO board: step 7, image 2 of 3 Keyboard Assembly Removal, Disconnect the USB IO board: step 7, image 3 of 3
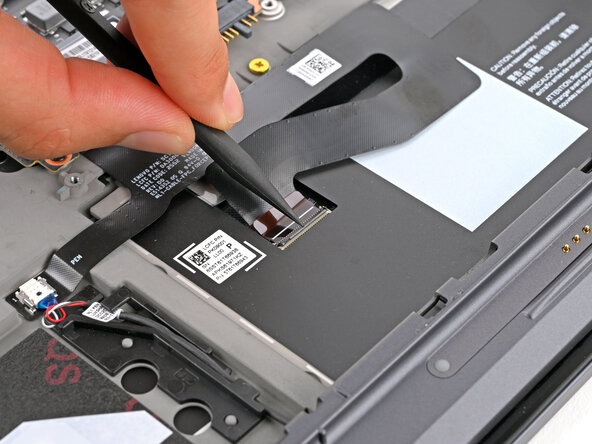
      • Use the point of a spudger or a clean fingernail to lift the small locking flap on the fingerprint reader connector.

      • Use a pair of tweezers to slide the fingerprint reader cable out of its connector.

      • Grip the cable by its plastic pull tab, not the cable itself.

      Ask FixBot

      Add Comment

    2. Keyboard Assembly Removal, Disconnect the touchpad: step 8, image 1 of 3 Keyboard Assembly Removal, Disconnect the touchpad: step 8, image 2 of 3 Keyboard Assembly Removal, Disconnect the touchpad: step 8, image 3 of 3
      Ask FixBot

      Add Comment

    3. Keyboard Assembly Removal, Disconnect the keyboard: step 9, image 1 of 3 Keyboard Assembly Removal, Disconnect the keyboard: step 9, image 2 of 3 Keyboard Assembly Removal, Disconnect the keyboard: step 9, image 3 of 3
      Ask FixBot

      Add Comment

    4. Keyboard Assembly Removal: step 10, image 1 of 3 Keyboard Assembly Removal: step 10, image 2 of 3 Keyboard Assembly Removal: step 10, image 3 of 3
      Ask FixBot

      Add Comment

    5. Keyboard Assembly Removal, Unfasten the keyboard assembly: step 11, image 1 of 2 Keyboard Assembly Removal, Unfasten the keyboard assembly: step 11, image 2 of 2
      • Use a Phillips screwdriver to fully loosen the six captive screws securing the keyboard assembly.

      Ask FixBot

      Add Comment

    6. Keyboard Assembly Removal, Flip your laptop over: step 12, image 1 of 1
      • Make sure the laptop is on a clean, level surface free of items and debris. The case, not the exposed internals, should support the laptop.

      • Flip your laptop over and open the screen just past 90 degrees—far enough to fit your fingers between the screen and keyboard assembly.

      Ask FixBot

      Add Comment

    7. Keyboard Assembly Removal, Remove the keyboard assembly: step 13, image 1 of 3 Keyboard Assembly Removal, Remove the keyboard assembly: step 13, image 2 of 3 Keyboard Assembly Removal, Remove the keyboard assembly: step 13, image 3 of 3
      • Lift the keyboard assembly near the hinges and remove it.

      • The assembly is held in place by magnets and should release easily— don't force it. If you're having trouble, double-check that all the keyboard assembly screws are fully loosened.

      • During reassembly, make sure the bottom sliding clips go in first.

      Ask FixBot

      Add Comment

Conclusion

To reassemble your device, follow these instructions in reverse order.

Cancel: I did not complete this guide.

Evan Gattuso

Member since: 09/13/21

22,365 Reputation

7 Guides authored

0 Guide Comments

Add Comment

View Statistics:

Past 24 Hours: 0

Past 7 Days: 2

Past 30 Days: 8

All Time: 72