
Justin Bieber Concert Microphone On/Off Switch Replacement

What you need

  1. Justin Bieber Concert Microphone On/Off Switch Replacement, Removing back panel: step 1, image 1 of 2 Justin Bieber Concert Microphone On/Off Switch Replacement, Removing back panel: step 1, image 2 of 2
    Tool used on this step:
    Flathead 1.5 mm Screwdriver
    $5.49
    Buy
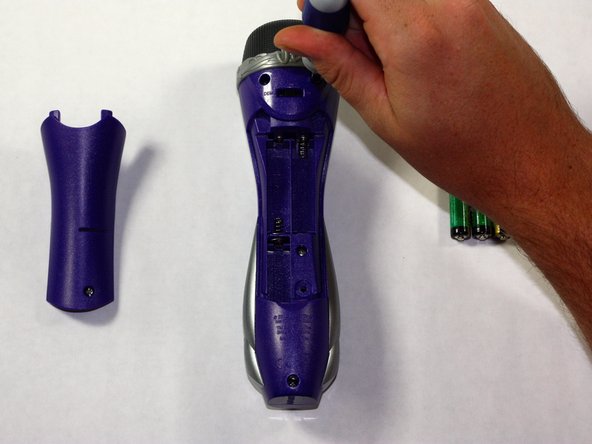
    • Remove the back panel of the device by unscrewing the single #8 11.6 mm Flathead screw on the back of the device.

  2. Justin Bieber Concert Microphone On/Off Switch Replacement, Removing batteries: step 2, image 1 of 1
    • Remove the 3 AAA batteries from the device.

  3. Justin Bieber Concert Microphone On/Off Switch Replacement, Removing back half of device: step 3, image 1 of 2 Justin Bieber Concert Microphone On/Off Switch Replacement, Removing back half of device: step 3, image 2 of 2
    • Unscrew the other 4, #8 11.6 mm Phillips Head screws to remove the entire back half of the device.

    • Pull apart the device once screws are loose, splitting the device in half.

  4. Justin Bieber Concert Microphone On/Off Switch Replacement, Positioning device: step 4, image 1 of 1
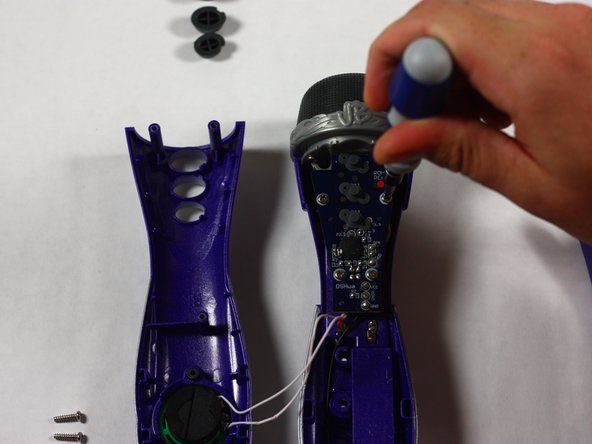
    • Keeping all wires connected to their attachments, place the front half of the device face down.

  5. Justin Bieber Concert Microphone On/Off Switch Replacement, Removing PCB: step 5, image 1 of 2 Justin Bieber Concert Microphone On/Off Switch Replacement, Removing PCB: step 5, image 2 of 2
    • Remove the 2, #8 11.7 mm Phillips Head screws as well as the 2, #8 7.5 mm screws on the printed circuit board.

  6. Justin Bieber Concert Microphone On/Off Switch Replacement, Removing on/off switch: step 6, image 1 of 2 Justin Bieber Concert Microphone On/Off Switch Replacement, Removing on/off switch: step 6, image 2 of 2
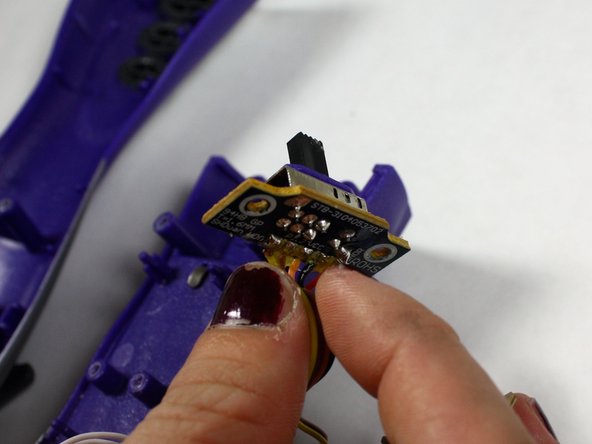
    • Remove the 2, #8 11.7 mm Phillips Head screws on the On/Off Switch Board

  7. Justin Bieber Concert Microphone On/Off Switch Replacement, Replacing on/off switch: step 7, image 1 of 2 Justin Bieber Concert Microphone On/Off Switch Replacement, Replacing on/off switch: step 7, image 2 of 2
    • Remove On/Off Switch Board from its holding and detach the wires.

    • Replace the On/Off Switch Board with a new one and reattach the wires using this soldering guide

Conclusion

To reassemble your device, follow these instructions in reverse order.

Mike Seyman

Member since: 10/19/14

437 Reputation

4 Guides authored

Team

Baylor, Team 4-1, Williams Fall 2014 Member of Baylor, Team 4-1, Williams Fall 2014

BU-WILLIAMS-F14S4G1

3 Members

4 Guides authored

0 Comments

Add Comment

View Statistics:

Past 24 Hours: 0

Past 7 Days: 0

Past 30 Days: 0

All Time: 153