
Jura Impressa F50 grinder replacement (TOTAL)

What you need

  1. Jura Impressa F50 grinder replacement (TOTAL), Open Case: step 1, image 1 of 3 Jura Impressa F50 grinder replacement (TOTAL), Open Case: step 1, image 2 of 3 Jura Impressa F50 grinder replacement (TOTAL), Open Case: step 1, image 3 of 3
    • Clean the coffee machine before starting as well as possible and remove any remaining coffee bean debris, etc.

    • Pull the power plug before working on the coffee machine!

    • Never submerge the coffee machine completely under water.

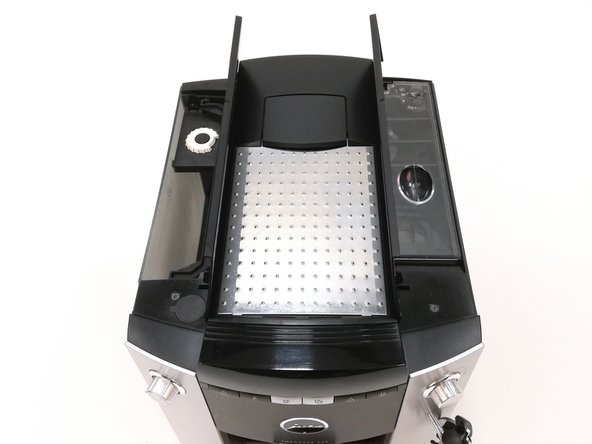
    • Remove the drip pan, tray and container for used coffee,...

    • ... the water tank, ...

    • and the aroma protection cover.

  2. Jura Impressa F50 grinder replacement (TOTAL): step 2, image 1 of 2 Jura Impressa F50 grinder replacement (TOTAL): step 2, image 2 of 2
    • Using an oval head bit remove all four oval head screws from the rear panel.

  3. Jura Impressa F50 grinder replacement (TOTAL): step 3, image 1 of 2 Jura Impressa F50 grinder replacement (TOTAL): step 3, image 2 of 2
    • Remove the two T15 Torx screws from the coffee machine housing cover.

  4. Jura Impressa F50 grinder replacement (TOTAL): step 4, image 1 of 2 Jura Impressa F50 grinder replacement (TOTAL): step 4, image 2 of 2
    • Remove the top cover of the coffee machine.

    • Remove the panel from the right side.

    • Slightly lift the side panel at the back and then pull it out backwards with a little effort. Especially when disassembling it for the first time, the force required for this can be quite high.

    • Remove the left side panel.

    • A light tap on the back of the recess for the water tank can help to loosen the side panel.

    • Remove the lock washer on the axle for grinding degree adjustment using pliers.

    • Removing the lock washer requires some force. Don't hesitate to pull firmly.

    • Remove the grinding degree adjustment axle by using pliers to pull it upwards.

  5. Jura Impressa F50 grinder replacement (TOTAL): step 9, image 1 of 2 Jura Impressa F50 grinder replacement (TOTAL): step 9, image 2 of 2
    • Remove the 2 screws on the bean container of the coffee machine with the Torx T10 screwdriver.

    • The screws are in a recess.

  6. Jura Impressa F50 grinder replacement (TOTAL): step 10, image 1 of 2 Jura Impressa F50 grinder replacement (TOTAL): step 10, image 2 of 2
    • Remove the bean container.

  7. Jura Impressa F50 grinder replacement (TOTAL): step 11, image 1 of 2 Jura Impressa F50 grinder replacement (TOTAL): step 11, image 2 of 2
    • Remove the pinion for the grinding degree adjustment.

  8. Jura Impressa F50 grinder replacement (TOTAL): step 12, image 1 of 2 Jura Impressa F50 grinder replacement (TOTAL): step 12, image 2 of 2
    • Remove the 3 screws attaching the grinding mill attachment to the grinder with the Torx T10 screwdriver.

  9. Jura Impressa F50 grinder replacement (TOTAL): step 13, image 1 of 1
    • Make sure not to rip any cables in this step.

    • Carefully lift up the grinder.

    • Disconnect the first connector (black cable) from the plug-in connector attached to the bottom of the grinder.

    • After you have removed the plug, you can carefully set down the grinder. For the next step you will need both hands.

    • Separate the second (white) cable attached to the grinder from the housing of the plug-in connector.

    • Carefully press on the housing of the plug-in connector.

    • Remove the grinder to clean or replace it.

    • Avoid putting the grinder down completely in this step, but hold it in your hand.

    • Reinstall the new or repaired grinder into the coffee machine.

    • Reconnect the grinder to the connectors. Make sure to place the connectors in the correct place.

  10. Jura Impressa F50 grinder replacement (TOTAL): step 18, image 1 of 1
    • Now set the grinder back into its correct position

  11. Jura Impressa F50 grinder replacement (TOTAL): step 19, image 1 of 2 Jura Impressa F50 grinder replacement (TOTAL): step 19, image 2 of 2
    • Reattach the 3 screws for grinding mill by fastening them to the inserted grinder with the Torx T10 screwdriver.

  12. Jura Impressa F50 grinder replacement (TOTAL): step 20, image 1 of 1
    • Reinsert the pinion.

    • Make sure that the marking aligns with the center of the grinder, as the pinion is used to adjust the grinding degree and hence the strength of the coffee.

    • Reinsert the bean container into the coffee machine.

  13. Jura Impressa F50 grinder replacement (TOTAL): step 22, image 1 of 2 Jura Impressa F50 grinder replacement (TOTAL): step 22, image 2 of 2
    • Fasten the two screws we remove from the bean container earlier with the Torx T10 screwdriver.

    • Reinsert the axle for grinding degree adjustment.

    • Use pliers to reseat the safety washer.

    • Reinstall the left side panel.

    • Put on the side wall and make sure that the lugs are snapped into the slots provided. Then slide the side panel slightly forward. The side panel should audibly snap into place when pushed forward.

    • Reinstall the right side panel.

    • First attach the side wall and make sure that the lugs have snapped into the slots provided. Then slide the side panel slightly forward. The side panel should audibly snap into place when pushed forward.

  14. Jura Impressa F50 grinder replacement (TOTAL): step 27, image 1 of 1
    • Place the housing cover back on the coffee maker.

  15. Jura Impressa F50 grinder replacement (TOTAL): step 28, image 1 of 2 Jura Impressa F50 grinder replacement (TOTAL): step 28, image 2 of 2
    • Use the Torx T15 screwdriver to tighten the 2 countersunk screws on the housing cover.

  16. Jura Impressa F50 grinder replacement (TOTAL): step 29, image 1 of 2 Jura Impressa F50 grinder replacement (TOTAL): step 29, image 2 of 2
    • Using the oval head wrench, tighten the 4 oval head screws on the back of the machine.

  17. Jura Impressa F50 grinder replacement (TOTAL): step 30, image 1 of 3 Jura Impressa F50 grinder replacement (TOTAL): step 30, image 2 of 3 Jura Impressa F50 grinder replacement (TOTAL): step 30, image 3 of 3
    • Replace the water tank,

    • the drip tray with drip tray, pulp tray and pulp container,

    • and place the aroma protection cover back on.

Finish Line

6 other people completed this guide.

Special thanks to these translators:

de en

100%

These translators are helping us fix the world! Want to contribute?
Start translating ›

Attached Documents

Natalie

Member since: 05/08/19

738 Reputation

4 Guides authored

Team

KMM 2019SS Member of KMM 2019SS

Community

11 Members

8 Guides authored

0 Comments

Add Comment

View Statistics:

Past 24 Hours: 6

Past 7 Days: 26

Past 30 Days: 137

All Time: 7,775