This translation was generated by a machine and has not been reviewed by a person yet. Speak this language? Review it.
Introduction
Is your JBL Pulse 3 battery life poor? Won't it turn on?
The battery is likely the culprit; we will show you how to replace it.
What you need
-
-
-
Check your battery model.
-
It is likely that your JBL Pulse 3 is equipped with the same battery as this one.
-
It is recommended to order only original batteries or, at the very least, batteries that meet European standards.
-
This JBL Pulse 3 is equipped with a P5542100-P battery.
 Ask FixBot
-
-
-
Use a spudger or an opening pick to remove the trim.
-
You can unclip one side at a time, then gently pull with your fingers to separate the piece.
-
-
-
Remove the trim piece, which is simply held in place by a quarter-turn fastener
-
Remove all the screws
-
Now, remove the diaphragm.
-
-
-
Remove the screws under the membrane; they hold the LED unit and battery assembly.
-
Take this opportunity to remove the Bluetooth antenna, which is glued on the left in this photo. I advise you not to unplug it from the electronic board. Simply peel it off the wall. Highlighted with the white arrow.
-
Flip the speaker over to the other side and remove the screws holding the LED deflector (the "glass" part that diffuses the colors).
-
-
-
You can now gently lift the LED diffuser straight up.
-
There may be some slight resistance. Proceed with caution.
-
-
-
-
Remove the screws holding the bottom part of your speaker.
-
It is possible that you cannot extract some screws; this is not a problem. Unscrew them as much as possible.
-
-
-
Carefully unclip the lower case. It is simply held in place by snap fits.
-
You can then remove the part by pulling it upward.
-
-
-
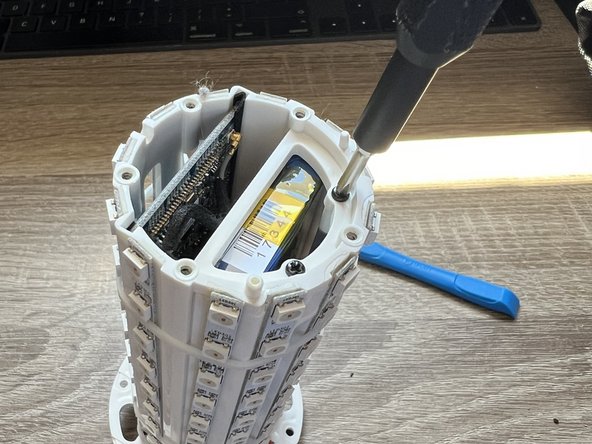
Remove the screws securing the LED tube, which also contains the battery.
-
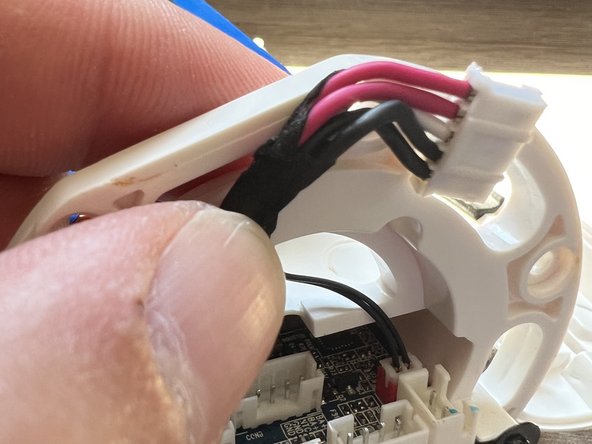
Disconnect the cables connecting it to the lower section.
-
-
-
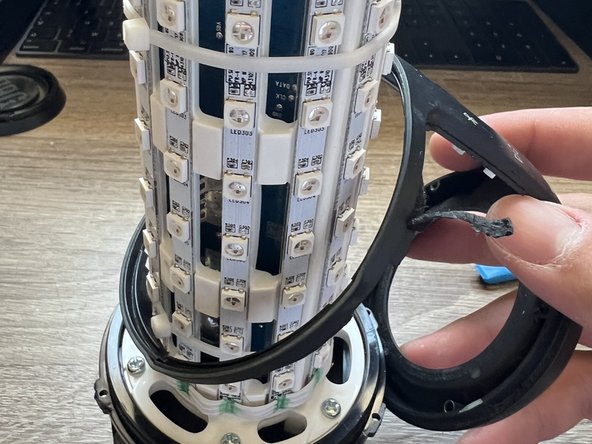
Almost there! Remove the screws from the top and bottom of the LED and battery tube.
-
Take this opportunity to remove the cable ties by cutting them with a pair of flush cutters.
-
-
-
Remove the first three LED strips from your JBL.
-
The first photo shows the first strip. You must remove the three LED strips in a counter-clockwise direction (to the left in the photo).
-
You can use an opening tool if the adhesive is stubborn. Be careful, we are almost there!
-
-
-
Disconnect the socket that connects the LED assembly to the circuit board.
-
This will make it easier for you to replace the battery.
-
-
-
There you go! You can open the battery compartment; it's like a shutter. You can open it with your nylon tool.
-
-
-
All that remains is to remove the battery and replace it.
-
You must unplug the Glued-Down Cables connecting the battery to the board, there are two!
-
WARNING: If your battery is glued in place, DO NOT use a box cutter, knife, or any other sharp object. Doing so could cause a fire or even very serious burns.
-
-








To reassemble your device, follow the instructions in reverse order.

