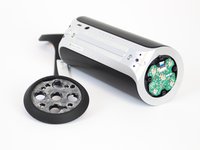
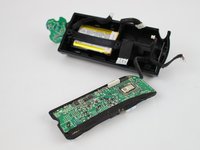
JBL Flip 2 MicroUSB Port Replacement

What you need

  1. JBL Flip 2 MicroUSB Port Replacement, JBL Flip 2 Outer Case Disassembly: step 1, image 1 of 2 JBL Flip 2 MicroUSB Port Replacement, JBL Flip 2 Outer Case Disassembly: step 1, image 2 of 2
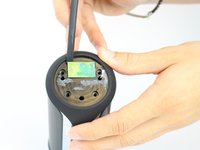
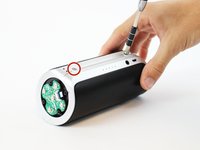
    • Begin by removing the rubber caps on both sides of the JBL Flip 2 by using the black spudger to get in between the creases.

    • Be very careful when removing the NFC rubber cap. There is a chip that is glued to the inside of the rubber cap. So, peel the rubber cap off slowly and remove the chip on the inside while peeling the rubber cap off.

  2. JBL Flip 2 MicroUSB Port Replacement: step 2, image 1 of 2 JBL Flip 2 MicroUSB Port Replacement: step 2, image 2 of 2
    • Remove the eight 7.0 mm Phillips #1 screws on both sides of the JBL Flip 2.

  3. JBL Flip 2 MicroUSB Port Replacement: step 3, image 1 of 3 JBL Flip 2 MicroUSB Port Replacement: step 3, image 2 of 3 JBL Flip 2 MicroUSB Port Replacement: step 3, image 3 of 3
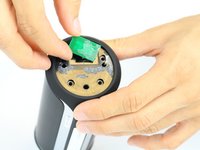
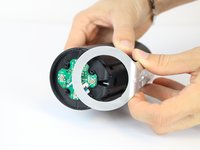
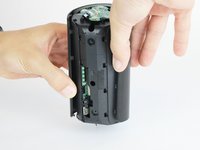
    • The NFC chip is glued onto the side of the device. Use the black spudger to separate the mic from the surface.

    • Be careful not to sever the wire connecting the nfc chip to the inside of the device.

    • Gently slide the NFC chip into the device through the slot that the wire comes from.

  4. JBL Flip 2 MicroUSB Port Replacement: step 4, image 1 of 2 JBL Flip 2 MicroUSB Port Replacement: step 4, image 2 of 2
    • Peel the black rubber piece from one end to the other.

  5. JBL Flip 2 MicroUSB Port Replacement: step 5, image 1 of 3 JBL Flip 2 MicroUSB Port Replacement: step 5, image 2 of 3 JBL Flip 2 MicroUSB Port Replacement: step 5, image 3 of 3
    • Remove the two 7.0 mm Phillips #1 screws.

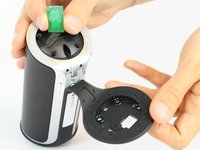
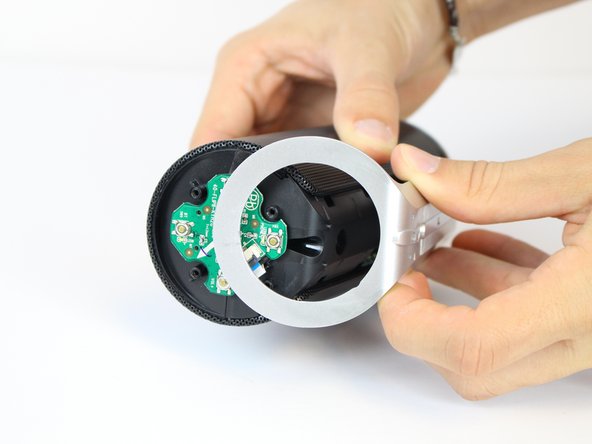
    • Carefully detach the silver plastic cover by pulling both ends off.

    • Pull both ends at the same time with the same amount of force to prevent the cover from breaking.

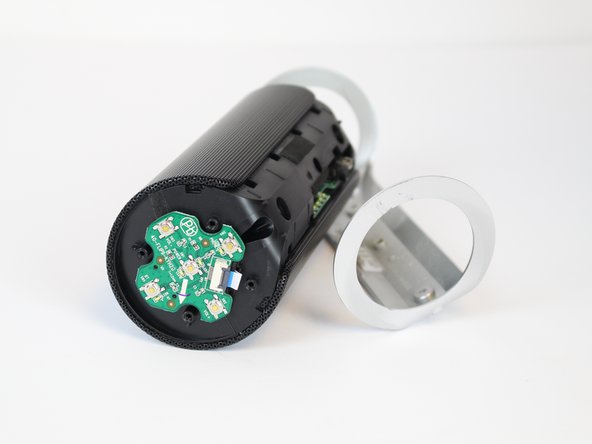
    • Separate the silver plastic piece by pulling it off from the middle.

  6. JBL Flip 2 MicroUSB Port Replacement: step 6, image 1 of 3 JBL Flip 2 MicroUSB Port Replacement: step 6, image 2 of 3 JBL Flip 2 MicroUSB Port Replacement: step 6, image 3 of 3
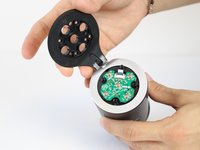
    • Using a flat-head screwdriver or spudger, pry out the 8 metal nibs on the back side of the speaker.

    • Repeat the same process for the 4 remaining metal nibs (two on each end).

  7. JBL Flip 2 MicroUSB Port Replacement: step 7, image 1 of 2 JBL Flip 2 MicroUSB Port Replacement: step 7, image 2 of 2
    • Expand the metal casing and carefully slide it off the speaker.

  8. JBL Flip 2 MicroUSB Port Replacement: step 8, image 1 of 2 JBL Flip 2 MicroUSB Port Replacement: step 8, image 2 of 2
    • Using the driver adapter, first insert the #4 socket into the driver; followed by the #1 Philip's head bit in order to reach the three 13.0 mm screws.

  9. JBL Flip 2 MicroUSB Port Replacement: step 9, image 1 of 3 JBL Flip 2 MicroUSB Port Replacement: step 9, image 2 of 3 JBL Flip 2 MicroUSB Port Replacement: step 9, image 3 of 3
    • Using the classic spudger, get underneath the black tape strips found on both side of the device.

    • After lifting a portion of the tape off of the device, gently peel the tape off of the device, making sure to keep it intact.

    • There is another piece of tape on the side of the device with the control buttons. Lift the tape with the classic spudger and then peel the rest of the tape off.

  10. JBL Flip 2 MicroUSB Port Replacement: step 10, image 1 of 3 JBL Flip 2 MicroUSB Port Replacement: step 10, image 2 of 3 JBL Flip 2 MicroUSB Port Replacement: step 10, image 3 of 3
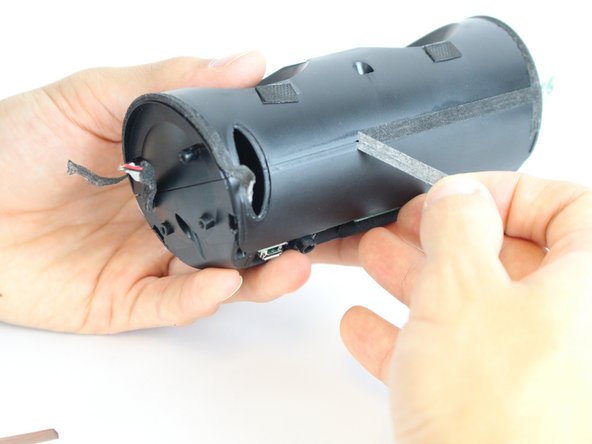
    • Wedge a spudger between the two halves where the tape was to pry the device open.

    • When working with electronics, it's important to choose a tool that's ESD-safe to avoid accidental damage to the device. The regular black nylon spudger or a plastic opening tool should be used whenever possible.

  11. JBL Flip 2 MicroUSB Port Replacement: step 11, image 1 of 2 JBL Flip 2 MicroUSB Port Replacement: step 11, image 2 of 2
    • Use the black spudger to disconnect the speaker cord from it's socket.

  12. JBL Flip 2 MicroUSB Port Replacement: step 12, image 1 of 2 JBL Flip 2 MicroUSB Port Replacement: step 12, image 2 of 2
    • Use the black spudger to disconnect the auxiliary wire from its socket.

  13. JBL Flip 2 MicroUSB Port Replacement: step 13, image 1 of 1
    • Carefully remove the cable connecting the control chip to the motherboard.

  14. JBL Flip 2 MicroUSB Port Replacement: step 14, image 1 of 2 JBL Flip 2 MicroUSB Port Replacement: step 14, image 2 of 2
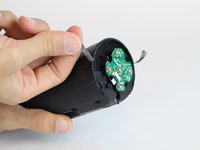
    • Using the black spudger, carefully remove the cord connecting the battery to the motherboard.

  15. JBL Flip 2 MicroUSB Port Replacement: step 15, image 1 of 1
    • Carefully remove the cable connecting the nfc chip to the motherboard.

  16. JBL Flip 2 MicroUSB Port Replacement, MicroUSB Port: step 16, image 1 of 1
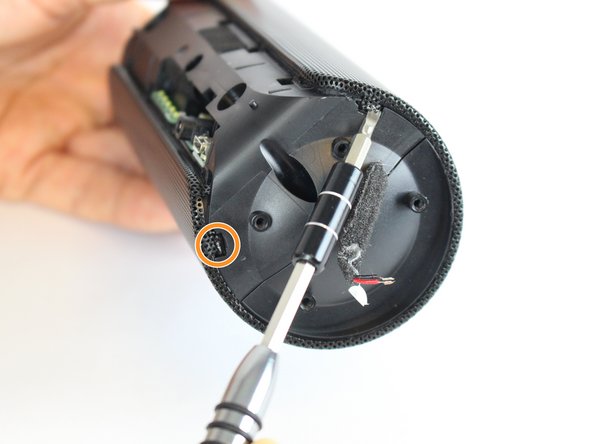
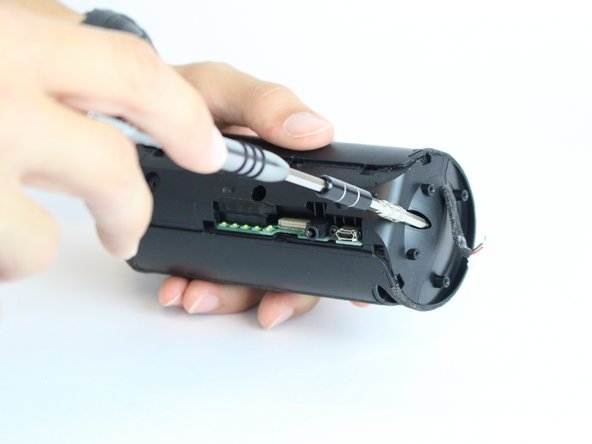
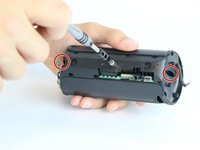
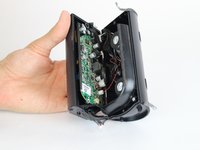
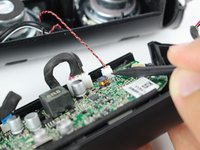
    • Remove the 7.0 mm Philips #1 screw that connects the I/O board to the casing.

  17. JBL Flip 2 MicroUSB Port Replacement: step 17, image 1 of 2 JBL Flip 2 MicroUSB Port Replacement: step 17, image 2 of 2
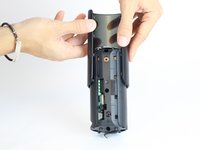
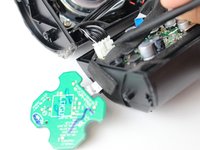
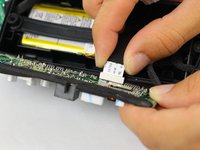
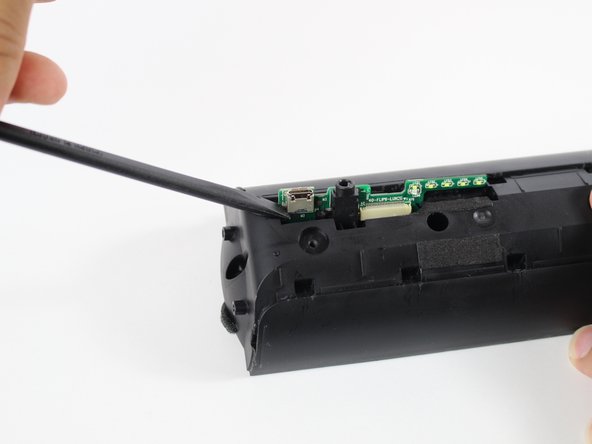
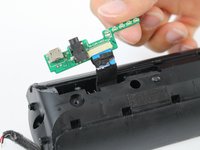
    • Remove the white ribbon cable that connects the I/O board to the motherboard.

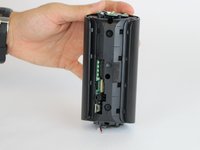
    • Put the motherboard to the side.

  18. JBL Flip 2 MicroUSB Port Replacement: step 18, image 1 of 2 JBL Flip 2 MicroUSB Port Replacement: step 18, image 2 of 2
    • With the black spudger, carefully wedge out the I/O board.

    • Be careful not to damage the I/O board with the black spudger.

  19. JBL Flip 2 MicroUSB Port Replacement: step 19, image 1 of 3 JBL Flip 2 MicroUSB Port Replacement: step 19, image 2 of 3 JBL Flip 2 MicroUSB Port Replacement: step 19, image 3 of 3
    • Gently pull the I/O board out from the speaker.

  20. JBL Flip 2 MicroUSB Port Replacement: step 20, image 1 of 1
    • Check out IFixit's official soldering guide for help with these special projects.

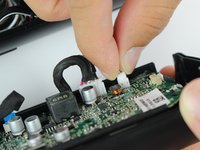
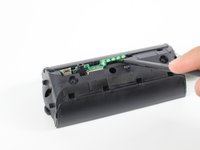
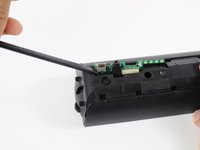
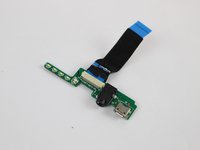
    • Pry off the loose MicroUSB port.

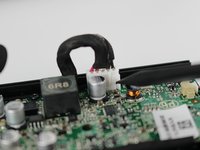
    • Use the soldering iron to solder the new MicroUSB port onto the I/O board.

    • Soldering iron will be very hot.

Conclusion

To reassemble your device, follow these instructions in reverse order.

14 other people completed this guide.

Jonathan Wear

Member since: 02/09/16

1,220 Reputation

5 Guides authored

Team

USF Tampa, Team 11-2, Cheng Spring 2016 Member of USF Tampa, Team 11-2, Cheng Spring 2016

USFT-CHENG-S16S11G2

4 Members

8 Guides authored

18 Comments

In my model MicroUSB is on separate board and both ports were covered by min. 20ml of hot-melt adhesive.

I spent hour on cables separation by sponge pieces - it is very important to use again hot glue to restore hermetic (!) speakers encloser, otherwise you get annoing sound of shaking cable.

101 - Reply

Mine was like that too! %#*@ hot glue made it a pain to pull the usb out. sadly i need a new usb board... mine 2 pads were completely gone... not worth trying to even fix the contacts...

Sammy Morini -

Good clear guide, but as reported by other earlier, steps starting from 17 will be different in case I/O board with USB is a separate piece of board covered with glue. You need hot glue gun to reassemble the unit after replacing the USC socket. Guy in below link shows the struggle with the glue: https://www.youtube.com/watch?v=N6ahpRyK...

piotr.kaszyca -

Anywhere I can just buy the whole usb i/o board?

Charles Burgos - Reply

Hi

Did you find it and where ?

Thank You

Marc BERGER -

Add Comment

View Statistics:

Past 24 Hours: 1

Past 7 Days: 14

Past 30 Days: 86

All Time: 53,376