Introduction
This guide will walk you through the steps to remove and replace the battery from your 1st generation JBL Boombox speaker.
It should be noted that there may be some internal wires held to others or the structure of the frame by cable ties. This appears to be inconsistent among devices, but just note that if there are wires in the way you may need to carefully cut the cable ties in order to move them.
What you need
-
-
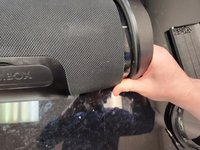
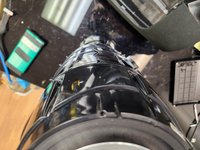
There rubbery rings on either end are only held in with friction.
-
Stand the speaker up and push down hard, and you can use a counter-clockwise motion to remove the ring.
-
-
-
Using your Phillips #2 screwdriver, remove the six screws from each side.
-
-
-
Using a steady and firm pressure, pry the handle on one side and it will pull away from the body on the bottom.
-
Once you've flexed the handle far enough, lift it upwards to slip it over the end on one side.
-
With one side removed, the handle should come off with no issue or hesitation.
-
-
-
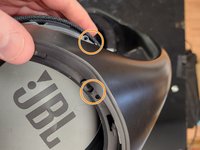
On each side of the handle, there is only one space that has two holes next to eachother.
-
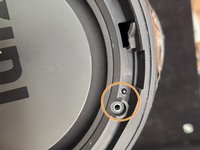
On each side of the body, there is only one screwhole that has a plastic post next to it.
-
These must be lined up properly. The handle can physically fit in either direction, but if you line it up incorrectly the screws will not line up properly and it will not be secure to put back together.
-
-
-
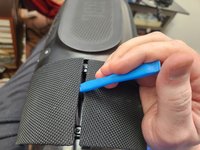
Using your opening tool, pry into the seam in the mesh cover on the bottom, lifting up the back side.
-
Using your Phillips #1 screwdriver, remove these four screws.
-
-
-
Using your opening tool, pry into the back of the mesh cover where indicated to release the two catches.
-
When both catches are released, the back cover should hinge completely backwards and be completely open.
-
-
-
Using your opening tool, pry into the front of the mesh cover where indicated to release the two catches.
-
When both catches are released, the front cover should hinge completely backwards and be completely open.
-
With both the back and front released, the mesh cover should easily lift away.
-
When reassembling, make sure these posts line up properly, as well. These posts are only on the front and ensure the mesh cover does not physically touch the speakers.
-
-
-
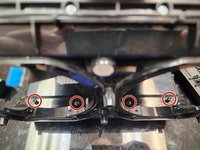
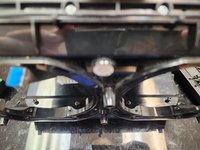
There are six screws surrounding each side of the tweeter housing.
-
Remove all six screws from each side, twelve total.
-
-
-
-
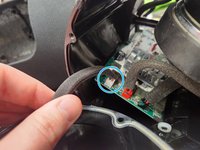
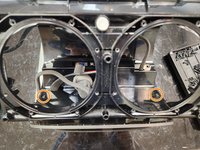
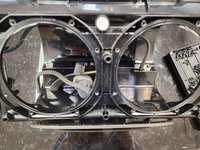
After separating the tweeter housing, carefully disconnect the tweeters.
-
The left side has only one connection to disconnect.
-
The right side has two connections to disconnect.
-
Once both sides are disconnected, you are finished removing the tweeters.
-
-
-
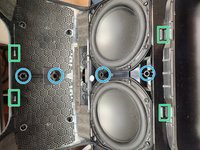
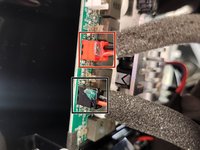
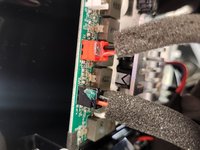
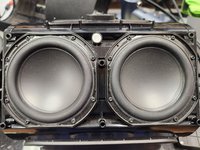
Once the tweeters are removed, disconnect the two subwoofer / speakers from the motherboard.
-
The left speaker is marked in red.
-
The right speaker is marked in black.
-
-
-
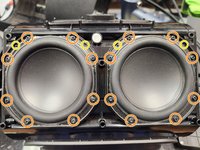
Using your Phillips #2 screwdriver, remove the 16 screws holding in the speakers.
-
Pay attention to the alignment posts only on the top side. These ensure your speakers are oriented correctly when reassembling.
-
-
-
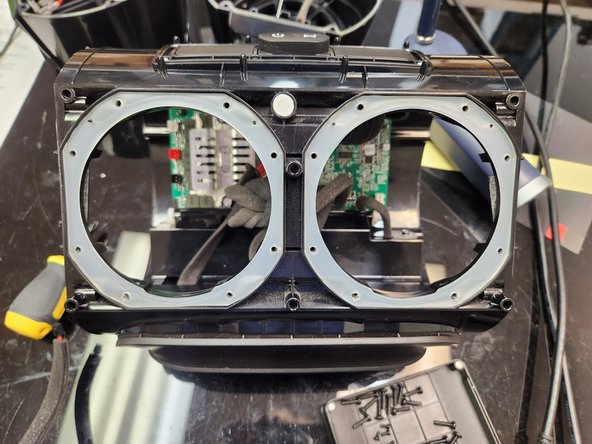
With the speakers disconnected and unscrewed, insert a hand in from the side where you removed the tweeter housing and gently push up from inside.
-
Using one hand to hold and lift the speakers, use your second hand inside the body of the Boombox to carefully guide the cable out of the hole, ensuring that it does not get caught and damaged on anything inside as it is removed.
-
-
-
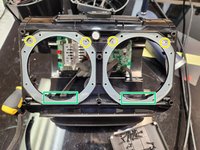
When removing the speakers, it is likely the gaskets will become dislodged from the frame and the speakers and fall somewhere in between.
-
Make sure you have both gaskets and that neither are torn or otherwise damaged.
-
Pay attention to the alignment posts only on the top side. These ensure your gaskets are oriented correctly when reassembling.
-
When reassembling, make sure the wires on the speaker are towards the bottom to fit smoothly into this cutout without catching and risking any damage to the wires or gaskets.
-
-
-
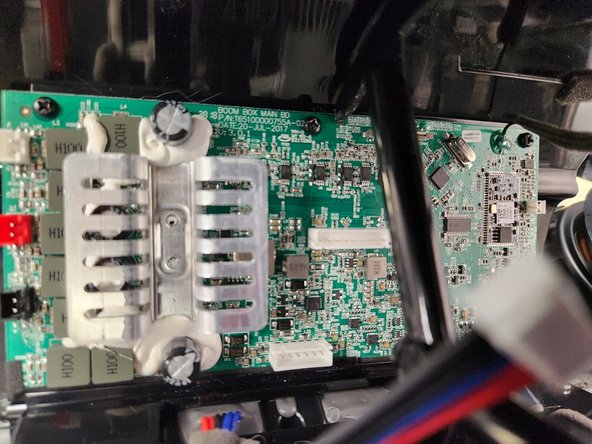
After removing the tweeters and the speakers, you are ready to remove the motherboard.
-
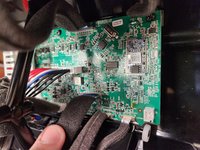
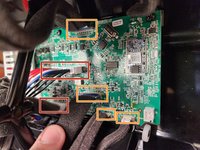
There are two JST type connectors connecting the battery. Remove these by pulling firmly.
-
There are four ribbon connectors connecting the various buttons and inputs. Make sure to release the brown locking tabs by pulling up on the sides before gently pulling the ribbon cables out.
-
-
-
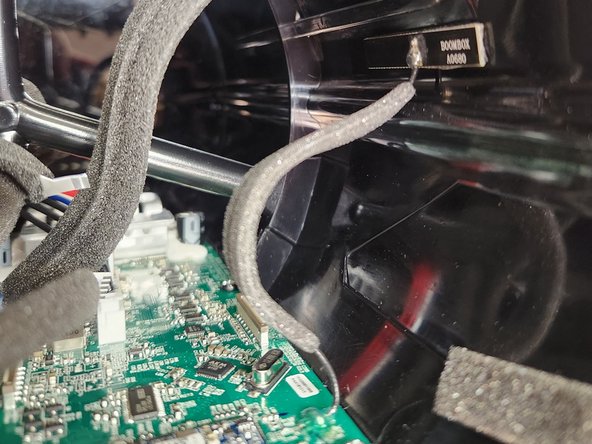
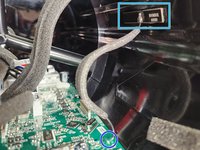
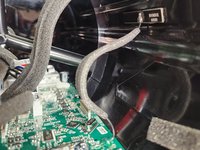
The antenna is adhered to the top of the unit with a double sided adhesive. Gently peel this off to have the antenna dangle loosely by it's attachment to the motherboard.
-
Take care as the antenna is soldered directly to the motherboard and is not to be removed. This connection is delicate and can be broken easily.
-
-
-
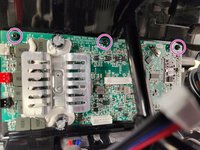
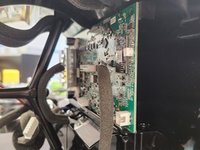
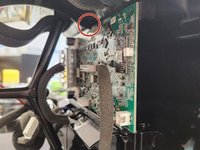
Using your Phillips #2 screwdriver, remove the three screws holding on the top of the motherboard.
-
-
-
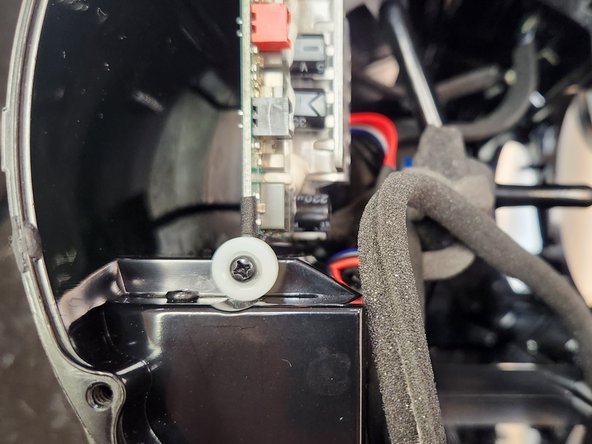
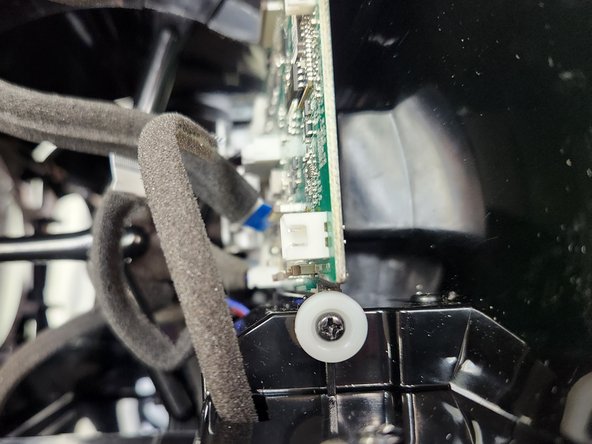
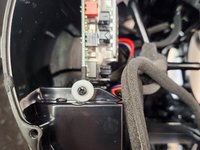
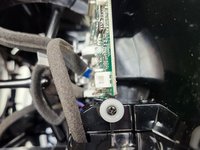
On either side of the motherboard on the bottom, there is a single screw with a large white plastic washer.
-
Using your Phillips #2 Screwdriver, remove both of these screws.
-
-
-
With all cables disconnected and all 5 screws removed, you are ready to remove the motherboard.
-
Using both hands, reach inside the frame from either side where the tweeter housing was. Gently but firmly grasp the motherboard on both sides and tilt it forward.
-
There is a notch in the PCB where the motherboard slots into a rib of the frame of the housing. The motherboard must be carefully tilted forward past this notch.
-
Once it is tilted forward far enough, the motherboard can be removed by lifting upwards.
-
-
-
With the motherboard removed, you are finally ready to remove the battery compartment and change the battery.
-
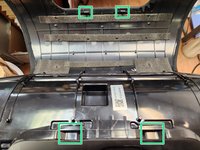
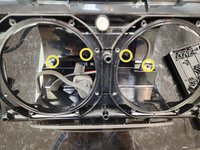
Using your Phillips #2 screwdriver, remove the four front screws.
-
-
-
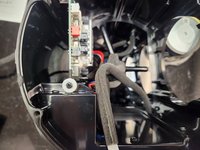
Using your Phillips #2 screwdriver, remove the two center screws.
-
-
-
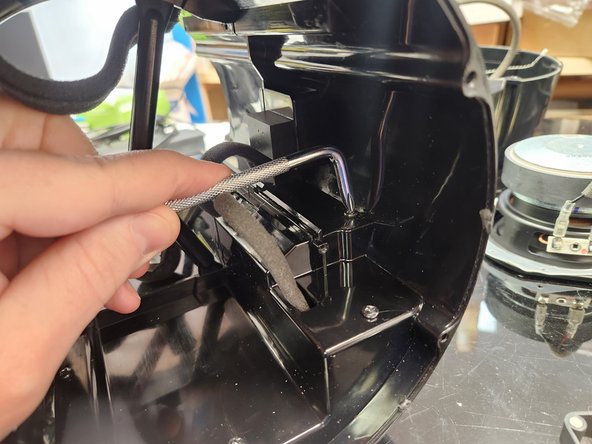
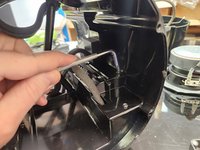
Using your right angle screwdriver, remove the 4 rear screws.
-
-
-
Once all 10 screws holding the battery compartment in place are removed, you are ready to access the battery.
-
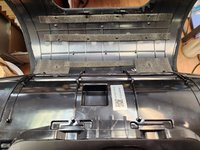
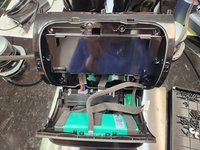
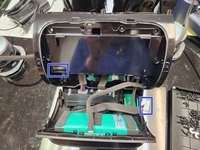
Slowly and carefully, keeping an eye on all the cables inside the housing to make sure nothing gets caught and damaged, keep the bottom of the battery compartment flat on the work surface and tilt the housing backwards.
-
It should tilt and the cables should all go out through their respective holes. Make sure to completely remove the battery cable. All other cables should be safe to remain partially through their holes and the device will rest as pictured.
-
At this point, the battery may only held in by friction, or it may have adhesive similar to the antenna in step 15. Either way, carefully pull the battery out and you are ready to install your new one!
-


To reassemble your device, follow these instructions in reverse order.
Take extra care to not get any cables caught behind the motherboard.
Take extra care that all cables from the battery compartment are pulled into the main housing fully before screwing shut.
Cancel: I did not complete this guide.
7 other people completed this guide.

6 Guide Comments
Getting off the caps was a bear, I ended up needing to go grab some gloves to get more grip. Also those last screws for the battery compartment that need a right angle screwdriver, the worst. Thanks to your guide I managed to get through it though, without it I think I would have given up at step 1. Thanks for putting the guide together!
The only thing is the wide connector at the top of the motherboard board. No one shows how that side is suppose to be plugged in. I bought a new battery and have ripped mine apart 5 times now and still nothing. With my old battery I still had power and it worked just fine. Now I'm stuck with idk what's wrong with it. But thx for the pics. Because the video I watched the guy had all the blue side up on the 3 across the bottom.
I have replaced my battery and plugged everything back correctly but it doesn't want to charge. It shows it is charging but doesnt go past the first dot and if it does it resets almost immediately back to the first dot
The chargers voltage is correct and the original
Any help or info would be appreciated
Hi Eckard, I do have exactly the same problem and does not get any info on how to repair. Did try other chargers, but still the same. Hope anybody can assist
Where will I get the Jbl boombox battery