What you need
-
-
Turn the phone over to where the battery compartment resides.
-
Remove the battery compartment door by pushing down on the door with your thumbs and sliding the door off of the bottom of the device.
-
Remove battery.
 Ask FixBot
-
-
-
Use a Phillips #0 screwdriver to remove the screw in the middle of the battery compartment.
-
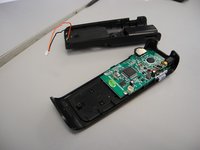
Pry open the case body with the plastic opening tool. Start at the bottom of the device and work toward the top. You will hear a "click" sound as the sides open.
-
-
-
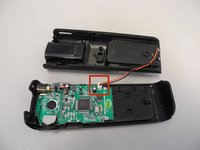
Carefully pull the wire connectors out of the white connector gauge to completely separate the front and back pieces.
-
-
-
-
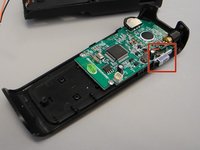
Find the lever on the right side of the back half of the device.
-
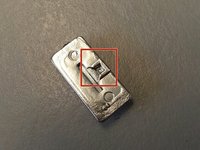
Insert the tip of the lever into the square indent on the underside of the button.
-
-
-
Use a Phillips #0 head screwdriver to remove two screws; one on either side of the circuit board.
-
-
Tool used on this step:Tweezers$4.99
-
Slide the circuit board down from the tab located underneath the top of the back half
-
Use tweezers to gently remove it if it doesn't come out.
-
-
-
Use desoldering braid to remove the red and black wires attached to both the circuit board and the laser bulb.
-
When you are ready to attach the new laser bulb, use a soldering iron to solder the new bulb's wires to the circuit board.
-


Team

Ohio State, Team 1-1, Buehl Spring 2014 Member of Ohio State, Team 1-1, Buehl Spring 2014
OSU-BUEHL-S14S1G1
4 Members
3 Guides authored