Introduction
Action cams are going to see action, and the lenses are at risk of scratches. Replacement lenses are affordable, but what tools and facilities do you need for replacing a scratched lens? Kudos to LA Hover Bikes for a super helpful video.
There remain some mysteries about how Insta360 repairs lenses. Presently I feel like I know more about what not to do than what is the best way. Please contribute to this procedure if you find a better way to remove the lens or to seal the new one!
What you need
-
-
Generic replacement lenses are available on eBay. Shipping can take several weeks. Quality may vary.
 Ask FixBot
-
-
-
If you are replacing only one of the lenses, then first protect the other lens from scuffs.
-
I used masking tape and a cotton ball to cover and pad the lens.
-
-
-
LA Hover Bikes found the best approach is to break the lens and remove the pieces. In theory the lens could be popped out. The factory uses a lens adhesive that does not release by heat. Alternatively, Life after 40 used a small screwdriver to pry out the lens.
-
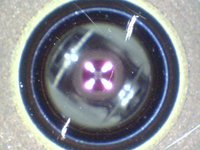
A Dremel cutting wheel can be used to score the glass. The "dome" shape of the glass makes it difficult to crack.
-
-
-
-
If heating the camera, first remove the battery and SD card low-temperature components.
-
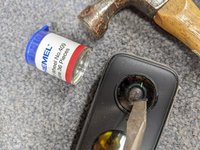
I did not have heat gun. I heated a surface to 150F, removed the heat source, and put the scratched lens in contact with the surface.
-
-
-
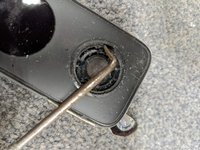
Remove excess adhesive. A dental pick or other tool tip could be used. Turn the camera so gravity cleans the cavity instead of filling it.
-
Alcohol may be used liberally to clean the lens. A soft toothbrush or Q-tips may be used. Here I soaked a film of superglue in alcohol and it wiped off.
-
-
-
Choose a room with dust-free air. Gravity removes dust from still air. Filters remove dust from moving air. Probably not the same location where you had the Dremel tool...
-
Use cotton balls, rubbing alcohol, or similar to thoroughly clean all dust and deposits from a 2' x 2' sealed/smooth work surface
-
Clean the cavity of the camera with alcohol and a fresh Q-tip and place it upside down to dry.
-
Open the new lens and clean the inside with alcohol and a fresh Q-tip and place it upside down to dry.
-
If the Q-tip is depositing any lint, then open a packaged lint-free lens wipe and clean the camera sensor window and inside the new lens.
-
-
-
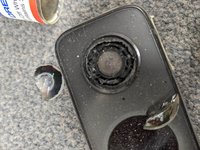
Ideally, the new lens will snap into place and hold firmly.
-
Here the lens was loose. I applied a small amount of epoxy to the outside, wiped to remove excess, centered the lens and allowed the epoxy to cure. I do not have a seam in my 360 image.
-


6 Guide Comments
I managed to remove by X2 lens in a different way - glueing a stick to the lens so that you can break the connection between lens and camera by applying force to the stick.
Details
1. protect the casing and the other lens
2. find a pipe with an outer diameter a bit smaller than the lens diameter (~20mm diameter, 10 cm length). I used a PVC pipe for electrical installations you get in every hardware store.
3. glue it to the lens using epoxy glue. Put most of the epoxy inside the pipe so that it does not glue to the casing, only to the lens. Still you want a large area of the lens covered. Let it cure.
4. break the stick from the camera - if the lens is removed you are finished but in my case the connection between lens and epoxy broke.
5. glue the stick again to the lens using super glue. Super glue is stronger in this case but you need the epoxy as it is not able to fill gaps - due to he epoxy there are no gaps between stick and lens
6. break the stick again from the camera - this time it worked
Replacing the lens will not work with the X3.
You need to buy a new module. I learned the hard way
For the X3, the lens is held in with a threaded ring, but insta have used thread lock to stop it from turning. What I did was remove the sensor module from the camera, then uses a dremel tool to carefully cut a groove into the retaining ring, making sure not to cut all the way into the threads on the camera module, it's aluminum, so easy to cut precisely. Then use a screwdriver to open up the gap in the retaining ring which will hopefully break the thread lock enabling you to remove the ring. Clean up any metal filings and dust, then the lens should pretty much pull out (no glue holding it in). Make sure new lens is free of fingerprints or dust, and install into camera. Screw down the replacement retaining ring that should come with the new lens. Reinstall sensor module into camera. Job done!