Introduction
This guide will have step-by-step instructions enabling the user have the ability to remove and replace the front camera of the Insignia Flex Elite 7.85.
What you need
-
-
Use a plastic opening tool to remove the metal backing of the tablet
-
Insert the plastic opening tool between the screen and metal backing. use a prying motion to lift the front case from the the metal panel.
-
move the tool around the perimeter of the device until the screen separates.
-
-
-
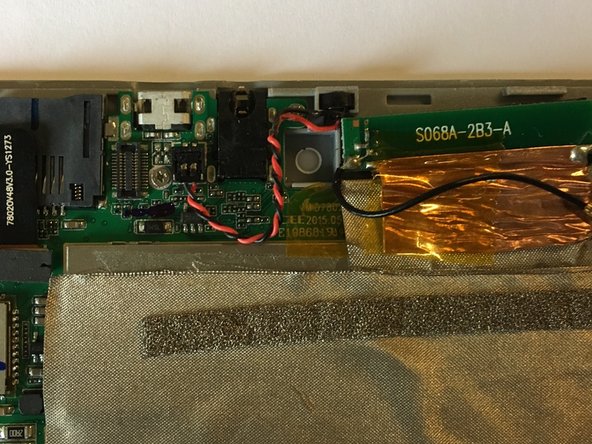
once the tablet is open, locate the camera
-
The camera is fitted in a small square compartment
-
Use a plastic opening tool to pry slightly on the back of the camera making it easier to come out of its compartment
-
When removing the camera, ensure that the red and black wire on top of it is not disconnected from the motherboard.
-
-


To reassemble your device, follow these instructions in reverse order.
To reassemble your device, follow these instructions in reverse order.
Team

UMass Dartmouth, Team S9-G2, Martin Spring 2017 Member of UMass Dartmouth, Team S9-G2, Martin Spring 2017
UMASSD-MARTIN-S17S9G2
3 Members
10 Guides authored