Infant Optics DXR-8 Power Button Replacement

What you need

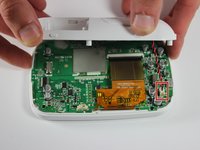
  1. Infant Optics DXR-8 Power Button Replacement, Internal Monitor Components: step 1, image 1 of 3 Infant Optics DXR-8 Power Button Replacement, Internal Monitor Components: step 1, image 2 of 3 Infant Optics DXR-8 Power Button Replacement, Internal Monitor Components: step 1, image 3 of 3
    • Using the plastic opening tool, remove screen protector from front of monitor.

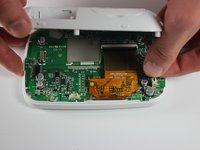
  2. Infant Optics DXR-8 Power Button Replacement: step 2, image 1 of 3 Infant Optics DXR-8 Power Button Replacement: step 2, image 2 of 3 Infant Optics DXR-8 Power Button Replacement: step 2, image 3 of 3
    • Remove the six 4mm screws using a Phillips #00 screwdriver.

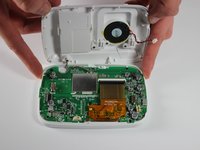
    • Remove the screen, exposing the circuit board.

    • Turn device over to expose rear circuit board.

  3. Infant Optics DXR-8 Power Button Replacement: step 3, image 1 of 3 Infant Optics DXR-8 Power Button Replacement: step 3, image 2 of 3 Infant Optics DXR-8 Power Button Replacement: step 3, image 3 of 3
    • Disconnect speaker from monitor for ease of access by unplugging wire.

  4. Infant Optics DXR-8 Power Button Replacement, Power Button: step 4, image 1 of 1
    • The power button is located at the top of the device.

  5. Infant Optics DXR-8 Power Button Replacement: step 5, image 1 of 1
    • Remove the button by picking it up out of the hole it is connected to.

  6. Infant Optics DXR-8 Power Button Replacement: step 6, image 1 of 1
    • Insert a new button by placing the small end in the hole to connect the button to the device.

Conclusion

To reassemble your device, follow the instructions in reverse order.

2 other people completed this guide.

2 Comments

Where did you get the replacement switch?

Dave Peterson - Reply

Where can you purchase a new power switch on the circuit board for replacement?

Derrick Silvestri - Reply

Add Comment

View Statistics:

Past 24 Hours: 0

Past 7 Days: 4

Past 30 Days: 17

All Time: 4,835